This article was co-authored by wikiHow Staff. Our trained team of editors and researchers validate articles for accuracy and comprehensiveness. wikiHow's Content Management Team carefully monitors the work from our editorial staff to ensure that each article is backed by trusted research and meets our high quality standards.
There are 15 references cited in this article, which can be found at the bottom of the page.
This article has been viewed 61,585 times.
Learn more...
Clipboards are handy for writing or drawing on the go, but many of them don’t include a place for your pen. Instead of using your pocket, make your own pen holder! The simplest way to do this is by stringing a pen to the clipboard’s clamp. If you want something flashier, try making a loop out of patterned tape or fabric. If you need to store multiple pens and other supplies, you could turn a pool noodle into a big pen holder.
Steps
Making a String Pen Holder
-
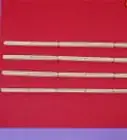
1Find a roll of damage-resistant string to tie the pen in place. Regular white cotton string is a great place to start. It’s inexpensive and easy to find. Twine, wire, elastic bands, and even alternatives like floss are also safe to use. Stronger materials resist stretching more, so keep this in mind if many people will use the pen or handle it roughly.[1]
- Check your local general store or craft supply store for some basic options to use in your project.
-
2Tie the string to the clipboard’s clamp. Thread the end of the string through the hole in the top part of the clamp. Loop the string around the edge to bring it back over the clamp. Then, knot the string to the clamp using a basic overhand knot. Consider tying a couple of knots to keep the string firmly connected to the clipboard.[2]
- Overhand knots are difficult to undo without cutting the string. Don't tie the string tightly unless you're willing to cut it to remove it.
Advertisement -
3Use the clipboard’s length to measure out how much string you need. The string has to stretch at least as far as the bottom of the clipboard. To get an accurate estimate, stand the pen vertically on the clipboard’s bottom corner. Unspool the string until it spans from the clipboard’s clamp to the very top of the pen. Cut the string from the spool once you know what length you need.[3]
- To ensure the string is long enough, add at least 1–2 in (2.5–5.1 cm) to the string length to compensate for the knot you need to tie on the pen.
-
4Tie the string to the pen to hold it to the clipboard. Wrap the string around the back end of the pen. If it has a clip, bring the string underneath the clip first, then up and over it. Knot the string firmly in place, then trim off any excess length.[4]
- This works best with pens that have clips. Most pens have clips or at least caps with clips that you can fit over the back end of the pen.
- If your pen doesn’t have a clip, tie the knot very tightly. Consider making a few knots. The pen may slip out over time as the string loosens, so be ready for it.


Constructing a Detachable Tape Pen Holder
-
1Cut a length of duct tape about 3 in (7.6 cm) long. Choose a pattern of duct tape you like, then cut a piece off with a sharp pair of scissors. This length fits most writing pens. Keep the tape a little longer for now if you plan on using a large pen or think you might need a larger pen holder.[5]
- You can use plenty of other material to make the loop. Try using an elastic band, a scrap of leather, or another piece of fabric, for example.
-
2Fold the tape in half lengthwise over the sticky side. The sticky side is blank and you don’t need it to be visible. Folding the tape this way also reduces the size of the finished loop. If you need a smaller loop, make the fold smaller and trim off the exposed tape underneath the fold.[6]
- The half-folded size works well for the binder clips used in most loops. It will usually be a little bigger than you need, but you can always trim it down to the proper size later.
-
3Trim the tape until it is the same width as a binder clip. Pick a binder clip or bulldog clip you plan on using to create the pen holder. Then, hold the tape up over the plastic part of the clip. If the clip has metal arms, move those out of the way first. Trim the tape to size with a sharp pair of scissors.[7]
- Binder clips are available online or at most office supply stores.
-
4Pull the tape over the clip to form the loop. Drape the tape over the closed end of the clip, not the part that opens and clamps to surfaces. Align the ends of the tape with the bottom edges of the plastic. While holding the tape in place, test the loop by putting your pen through it.[8]
- If you need to shorten the loop to tighten it, cut some length off the end of the tape. Make sure the loop holds your pen securely in place before you finish attaching it to the clip.
-
5Cut and place thin strips of duct tape to hold the loop in place. Make the strips of tape as long as the clip and about 1⁄2 in (1.3 cm) wide. Fit a strip of tape over the tail ends of the loop. If the strips are a little long, tuck the ends inside of the jaws of the clip. Press the tape flat to secure the loop in place.[9]
- Leave the tape a little longer than you think you need it at first. Trim it or fold it over the plastic as needed once you have the loop in place.
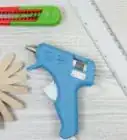
- If you’re using another material such as fabric, you can glue the loop directly to the clip. Try using a hot glue gun or super glue.[10]
-
6Place the pen holder on your clipboard and slip the pen in the loop. Squeeze the binder clip to open its jaws and fit them on the edge of your clipboard. The loop you made hangs off the clipboard, providing an open pocket to store your pen. Slide your pen into the loop, fitting the tape underneath its clip to keep it in place until you need it.[11]
- Pens with clips are best for tape loops. If you’re using a pen without a clip, place the loop on the top edge of the clipboard so the pen rests horizontally against it. Make the loop as tight as possible to prevent the pen from slipping out.


Making a Pool Noodle Pen Holder
-
1Purchase a pool noodle or another piece of foam. Pool noodles are perfect because of their round shape and durability. They fit well over the back ends of clipboards while still providing plenty of room for pens. If you use a different piece of foam, pay attention to its size. Make sure it is wider than the clipboard.
- Pool noodles are available at many general stores and pool supply stores. If you can’t find a pool noodle, look for foam blocks at general stores and craft supply stores, or shop online.
-
2Cut the foam about 2 in (5.1 cm) wider than the clipboard. Place the pool noodle on the edge of the clipboard behind the clip. Make sure it goes at least 1 in (2.5 cm) past the clipboard on both ends. Measure it as needed with a ruler, then use a sharp pair of scissors or a craft knife to cut off the excess material.[12]
- The pen holder can be longer if you want it to be, but keep in mind that the extra length makes it more difficult to use and store. If you’re going to keep it out on your desk, for example, the extra length might not matter besides giving you room to store more pens.
-
3Slice the foam lengthwise to fit it onto the clipboard. Make the cut horizontally from one end of the pool noodle to the other. Cut down the center in a single, straight line. Deepen the cut to the center of the foam, then pull the foam apart with your fingers.[13]
- Work slowly. Craft knives are sharp, and you may end up damaging the foam or your fingers if you aren’t careful.
-
4Place the foam onto the edge of your clipboard. Push the top of the clipboard into the cut you made. Make sure your pen holder fits tightly by cutting away excess foam or deepening the lengthwise cut as needed. Ideally, the foam shouldn't get in the way of the clip, but covering it is okay.[14]
- You can put the foam over the clip. The clip will fit inside the cut you made without harming your pen holder. If the pen holder is too wide, you may need to remove it in order to use the clip, though.
-
5Mark and cut holes in the foam for your pens. Make the first hole in the center of the pen holder. Use your craft knife to mark a spot as wide as the pen you plan on storing. Then, scrape out a little bit of the foam to create a small hole to fit the pen in. Cut multiple holes as needed if you plan on storing additional pens, spacing the holes about 1 in (2.5 cm) apart.[15]
- If you plan on storing your pen vertically, cut an X on the top edge of the foam. If you're planning on laying your pen horizontally, make a small horizontal slit on the top side of the foam.
- Pens need to be placed vertically or horizontally in order to stay in the holder. Anything placed at a diagonal angle will eventually fall out.
- Pool noodles often have empty space inside. If you’re using a solid piece of foam, you may need to cut out a little more of the foam in order to get the pens to fit.
-
6Push your pens into the holes to store them. Place a pen in each hole you cut, pushing them down until they stand or lay in place. Keep in mind that pens come in all sorts of sizes, so you may need to widen some of the holes or choose different pens. When you’re done using the holder, you can slide it off the clipboard or even move it to another side.[16]
- For additional storage space, hollow out the center of the foam. Most pool noodles are already hollow in the center, so you won't have to do this yourself if you're using one. Try storing extra pens, erasers, coloring supplies, or anything else you may need.


Warnings
- Be careful when using sharp tools like craft knives and keep them out of the hands of children.⧼thumbs_response⧽
Things You'll Need
Making a String Pen Holder
- Cotton string or an alternative
Constructing a Detachable Tape Pen Holder
- Duct tape or fabric
- Binder or bulldog clip
- Scissors
- Ruler
Making a Pool Noodle Pen Holder
- Pool Noodle
- Ruler
- Craft knife


References
- ↑ https://www.youtube.com/watch?v=4foNvZuRY7o&feature=youtu.be&t=17
- ↑ http://www.101knots.com/overhand-knot.html
- ↑ https://www.youtube.com/watch?v=4foNvZuRY7o&feature=youtu.be&t=25
- ↑ http://www.101knots.com/overhand-knot.html
- ↑ https://www.youtube.com/watch?v=v8VVIiUt8Mw&feature=youtu.be&t=82
- ↑ https://www.youtube.com/watch?v=v8VVIiUt8Mw&feature=youtu.be&t=105
- ↑ https://www.youtube.com/watch?v=f8jIodgjul0&feature=youtu.be&t=501
- ↑ https://www.youtube.com/watch?v=rFuovgdljRc&feature=youtu.be&t=203
- ↑ https://www.youtube.com/watch?v=v8VVIiUt8Mw&feature=youtu.be&t=236
- ↑ https://www.youtube.com/watch?v=7J8ss7eYLPo&feature=youtu.be&t=246
- ↑ https://www.youtube.com/watch?v=f8jIodgjul0&feature=youtu.be&t=678
- ↑ https://www.youtube.com/watch?v=Gj3mzffN8bw&feature=youtu.be&t=41
- ↑ https://www.youtube.com/watch?v=vTy3bmowFuc&feature=youtu.be&t=46
- ↑ https://www.youtube.com/watch?v=Gj3mzffN8bw&feature=youtu.be&t=114
- ↑ https://www.youtube.com/watch?v=Gj3mzffN8bw&feature=youtu.be&t=142
- ↑ https://www.youtube.com/watch?v=Gj3mzffN8bw&feature=youtu.be&t=158
About This Article