This article was co-authored by wikiHow Staff. Our trained team of editors and researchers validate articles for accuracy and comprehensiveness. wikiHow's Content Management Team carefully monitors the work from our editorial staff to ensure that each article is backed by trusted research and meets our high quality standards.
The wikiHow Video Team also followed the article's instructions and verified that they work.
This article has been viewed 385,718 times.
Learn more...
Bridges across the globe make up some of the most beautiful landmarks on this Earth. However, it would be quite impossible to bring them to the kitchen table. Luckily, with a few bridge building techniques, a few popsicle sticks, a creative mind, and a few other household items, you can now build a glorious bridge of your very own.
Steps
Planning out Your Bridge
-
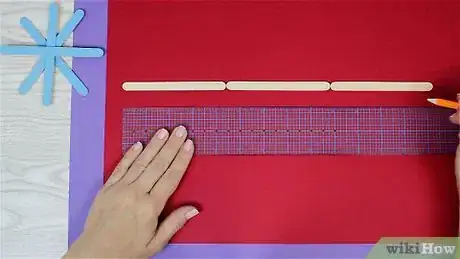
1Determine the length of your bridge. You should consider how long you want to make your bridge before you even go shopping for supplies. There are multiple different sizes of popsicle stick that will be available at your local grocery or craft store. You may want to:
- Lay out a yardstick on your work space.
- Note the approximate length of your bridge.
- Lay your yardstick crosswise to note the width of your bridge.
- Estimate the amount of popsicle sticks based on these dimensions, and the size of popsicle stick you decide on using.
-
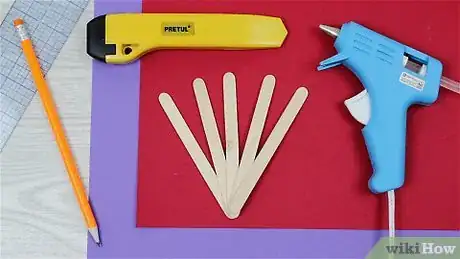
2Gather your supplies. Your popsicle bridge building supplies can be purchased at a local grocery store, general retailer, or craft store. The kind of popsicle stick you decide on using will depend on the vision you have for your bridge, but be sure you purchase a goodly amount so you don't run out mid-building. Including your sticks, you'll also need:
- Popsicle sticks
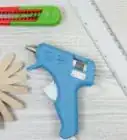
- Hot glue gun (and glue)
- Large piece of cardboard or construction paper
- Paper (for designing)
- Pencil
- Scissors or shears (for cutting popsicle sticks)
- Yardstick or ruler
Advertisement -
3Ready your work space for action. Place a piece of cardboard or construction paper on a table or any other type of smooth, flat, level surface. Make sure that the size of your work space is large enough to accommodate the bridge you will be constructing by measuring out its rough dimensions against the area available on your work space.
-
4Decide on the kind of bridge you will make. There are several different kinds of bridge you can decide between, including suspension bridges, draw bridges, and truss bridges.[1] Since a truss bridge uses triangles in its frame to support and strengthen its structural integrity, it is ideal for a popsicle stick bridge.
- For the purposes of providing a guided example, the following model bridge will be built following the classic Warren truss bridge structure.[2]
-
5Imagine a blueprint for your bridge. A blueprint is a drawing that will serve as a plan for your design.[3] Truss bridges can varying degrees of complexity, and you should investigate a few designs on your own before coming up with your design. Generally, a truss bridge has:
- Crosswise floor beams and struts.
- A deck, that forms the walkway or road of the bridge.
- Longways laying stringer beams beneath the deck.
- An external frame, composed of squares divided into triangles for better integrity.
- Cross bracing forming an X along the top sections of the bridge.
- Sway bracing beneath the top crosswise struts.[4]
-
6Draw your blueprint. Now that you have a general idea of the structure you're trying to build, as well as the tried and true essential parts of a truss bridge, you're ready to use your imagination. Take some time to sketch out your design. Don't worry too much about being true to life; your blueprint is a plan, not a perfect representation.
Constructing the Beams of the Truss
-
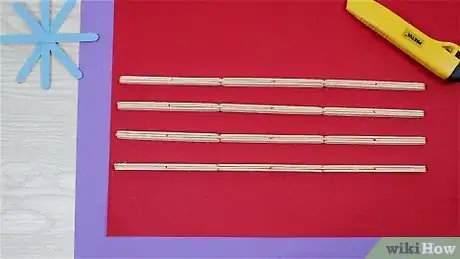
1Plan out your truss beam layout in finer detail. Allow your general blueprint to guide you, but now you have to get down to arranging your popsicle sticks for actual construction. The trusses are the four beams that will run the length of the top and bottom of your bridge. Later, you'll add triangles to these for improved support. To lay out your truss:
- Lay out four rows of popsicle sticks with each row being three sticks wide. Each row should be equal in length.
- Cut four popsicle sticks in half. Place each of the halved popsicle sticks at both ends of each of the truss beams, in the middle position of the three-wide popsicle sticks.
- The component three-wide popsicle sticks of each truss will be glued together to form a truss three sticks thick.
-
2Glue your truss beams together. Take the component popsicle sticks of each of your four rows and, remembering to keep the popsicle sticks even, hot glue your truss beam together. This will create four, three-stick-thick truss beams.
- Hot glue dries very quickly! For best results, press and/or clamp your popsicle sticks together as soon as the glue has been applied.
- Press the popsicle sticks together and apply firm pressure so your trusses are securely glued.
-
3Lay out your trusses and allow the glue to set for a short while. If you are using hot glue, this won't take long, but by allowing the glue to fully dry, you can prevent yourself (or others) from knocking loose a popsicle stick from your truss. Other kinds of glue, like wood glue or general purpose glue, should be allowed to rest 10 to 15 minutes.
- If, when you touch your glued truss, the bond feels weak, tacky, or loose, allow the glue to dry for another 15 minutes.
-
4Measure your cross supports for your truss. Use your pencil and yardstick or ruler to measure out regular intervals where you will support and connect your trusses with cross bracing popsicle sticks. For the purposes of this model, you will be using two sticks side by side in a W pattern.[5]
- Another way to think of this: each line of the W pattern that will connect two trusses together represents two popsicle sticks laid side by side.
- The more bracing you have, the stronger your bridge will be. However, too many popsicle sticks might make it difficult to see anything move across the deck of your bridge.
-
5Unite the beams of your trusses. With the W pattern marked out, you should be able to determine how many popsicle sticks you will need. Count out the appropriate number to have at the ready, and:
- Position your popsicle sticks along the truss beams before gluing to verify the final structure of the wall truss.
- Use hot glue, or another suitable glue, to adhere the popsicle stick cross braces to the truss beams.
- Wait sufficient time until the glue you are using sets.
Constructing the Deck
-
1Lay out the deck of your bridge. Set your two trusses flat on your workspace so that each lay parallel. Then, take your popsicle sticks, laying several crosswise between each of your trusses. These will form the deck, or the road, that runs the length of your bridge between the truss walls. Lay out popsicle sticks until your deck stretches the distance of the trusses.
- The distance between your crosswise popsicle stick deck will determine the width of your bridge deck.
- Be sure that all of your popsicle sticks are even, otherwise the deck leading over your bridge will look irregular.
-
2Anchor your deck with staggered lengthwise supports. Larger sized popsicle provide more stability, but smaller popsicle sticks should work just fine if you don't have any larger ones on hand. Lay your sticks in a staggered formation lengthwise to join your deck into one, continuous piece.
- Once your deck supports are in position, use your hot glue gun or some other suitable glue to fasten your supports in place.
- If you are using wood glue or general purpose glue, allow some time for the glue to dry before handling the deck.
-
3Measure for cradle supports for your deck and truss joiners. Take your yardstick or ruler and measure the length of your deck. You'll need to created union braces for your deck to rest upon. These will also connect the walls of your trusses crosswise together. Take the measure of your deck and the thickness of either truss.
-
4Cut your cradle supports and truss joiners. If you have popsicle sticks of assorted sizes, you may be able to use this, so long as it is as long or longer than the total width of your deck and both trusses. If you are using a yardstick or ruler and your deck/truss measurements, you'll need to:
- Multiply the width of your truss measurement by two to account for the width of both trusses and then add the width of the deck.
- Cut three or four popsicle sticks to this length.
- If your popsicle sticks are too short, make a longer one. Cut two sticks and, with glue, join each by attaching another stick to the bottom for support.
Putting It All Together
-
1Unite the truss walls.[6] You may want to consider having a friend help you for this part of the bridge assembly, or you might use books to lean your trusses up against to make gluing more manageable. You should:
- Secure the first two deck cradle beams within the cross braces of the trusses at both ends of the bridge.
- Use your glue to attach your cradle beams on the truss beam. Hold the glue firmly until it sets and is well bonded to the truss.
-
2Lay additional deck support beams as needed. The more braces you add and the more triangles you create with the frame of your bridge, the stronger it will be. Use your glue to add additional deck cradle beams to support the truss walls.
-
3Attach your deck, if desired. You may want to leave your deck loose, so that you can show off every aspect of your bridge's construction. However, if you want the deck connected to the cradle beams, simply add glue to the cradle beams and lay your deck into place.
- Try to move quickly during this step, especially if using hot glue. It would be unfortunate if the glue dried before you were able to lay the deck into place.
-
4Add upper support beams.[7] If you have long popsicle sticks, you can simply lay these across the top of the struts and then glue each into place. However, if your popsicle sticks aren't long enough, you may make longer ones. Cut a few and join these into a longer stick using a stick glued to the bottom as support.
- Equal distance spacing will give the appearance of the real thing.
Community Q&A
-
QuestionDoes it have to be a hot glue gun, or can I use just regular wood glue?
 Community AnswerYou can use regular craft glue, or superglue as well; it is just that a hot glue gun speeds up the entire process, especially useful for the less patient builder!
 -
QuestionHow many sticks does this take to make?
 Community AnswerAround 150-200 sticks, but you can make smaller or larger trusses depending on the material you have
 -
QuestionHow much load can this type of bridge carry, if it has a span of 50 cm in length?
 Community AnswerA 50 cm long, well-constructed bridge like this could hold a few kilograms of weight, and 8 kg would probably be the limit. However, it's not the weight placed on a bridge that matters, it's at the force with which it comes into contact with the bridge. For example, if you were to drop a 4 kg ball on the bridge from two meters high, the bridge would weaken or even collapse.
Warnings
- Always exercise caution when operating a hot glue gun. Improper handling can result in you getting burned. Be very careful and be prepared.⧼thumbs_response⧽
Things You'll Need
- Popsicle sticks
- Hot glue gun (and glue)
- Large piece of cardboard or construction paper
- Paper (for designing)
- Pencil
- Scissors or shears (for cutting popsicle sticks)
- Yardstick, ruler or tape measure
References
- ↑ http://www.historyofbridges.com/facts-about-bridges/types-of-bridges/
- ↑ http://ojhsbridges.weebly.com/truss-bridges.html
- ↑ http://www.thefreedictionary.com/blueprint
- ↑ http://www.brighthubengineering.com/structural-engineering/63635-truss-bridge-designs/
- ↑ http://makezine.com/projects/make-36-boards/make-warren-truss-bridge-popsicle-sticks/
- ↑ http://makezine.com/projects/make-36-boards/make-warren-truss-bridge-popsicle-sticks/
- ↑ http://makezine.com/projects/make-36-boards/make-warren-truss-bridge-popsicle-sticks/
About This Article
To build a bridge with popsicle sticks, first glue some sticks end-to-end to make 4 trusses, which are beams that run the length of your bridge. When the glue is dry, glue sticks in a W pattern between each pair of trusses for support. Then glue sticks side-by-side to make the bridge’s deck, which will sit flat between your 2 pairs of trusses. Next, use long sticks or glue together shorter ones to make supports to go crosswise under the deck and trusses. Finally, assemble the trusses, deck, and supports. If you want to learn how to plan a blueprint for the bridge, keep reading the article!
