X
This article was co-authored by wikiHow staff writer, Travis Boylls. Travis Boylls is a Technology Writer and Editor for wikiHow. Travis has experience writing technology-related articles, providing software customer service, and in graphic design. He specializes in Windows, macOS, Android, iOS, and Linux platforms. He studied graphic design at Pikes Peak Community College.
This article has been viewed 1,363 times.
Learn more...
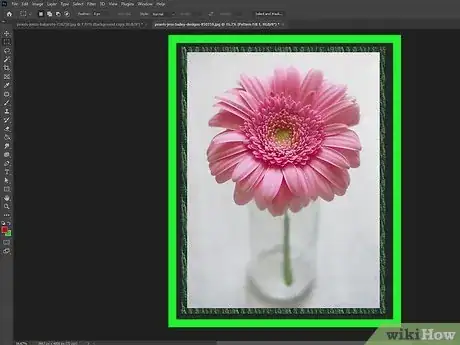
Do you want to add a border to an image? You can easily do so in Photoshop. You can either expand the canvas to create a rectangle-shaped border, or you can use a layer mask to create a custom border shape. This wikiHow article teaches you how to add a border to an image in Photoshop.
Steps
Method 1
Method 1 of 2:
Increasing the Canvas Size
-
1Understand when to use this method. You can use this method to create a rectangle-shaped border around your image without cutting off any of the edges around the image. However, you cannot use this method to create custom border shapes, like an oval.
-
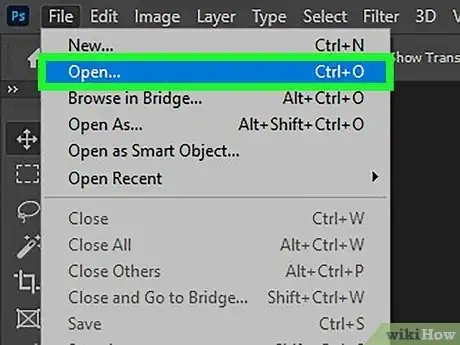
2Open an image in Photoshop. You can easily open an image in Photoshop by right-clicking on the image and selecting Open with... Then click Photoshop. Alternatively, you can use the following steps to open an image from within Photoshop:
- Open Photoshop.
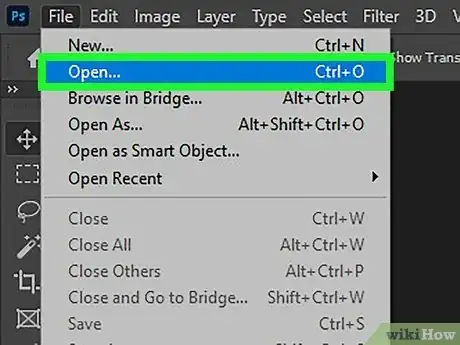
- Click File in the menu bar at the top.
- Click Open. Alternatively, you can click Open on the title screen when you first open Photoshop.
- Select the image you want to add a border to.
- Click Open.
Advertisement -
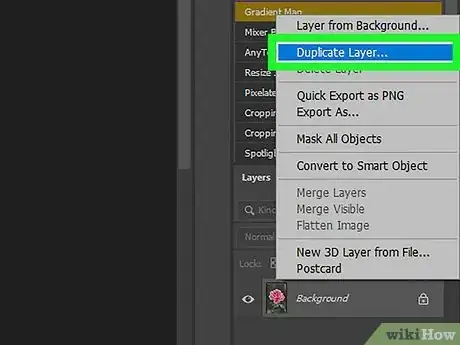
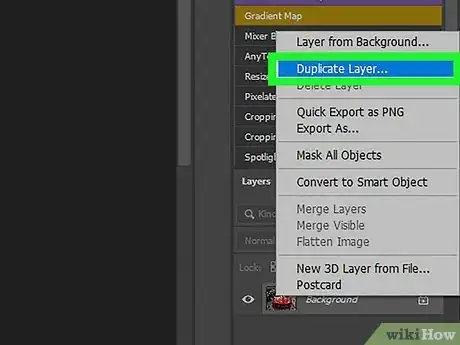
3Duplicate the background layer. To duplicate a layer in Photoshop, click Layer in the menu bar at the top. Then click Duplicate Layer.
- If the image is already a Photoshop (.psd) file with multiple layers, you can skip this step.
-
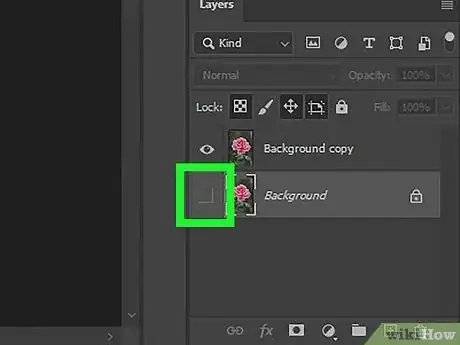
4Turn off the background layer. To do so, open the Layers panel and click the eyeball icon next to the layer labeled "Background". It should be the last layer on the bottom of the Layers panel.
- If you don't have the Layers panel open, click Window in the menu bar at the top and then click Layers to open the Layers panel.
-
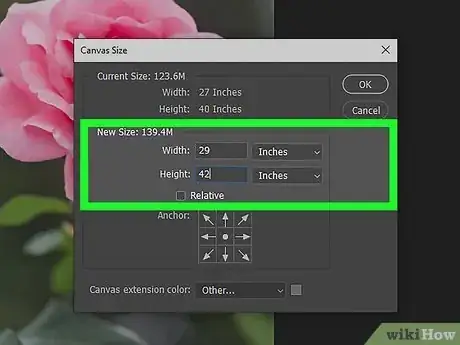
5Increase the canvas size. This will add a blank border around your image. To do this, you will need to know how wide of a border you want to create and add it to the dimensions of the image. For example, if you want to add a half-inch border to an 8" x 11" image, you would change the canvas size to 8.5" x 11.5" Use the following steps to change the canvas size:
- Click Image in the menu bar at the top.
- Click Canvas Size.
- Select a unit of measurement (i.e. Inches or pixels) using the drop-down menus next to "Height" and "Width."
- Enter the height and width of the image, including the border next to "Height" and "Width."
- Click Ok.
-
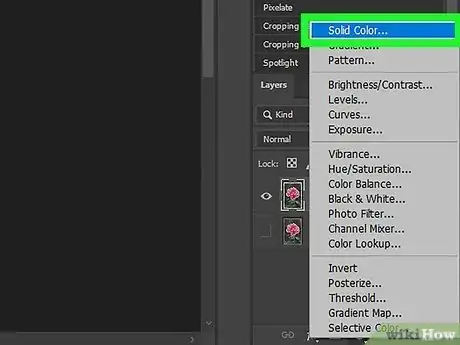
6Create a new solid color layer. This layer can be any color you want your border to be. Use the following steps to create a new solid color layer.
- Click the icon that resembles a half-black-half-white circle at the bottom of the Layers panel:
- Click Solid Color.
- Click a color hue in the rainbow-colored strip.
- Click a color tint in the large color box.
- Click Ok.
-
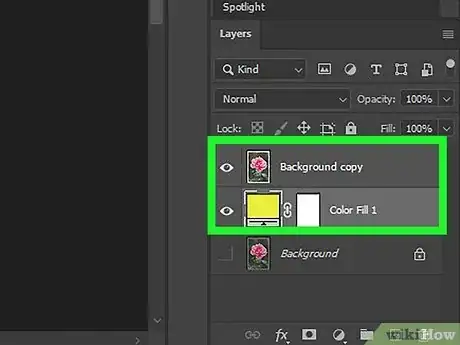
7Drag the solid color layer below your image. You can rearrange layers in the Layers panel by clicking and dragging them. Click and drag the solid color layer you just created and drag it below your image layer.
-
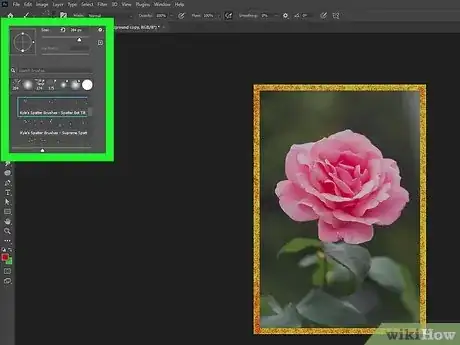
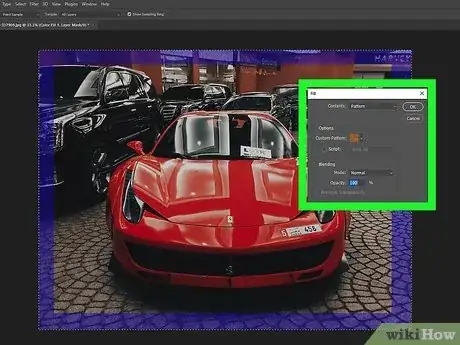
8Add any additional designs (optional). If you want to add any additional designs, you can create a new layer and drag it below your image and above the solid color layer. Use the Photoshop tools to create your own design.[1]
- To create a new layer, click the icon that resembles a sheet of paper at the bottom of the Layers panel.
- For example, you could install some new brushes and use the paintbrush tool to decorate your border using Photoshop brushes.
Advertisement
Method 2
Method 2 of 2:
Using a Layer Mask
-
1Understand when to use this method. You can use this method to create a rectangle, oval, or custom border shape. You can also add feathering to create an optional fade around your border. However, this will trim some of the edges around your image.
-
2Open an image in Photoshop. You can easily open an image in Photoshop by right-clicking on the image and selecting Open with... Then click Photoshop. Alternatively, you can use the following steps to open an image from within Photoshop:
- Open Photoshop.
- Click File in the menu bar at the top.
- Click Open. Alternatively, you can click Open on the title screen when you open Photoshop.
- Select the image you want to add a border to.
- Click Open.
-
3Duplicate the layer. To duplicate a layer in Photoshop, click Layer in the menu bar at the top. Then click Duplicate Layer.
- If the image is already a Photoshop (.psd) file with multiple layers, you can skip this step.
-
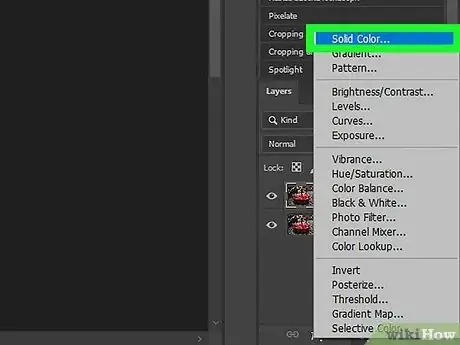
4Create a new solid color layer. This layer can be any color you want your border to be. Use the following steps to create a new solid color layer:
- Click the icon that resembles a half-black-half-white circle at the bottom of the Layers panel:
- Click Solid Color.
- Click a color hue in the rainbow-colored strip.
- Click a color tint in the large color box.
- Click Ok.
-
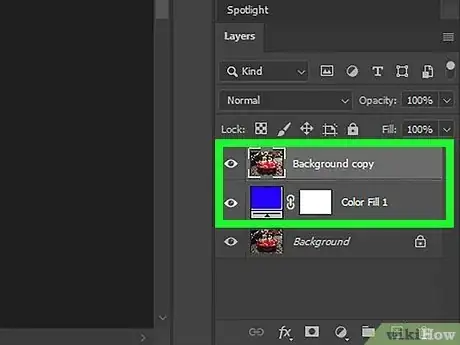
5Drag the solid color layer below your image. You can rearrange layers in the Layers panel by clicking and dragging them. Click and drag the solid color layer you just created and drag it all the way to the bottom.
-
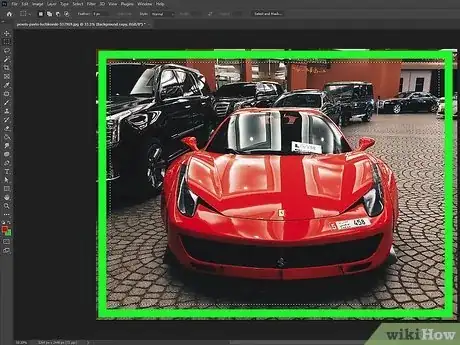
6Create a selection around the area of your image you want to frame. Select the Rectangle Marquee tool to create a rectangle-shaped frame or the Elliptical Marquee tool to create an oval-shaped frame. Click and drag near the upper-left corner to the lower-right corner to create a selection. The area outside of the dotted line is the area that will be your border.
- If you are not happy with the shape of the border, press Ctrl + D (or Command + D on Mac) to undo the selection and then try again with one of the Marquee tools.
- Use the rulers to create a more accurate selection. To turn on rulers, click View in the menu bar at the top, then click Rulers.
- Optional Fade: If you want to create a faded frame around your image, enter the number of pixels you want the gradient fade to be (i.e. 25 px) next to "Feather" in the panel at the top of the screen.
- If you want to create a custom frame shape (i.e. a star, or polygon), use the Lasso Tool or Polygon Lasso tool and hand draw the shape you want the border to be.
-
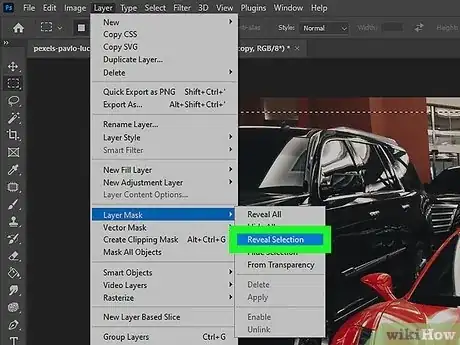
7Apply a reveal layer mask. This will mask the area outside of your area selection and create a border around the edges of your image. Use the following steps to apply a reveal mask:
- Click Layer in the menu bar at the top.
- Click Layer Mask.
- Click Reveal Selection.
-
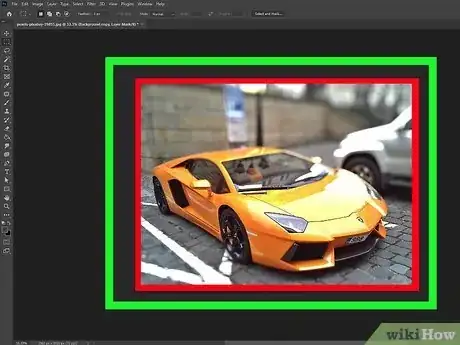
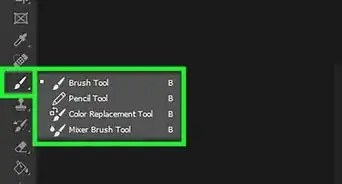
8Add any additional designs (optional). If you want to add any additional designs, you can create a new layer and drag it below your image and above the solid color layer. Use the Photoshop tools to create your own design.[2]
- For example, you could install some new brushes and use the paintbrush tool to decorate your border using Photoshop brushes.
Advertisement
References
About This Article
Advertisement






-Step-9-Version-2.webp)


