This article was co-authored by wikiHow Staff. Our trained team of editors and researchers validate articles for accuracy and comprehensiveness. wikiHow's Content Management Team carefully monitors the work from our editorial staff to ensure that each article is backed by trusted research and meets our high quality standards.
There are 25 references cited in this article, which can be found at the bottom of the page.
This article has been viewed 13,852 times.
Learn more...
A subwoofer is a speaker that’s specially designed to deliver low-frequency sounds, specifically those in the 20-200 Hz range. Subwoofers, along with other speaker components, can generally be divided into two main types: active and passive. Whereas passive subwoofers rely on external amplifiers or A/V receivers to function, active subs incorporate their own components, all in one self-contained system that’s easy to set up and place for full effect.
Steps
Home Audio Setup
-
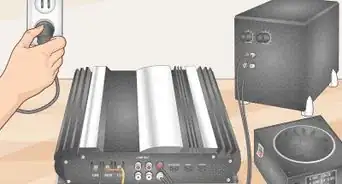
1Plug your subwoofer into a nearby electrical outlet. First things first—in order for your subwoofer to be able to deliver those earth-shaking low tones you crave, it needs to have a steady supply of electricity. The power cords on most newer speakers come fitted with standard 2- or 3-prong connectors, so you shouldn’t have any trouble getting the plug to fit.[1]
- A power strip can come in handy if you already have a lot of other devices hooked up in the area where you want to put your subwoofer.
- Keep a little slack in your power cord or consider making use of a separate extension cord. You’re most likely going to want to move your subwoofer around a little later on in order to get its placement just right.[2]
Tip: A decent subwoofer is no small investment. It’s therefore strongly recommended that you connect your speaker to a surge protector to safeguard it against power outages and other types of unexpected electrical interference.[3]
-
2Use a subwoofer cable to connect your receiver to the LFE input on your sub. LFE, short for “low-frequency effects,” is a special auxiliary audio channel sometimes used to lend a particular bass track a little more oomph. Double-check that the cable is running from the output hub on your receiver, or the device responsible for generating the audio, to the input hub on your subwoofer. This connection will ensure that the speaker is enabled and ready to rock.[4]
- A new speaker should come with its own subwoofer cable. If for some reason it yours didn’t, you can pick one up for around $20-30 at any electronics store or audio equipment supply shop.
- Most types of media receivers feature subwoofer output ports specifically for this purpose.[5]
- Examples of common AV receivers include things like radios, stereos, DVD/Blu-ray players, and gaming consoles.
- Most movies and video games are engineered with LFE capability, while other forms of entertainment, including professionally-mastered music, rely on several different channels to create a full spectrum of sound.
- A useful way to think of LFE is as a bonus layer of bass rather than its primary source.[6]
Advertisement -
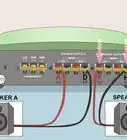
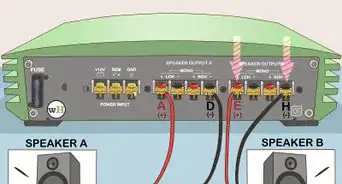
3Hook your sub up directly to your main speakers if LFE isn’t enabled. Connect the output of your amplifier/receiver to the subwoofer first. Then, connect the sub to the speakers. It's important to connect to the sub first, especially if the sub has a crossover built-in.[7]
- A crossover splits the signal so the sub only plays the low frequencies and the speakers only play the higher frequencies. Use a crossover if your sub has one, because this will improve audio quality.
- If you don’t hear any bass coming from your subwoofer upon finalizing your installation, connect your receiver’s left and right line outputs to the indicated input ports on your subwoofer instead to make it compatible with a multi-channel setup.
-
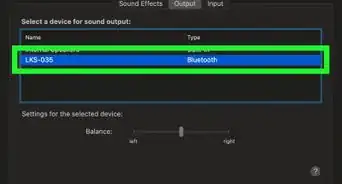
4Set the size of your front left and right speakers to “small” if it has options. Head to your receiver’s settings menu and select “speakers” under the “audio settings” submenu. There, you should see the option to change your recognized speaker size. By setting your speaker size to “small,” you’ll be routing more low-frequency sounds to your subwoofer.[8]
- This is a good trick for optimizing your sound’s low range texture, even if you’re working with large standing speakers.[9]
- If you plan on using your subwoofer with multiple receivers, keep in mind that you’ll need to adjust the speaker size setting on each of them individually.
- Note that not all speakers have this option.
-
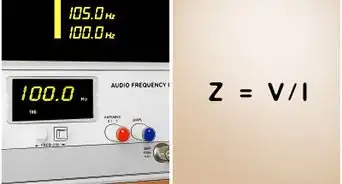
5Set your sub’s crossover point to 10 Hz above the lowest frequency it can produce cleanly. Put on some music and turn the frequency as low as it can go. Then, raise the frequency until the music sounds clean and not distorted. Raise the crossover point 10 Hz above this level for optimum sound.[10]
- In the majority of cases, a new subwoofer will come pre-set to a crossover point that’s optimized for the speaker’s size. Unless you’re specifically asked to configure this setting, avoid messing with it.
- The term “crossover point” describes the frequency at which lower-pitched sounds are split from the front left and right speakers to the subwoofer, which is better built to handle them.[11]
-
6Adjust the phase to whichever setting offers superior clarity and depth. Look for the phase switch somewhere on the back or side of your speaker or a dial on the digital interface. The phase range is between 0 and 180. To determine what setting you should go with, put on some media with plenty of bass and flip back and forth between the two settings or rotate the dial a few times before settling on what sounds best.[12]
- The quality of the sound as influenced by the phase depends partly on where the speaker is located in the room, so let your ears guide you and don’t worry too much about making the “right” choice.
-
7Turn the volume up to your preferred level. Most large and midsized subwoofers have their own onboard volume controls, which allows you to decide how much bass you want to hear in a particular audio track. Simply turn the corresponding knob to the right to increase the volume or to the left to decrease it.[13]
- You may need to tweak the volume on a movie-to-movie or game-to-game basis, since different soundtracks are mastered with different levels.


Subwoofer and Speaker Placement
-
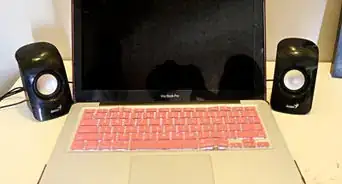
1Keep smaller subwoofers within 3–4 ft (0.91–1.22 m) of your main speakers. If space permits, place your sub (or subs) somewhere in the immediate vicinity of your front-facing left and right speakers. Grouping your individual speakers in this way will help to ensure that you’re treated to one cohesive wave of sound rather than a disjointed mess.[14]
- If you get your audio from a soundbar, try to find a home for your subwoofer on either side of it to keep both components close together.
- If you situate your front speakers and subwoofer too far apart, it may sound as if the bass is coming from somewhere else entirely. This can make for a somewhat chaotic listening experience.
- Placement isn't as important for larger subs. Just don't put them in a cabinet or other area where they're totally enclosed.
-
2Place your sub about a third of the way into the room from the outer walls. When it comes to figuring out where to put subwoofers and other audio equipment, it can be helpful to follow the “Rule of Thirds.” That is, stow your speaker in the sweet spot that lies roughly a third of the way between the center of the room and its outer walls. This zone will generally offer the best balance between acoustics and practicality.[15]
- Positioning a speaker right next to a wall invites irritating vibration or distortion, but installing one smack dab in the center of the room has a tendency to result in a dull, unfocused sound.
- Avoid placing a sub in a corner, as this could distort the sound.
-
3Put the sub where you sit and move around the room to find the best placement. Stick your sub on your couch or another area where you'll be spending time listening to music or movies. Turn on your sound system and crank the volume. Then, get down on your hands and knees and slowly make your way to different parts of the room, noting any alterations to the character of the sound as you go. When you find a position you like, move your sub as close to that spot as possible without interfering with the room’s layout.[16]
- It will be much easier for you to simply take a few steps here and there than it will be to keep moving your subwoofer over and over again.
- “Crawling” for bass can be a useful solution if you’ve already tried out a few different placements and none of them have stood out to you.[17]
-
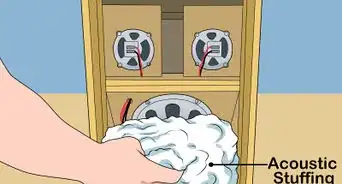
4Perch your subwoofer on a sound-dampening platform to minimize vibration. These nifty accessories do exactly what their name suggests—absorb environmental sound that might otherwise threaten to disrupt your enjoyment of whatever you’re listening to. If you’ve got hard flooring in the room you’ve designated for your home entertainment setup, having some type of base for your bass is a must.[18]
- A decent speaker platform will typically cost you somewhere between $50-80. You’ll find these accessories at the same shop where you bought your subwoofer.
- If you don’t want to shell out for a proper platform, you can try improvising one by setting your subwoofer on a throw rug, a folded towel, or a small stack of newspapers.
- You could also try rigging up your own elevated platform using items like a low end table or wooden frame and an anti-vibration foam pad cut to size.[19]


Car Audio Installation
-
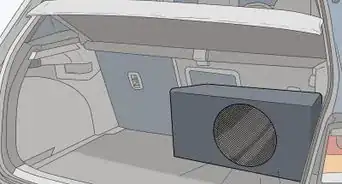
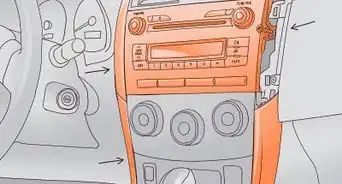
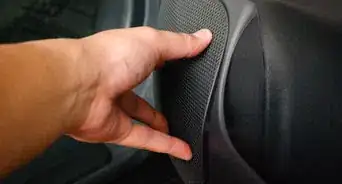
1Find a good place to put your sub unit. Most mobile audio enthusiasts prefer to tuck their subwoofers away in the trunk or rear compartment, where they typically have plenty of room to sit comfortably. If your trunk or hatch is a no-go, however, you could also stash your unit somewhere inside the cab, like under the front passenger-side seat, between the back seats, or inside the back shelf just below the rear windshield.[20]
- Active subwoofers generate a lot of heat while in use, so make it a point to choose a spot that will offer adequate ventilation. Never cover your unit with blankets, clothing, or any other flammable materials.[21]
Warning: If you decide to store your subwoofer inside your vehicle’s cab, keep in mind that it may be visible to anyone who happens to walk by. Subwoofers are common targets for thieves.
-
2Disconnect the negative terminal of your vehicle’s battery to power. Turn off your vehicle completely and remove your keys from the ignition. Then, pop the hood and use an appropriately-sized wrench to loosen the bolt locking the battery’s negative terminal head in place. Lift the terminal off of its post and pull it safely to one side.[22]
- The negative terminal will be the one marked with the “-” symbol.
- Automobile battery terminals are almost always secured with 10mm bolts, which can be good to know if you’re having trouble selecting the right wrench.[23]
- This step is crucial for ensuring that there’s no electric current being directed to any part of your vehicle while you’re figuring out the wiring for your subwoofer.
-
3Connect your subwoofer to your vehicle’s battery and stereo system. First, run the main power cable from the battery to the unit’s fuse holder. Splice the turn-on wire and signal cable into your stereo’s internal wiring harness and route them through the cabin of your vehicle in such a way that they remain hidden and protected from damage. Then, fasten the unit’s ground wire to a suitable spot on your vehicle’s chassis to guarantee a safe, stable connection.[24]
- Hooking up a subwoofer is a somewhat complicated project, one that requires a fair amount of technical expertise. Unless you’re sure you know what you’re doing, it’s strongly recommended that you hire a qualified audio expert to make sure that job gets done right and avoid making any costly mistakes.[25]
- Don’t forget to reconnect the negative terminal of your vehicle's battery when you’re done putting in your new subwoofer.
-
4Adjust your sub’s settings to the levels that sound best in your vehicle. Settings like gain, frequency, crossover, and bass boost play a role in determining the overall character of the sound emitted by your subwoofer. Generally speaking, you want your bass to be focused enough to clearly hear those bumping, booming low tones, but not so loud that it opens the door for irritating audio defects like rattling, buzzing, or distortion.[26]
- Turn the built-in amp’s gains all the way down before giving your sub a test run. That way, you can tweak them all individually as you listen until you achieve the precise sound you’re looking for.[27]


Warnings
- Never install a subwoofer inside a cabinet, under a piece of furniture, or behind the wall, unless you have no other option. It may seem like a savvy decorating decision, but these sorts of surroundings will only deaden the sound and amount to a tragic waste of hard-earned money.[28]⧼thumbs_response⧽


References
- ↑ https://www.qsc.com/resource-files/productresources/spk/ks/q_spk_ks_usermanual.pdf
- ↑ https://www.youtube.com/watch?v=uzCIMufCQLk&feature=youtu.be&t=33
- ↑ https://www.cnet.com/how-to/10-things-you-should-know-about-surge-protectors/
- ↑ https://www.nytimes.com/wirecutter/blog/the-five-cs-of-subwoofer-setup/
- ↑ https://www.cnet.com/how-to/how-to-hook-up-a-subwoofer-to-a-stereo-system/
- ↑ https://www.dolby.com/uploadedFiles/Assets/US/Doc/Professional/38_LFE.pdf
- ↑ https://www.youtube.com/watch?v=uzCIMufCQLk&feature=youtu.be&t=36
- ↑ https://www.youtube.com/watch?v=blrGXp170BY&feature=youtu.be&t=25
- ↑ https://www.crutchfield.com/S-YhPZV2ueTBq/learn/reviews/audio_explorations/2007/0327.html
- ↑ https://www.digitaltrends.com/home-theater/home-theater-calibration-guide-manual-speaker-setup/
- ↑ https://www.audioholics.com/home-theater-calibration/a-v-receiver-setup-crossover-distance-level-eq
- ↑ http://hifi-writer.com/wpblog/?p=1148
- ↑ https://www.cnet.com/how-to/how-to-set-up-a-subwoofer/
- ↑ https://www.cnet.com/how-to/how-to-set-up-a-subwoofer/
- ↑ https://www.audioholics.com/subwoofer-setup/subwoofer-placement-the-place-for-bass-part-1/subwoofer-placement-the-place-for-bass-part-1-page-6
- ↑ https://www.nytimes.com/wirecutter/blog/the-five-cs-of-subwoofer-setup/
- ↑ https://www.nytimes.com/wirecutter/blog/the-five-cs-of-subwoofer-setup/
- ↑ https://www.youtube.com/watch?v=S_GwaGeWQOg&feature=youtu.be&t=85
- ↑ https://improvisedlife.com/2018/03/28/a-simple-effective-fix-for-irritating-vibrations-vibrating-bed-problem-solved/
- ↑ https://greatestspeakers.com/install-car-subwoofer/
- ↑ https://www.youtube.com/watch?v=keL0WO3gVVs&feature=youtu.be&t=16
- ↑ https://www.youtube.com/watch?v=tARRVm65soU&feature=youtu.be&t=4
- ↑ https://www.caranddriver.com/features/a26873586/car-battery-disconnecting/
- ↑ https://www.youtube.com/watch?v=keL0WO3gVVs&feature=youtu.be&t=40
- ↑ https://www.angieslist.com/articles/how-install-subwoofer.htm
- ↑ https://www.caraudionow.com/amplifier-tuning-quick-guide-to-tune-your-amp/
- ↑ https://www.youtube.com/watch?v=keL0WO3gVVs&feature=youtu.be&t=200
- ↑ https://www.digitaltrends.com/home-theater/how-to-setup-a-subwoofer/
About This Article