X
This article was co-authored by wikiHow staff writer, Jack Lloyd. Jack Lloyd is a Technology Writer and Editor for wikiHow. He has over two years of experience writing and editing technology-related articles. He is technology enthusiast and an English teacher.
The wikiHow Tech Team also followed the article's instructions and verified that they work.
This article has been viewed 331,068 times.
Learn more...
This wikiHow teaches you how to select or create a template in Microsoft Word for Windows and Mac. Templates are pre-formatted documents designed for specific purposes, such as invoices, calendars, or résumés.
Steps
Method 1
Method 1 of 6:
Selecting a Template on Windows
-
1Open Microsoft Word. Double-click the Word icon, which resembles a white "W" on a dark-blue background.
-
2Search for a template. Scroll through the Microsoft Word home page to find a template you like, or type word into the search bar at the top of the page to search for matching templates.
- For example, if you wanted to find budget-related templates, you would type "budget" into the search bar.
- You must be connected to the Internet in order to search for templates.
Advertisement -
3Select a template. Click a template that you want to use. This will open it in a window where you can take a closer look at the template.
-
4Click Create. It's to the right of the template preview. Doing so opens the template in a new Word document.
-
5Edit the template. Most templates have sample text; you can replace this text by deleting it and typing in your own.
- You can also edit most templates' formatting (e.g., font, color, and text size) without ruining the template itself.
-
6Save your document. Click File in the upper-left side of the page, click Save As, double-click a save location, enter your document's name, and click Save.
- You can re-open this document by going to the folder where you saved it and double-clicking it.


Advertisement
Method 2
Method 2 of 6:
Selecting a Template on Mac
-
1Open Microsoft word. Double-click the Word icon, which resembles a white "W" on a dark-blue background. Depending on your Word settings, this will either open a new document or bring up the Word home page.
- If the Word home page opens, skip to the "search for a template" step.
-
2Click File. It's a menu item in the top-left side of the screen. A drop-down menu will appear.
-
3Click New from Template. You'll find this option near the top of the File drop-down menu. Clicking it opens the template gallery.
-
4Search for a template. Scroll through the available templates to see pre-set options, or type a search term into the search bar in the top-right side of the page.
- For example, to find invoice-related templates, you might type "invoice" into the search bar.
- You must be connected to the Internet in order to search for templates.
-
5Select a template. Click a template to open a preview window with the template displayed.
-
6Click Open. It's in the preview window. This will open the template as a new document.
-
7Edit the template. Most templates have sample text; you can replace this text by deleting it and typing in your own.
- You can also edit most templates' formatting (e.g., font, color, and text size) without ruining the template itself.
-
8Save your document. Click the File menu item, click Save As, enter a name for your document, and click Save.


Advertisement
Method 3
Method 3 of 6:
Applying a Template to an Existing Document on Windows
-
1Open your Microsoft Word document. Double-click the document to which you want to apply your template.
- This will only work for recently-opened templates. If you haven't recently opened the template you want to use, open the template and then close it before continuing.
-
2Click File. It's in the upper-left side of the page.
-
3Click Options. You'll find this in the bottom-left side of the "File" page.
-
4Click the Add-ins tab. It's on the left side of the Options window.
-
5Click the "Manage" drop-down box. This box is at the bottom of the Add-Ins page. A drop-down menu will appear.
-
6Click Templates. It's near the middle of the drop-down menu.
-
7Click Go…. This button is to the right of the "Manage" drop-down box.
-
8Click Attach…. It's in the upper-right side of the page.
-
9Select a template. Click a template that you want to use.
-
10Click Open. It's at the bottom of the Template window. This will open your template.
-
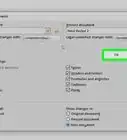
11Check the "Automatically update document styles" box. You'll find this box below the template's name near the top of the page.
-
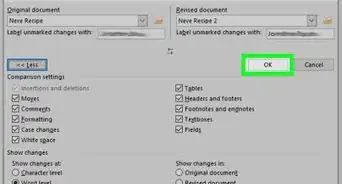
12Click OK. It's at the bottom of the window. Doing so will apply your template's formatting to the document.
-
13Save your document. Click File in the upper-left side of the page, click Save As, double-click a save location, enter your document's name, and click Save.


Advertisement
Method 4
Method 4 of 6:
Applying a Template to an Existing Document on Mac
-
1Open your Microsoft Word document. Double-click the document you want to open.
- This will only work for recently-opened templates. If you haven't recently opened the template you want to use, open the template and then close it before continuing.
-
2Click Tools. This menu item is on the left side of the Mac's menu bar. Clicking it prompts a drop-down menu.
- If you don't see Tools, click your Microsoft Word window to make it appear.
-
3Click Templates & Add-Ins…. It's an option near the bottom of the drop-down menu. Doing so opens a window.
-
4Click Attach. You'll find this in the Templates & Add-Ins window.
-
5Select a template. Click a template that you want to apply to your document.
-
6Click Open. Doing so will apply the template's formatting to your document.
-
7Save your document. Click the File menu item, click Save As, enter a name for your document, and click Save.


Advertisement
Method 5
Method 5 of 6:
Creating a Template on Windows
-
1Open Microsoft Word. Double-click the Word icon, which resembles a white "W" on a dark-blue background.
- If you want to create a template from an existing document, double-click the document itself and skip to the "edit your document" step.
-
2Click the "Blank document" template. It's in the upper-left side of the Word window.
-
3Edit your document. Any formatting changes you make (e.g., spacing, text size, font) will be parts of your template.
- If you're creating a template from an existing document, you might not need to edit anything.
-
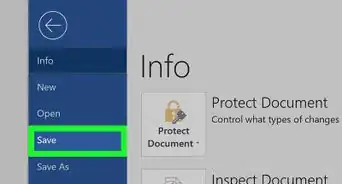
4Click File. It's a tab in the upper-left side of the page.
-
5Click Save As. This option is near the top of the File pop-out window.
-
6Select a save location. Double-click a save folder or location here to set it as the template's storage spot.
-
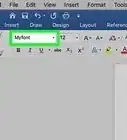
7Enter a name for your template. Type in the name you want to use for your template.
-
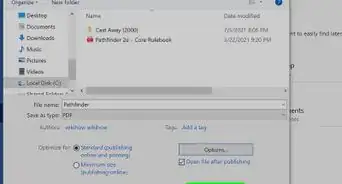
8Click the "Save as type" drop-down box. It's below the file name text box. A drop-down menu will appear.
-
9Click Word Template. This option is near the top of the drop-down menu.
- You can also click Word Macro-Enabled Template here if you put macros in your document.
-
10Click Save. It's in the bottom-right side of the window. Doing so saves your template.
- You'll be able to apply the template to other documents if you want to.


Advertisement
Method 6
Method 6 of 6:
Creating a Template on Mac
-
1Open Microsoft Word. Double-click the Word icon, which resembles a white "W" on a dark-blue background.
- If you want to create a template from an existing document, double-click the document itself and skip to the "edit your document" step.
-
2Click the New tab. It's in the upper-left side of the home page.
- If there isn't a home page, click the File tab and then click New from Template first.
-
3Click the "Blank Document" template. It's a white box. This will create a new Word document.
-
4Edit your document. Any formatting changes you make (e.g., spacing, text size, font) will be parts of your template.
- If you're creating a template from an existing document, you might not need to edit anything.
-
5Click File. It's a menu item in the top-left side of the page.
-
6Click Save As Template. You'll see this option in the File drop-down menu.
-
7Enter a name for your template. Type in the name you want to use for your template.
-
8Click the "File Format" drop-down box. It's near the bottom of the window. A drop-down menu will appear.
-
9Click Microsoft Word template. This option is in the drop-down menu, and has the ".dotx" extension next to it.
- You can also select Microsoft Word Macro-Enabled template if you put macros in your document.
-
10Click Save. It's the blue button at the bottom of the window. Doing so will save your template.
- You'll be able to apply the template to other documents if you want to.


Advertisement
Community Q&A
-
QuestionHow do I save an edited template as a default template in Word?
 Community AnswerYou can open HTML window in editor and you can place your code there. It will work if your editor has an edit HTML option.
 -
QuestionHow can I use a template in Outlook?
 Community AnswerPrepare your template and save it as .oft (Outlook template). Next time you need it, go to the Home tab and select New Items / More Items / Choose Form / Look in: User Templates in File System and select your template.
 -
QuestionHow do I add lines inside the text box?
 Community AnswerDraw them using the line tool in the box. On updated computers, go to insert>illustrations>shapes. On non-updated computers, go to insert>shape. You can also underline text by highlighting it, then going to home>underline text.
Advertisement
Warnings
- You shouldn't have to pay for templates.⧼thumbs_response⧽
Advertisement


About This Article
Jack Lloyd
wikiHow Technology Writer
This article was co-authored by wikiHow staff writer, Jack Lloyd. Jack Lloyd is a Technology Writer and Editor for wikiHow. He has over two years of experience writing and editing technology-related articles. He is technology enthusiast and an English teacher. This article has been viewed 331,068 times.
How helpful is this?
Co-authors: 20
Updated: August 29, 2022
Views: 331,068
Categories: Microsoft Word
Advertisement