This article was co-authored by wikiHow Staff. Our trained team of editors and researchers validate articles for accuracy and comprehensiveness. wikiHow's Content Management Team carefully monitors the work from our editorial staff to ensure that each article is backed by trusted research and meets our high quality standards.
The wikiHow Tech Team also followed the article's instructions and verified that they work.
This article has been viewed 168,488 times.
Learn more...
To upgrade your Notes app on your iPhone, update to iOS 9 and open the app. You'll be prompted to upgrade your Notes to the latest version, which will affect all of your notes on your device and in your iCloud storage. After upgrading, you'll have access to a bunch of new features, including folder storage, drawings, checklists, and more.
Steps
Upgrading Your Notes
-
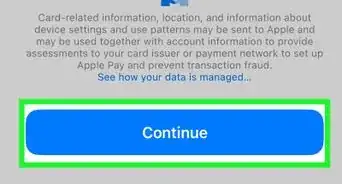
1Update to iOS 9 or later. In order to use the new features in the Notes app, you'll need to update your iPhone to iOS 9 or alter. You can check for updates in the "General" section of the Settings app, or by connecting your iPhone to your computer and opening iTunes. See Update iOS for details.
-
2Open the Notes app on your iPhone. You can find this on one of your Home screens.
- You may be prompted to upgrade Notes as soon as you open it, in which case you can proceed with upgrade on the screen presented to you.
Advertisement -
3Tap the "<" button to view the folder list if you aren't prompted to upgrade. You'll find the upgrade option on this screen.
-
4Tap "Upgrade" in the upper corner. This will open a new window.
-
5Tap "Upgrade Now" when prompted. Your Notes service will begin upgrading.
- When you upgrade notes, you will no longer be able to access them on devices running earlier versions of iOS, or on Macs running versions earlier than El Captian (10.11).[1]
-
6Wait while your Notes app upgrades. This may take a few moments to complete. The app will display when it has finished upgrading. Don't close the app until the upgrade is complete.


Using Upgraded Notes
-
1Add notes to folders. One of the big additions to the Notes app is the ability to file notes into folders instead of viewing them all in one big list. Tap the "<" in the upper-right corner to view your folders.
- Tap "Edit" in the upper right corner of your notes list to select notes.
- Tap each note that you want to move to a new folder.
- Tap "Move To..." in the lower right corner.
- Tap "New Folder" to create a new folder for your notes, or tap an existing folder to move the notes to it.
-
2Add photos and videos to your notes. You can quickly add photos and videos to your notes, including pictures and videos from your camera roll or new photos or recordings captured with the camera. See Add Pictures to iPhone Notes for detailed instructions.
- Open the note you want to add a picture or video to.
- Tap the Camera button above the keyboard. You may need to tap the "+" to see it. You can also tap "Done" in the upper-right corner to lower the keyboard and display the Camera button.
- Select to either use a picture or video from your device or take a new picture. The picture will be added at your cursor's location in the note.
-
3Draw on your notes. You can add drawings to any of your notes as well. These sketches will appear directly in your note. Sketches are not available on older devices. You'll need an iPhone 5 or newer to create sketches. See Draw in iPhone Notes for tips on drawing in Notes.
- Open the note you want to add a sketch to.
- Tap the Drawing button, which looks like a squiggle line, at the bottom of the screen. This will open the drawing tools. You may need to tap the "+" to see the Drawing option. You can also tap the "Done" button at the top of the screen to drop the keyboard and find the Drawing button.
- Drag your finger on the screen to draw. You can switch to different line styles by selecting the drawing tool at the bottom of the screen.
- Tap the current color in the lower-right corner to change the drawing color.
-
4Create a checklist. You can use the upgraded Notes app to create checklists. See Create a to Do List in iPhone Notes for helpful tips on using checklists to get organized.
- Tap the "✓" button above the keyboard to create a new checklist in a note. You may have to tap the "+" button to see the checklist option. You can also tap "Done" to hide the keyboard and reveal the "✓" button.
- You can also select text and then tap the "✓" button. Each new line will be turned into a checklist entry, making it easy to convert an old list into a checklist.
- Tap an empty circle on your checklist to check it off your list.
-
5Change the formatting of your text. The upgraded version of Notes allows you to change the formatting of your text. Your options are limited, but you can change the emphasis of the text and create several types of lists. See Format Your Text in iPhone Notes for a detailed explanation of the formatting options.
- Tap in a note to begin typing so that the keyboard opens.
- Tap the "+" button and then tap the "Aa" button.
- Select between "Title," "Heading," and "Body" for different text emphasis. Title is the largest, and body is the smallest (standard).
- Select from the different list options. You can create a bulleted list, a dash list, or a numbered list. Each new line will be a new list entry.
-
6Add attachments from other apps. You can add attachments from many different apps to your notes, including locations from Maps, websites from Safari, and many other apps with the ability to share content.[2]
- Open the app with the item you want to add to your note. For example, to add a webpage to your note, open the page you want to save in Safari. To save a location, pin a location in Maps.
- Select the "Share" option in the app. The location of this will vary depending on the app. In Safari, you'll find it along the bottom of the screen. In Maps, you'll find it in the upper-right corner after opening a location's details.
- Select "Add to Notes." You'll find this in the top row of options.
- Select the note you want to add it to, or create a new note. By default, the item will be added to a new note. Tap "Choose Note" at the bottom of the pop-up to choose the note you want to add the item to.
- Enter any text you want to add along with the item. You can type in notes for the item you're adding, which will be added beneath the item in the note.
- Tap "Save" to save the note. The item will either be added to a new note or to the note you selected.


Community Q&A
-
QuestionI don't see an upgrade button. Can you help?
 Community AnswerIt will pop up on your home screen when you press the power button.
 -
QuestionI am using IOS 13.3 and my Notes app looks nothing like diagrams from March of 2019. Specifically, I am looking to retrieve a note that I accidentally erased, and there is no retrieval function listed. What can I do?
 Community AnswerIn the notes app, go to folders scroll to the bottom and see Deleted Notes. From there, retrieve the note you accidentally erased.


References
About This Article