This article was co-authored by Luigi Oppido and by wikiHow staff writer, Sam Browning. Luigi Oppido is the Owner and Operator of Pleasure Point Computers in Santa Cruz, California. Luigi has over 25 years of experience in general computer repair, data recovery, virus removal, and upgrades. He is also the host of the Computer Man Show! broadcasted on KSQD covering central California for over two years.
This article has been viewed 25,342 times.
Identifying a failing component in your computer can be difficult, especially when different components malfunctioning lead to the same symptoms. Luckily, there are specific methods you can use to check that your power supply and motherboard are working as expected. This wikiHow article will teach you how to test both your power supply and motherboard for faults.
Steps
Using the Paperclip Test
-
1Check for symptoms of PSU failure. If your computer is not turning on, it continually restarts or blue screens, or it makes strange noises or is giving off a burning smell, you could have a failing power supply unit.[1]
-
2Turn off your PSU and unplug it from the outlet. Set the switch on the back of your PSU to “Off”, then unplug it from the wall outlet.[2]Advertisement
-
3Open your computer case to access the PSU. Most cases have a side panel that can easily be removed to access the components of the computer.
-
4Disconnect all cables from the PSU. If you are not as familiar with computer components, consider taking a picture of your computer to help you remember where each PSU cable connects.
-
5Bend a paperclip into a “U” shape. You can use this paperclip to make your PSU think it has been turned on, allowing you to test it.
-
6Look for the green pin and a black pin on the PSU’s 24 pin connector. The 24 pin connector plugs into the motherboard, and it is the largest of the PSU connectors. Additionally, there should be only one green pin, while there are a number of black pins.
-
7Insert an end of the paperclip into both pins. By connecting the two pins with a piece of metal, you will essentially be able to jump start your PSU when you plug it in and turn it on.
-
8Plug your PSU in and turn it on. Be sure to check one last time that all other devices are disconnected before turning it on to properly test your PSU.
-
9Check to see if your fan is moving. If your fan is moving, your PSU is turning on. Otherwise, unplug your power supply, double-check your paperclip placement, and run the test once more. If the fan still does not move, your PSU is probably dead.
- Even if your fan is moving, your power supply might not be outputting the correct power levels. To be certain it is working as intended, test it using the next method.


Using a Power Supply Testing Unit
-
1Purchase a power supply testing unit. They can be purchased online or at an electronics store and are relatively inexpensive.
-
2Turn your PSU off and unplug it from the outlet. This will take away any residual current and help you avoid getting shocked.
-
3Connect the PSU’s 24 pin connector to the power supply testing unit. The 24 pin connector will likely be the largest of the PSU connectors.[3]
-
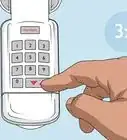
4Plug the PSU into an outlet and turn it on. If there is a button on your power supply testing unit to turn on your PSU, press it. Otherwise, your PSU should automatically turn on, and you should begin seeing readings on your power supply testing unit.
-
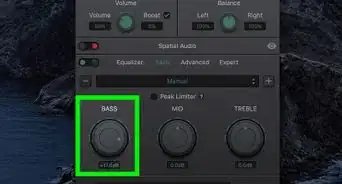
5Check your voltages against their acceptable ranges. There are four key measurements you should look for, each with their own acceptable range of variation. If any of the measurements are outside their acceptable ranges, the PSU should be replaced.
- +3.3 VDC (within +/- 5%)
- +5 VDC (within +/- 5%)
- +12 VDC (within +/- 5%)
- -12 VDC (within +/- 10%)
-
6Test other cables. If your 24 pin connector is outputting power properly, work your way through each of the PSU’s cables, turning it off and unplugging it between each test. If all the cables are outputting properly, your PSU is likely working!


Testing Your Motherboard With POST
-
1Check for symptoms of a bad motherboard. If your computer is not recognizing peripherals like your mouse and keyboard, your computer boots more slowly than usual, or you smell something burning, your motherboard might be dying.[4]
-
2Set your motherboard on the edge of a flat surface. If you are using an external graphics card, this will allow it to sit on the motherboard without damaging any overhanging prongs.
- Additionally, avoid static electricity as much as possible! Ideally, use a surface like wood or glass, and do not stand on carpet.
-
3Install your CPU. Depending on your motherboard, you may have to unscrew some brackets to install your CPU. Your CPU should seat properly without any force.[5]
-
4Install your cooler (optional). While a cooler is not necessary for this test, if you are building a new PC and the test is successful, already having your cooler installed will take away another step in the process.
-
5Mount your RAM. Be sure to align the small notch at the bottom of your RAM with the notch in your motherboard. Once the notches are in alignment, use a small amount of force to push down until you hear a click.
- If you are using multiple sticks of RAM but are not filling all your computer’s available slots, refer to your manual for optimal placement.
-
6Install your graphics card. Many Intel CPUs and some Ryzen CPUs have GPUs built in, so it may not be necessary to connect an external graphics card depending on your build.
-
7Connect your PSU to your motherboard and graphics card. This method requires a working PSU, so be sure to test it using the two methods above before proceeding. Your PSU should connect to the motherboard with a 24 pin connector, while the pins in the graphics card connector will vary.
-
8Connect your motherboard to your monitor. Most commonly, the connectors on the motherboard will be HDMI and/or DisplayPort. Cables will likely be included with your monitor.
-
9Set the power supply to off, plug in the power supply, then turn it on. You should now see lights appearing on your motherboard.
-
10Check that your computer boots to the BIOS settings. If the BIOS screen does not appear on your monitor, something has gone wrong. Try checking that all components are properly installed and connected and try again.
- If you are hearing a series of beeps, that is a beep code that represents a specific error.
- Your computer performs a POST each time you turn it on, so if your motherboard is already installed, turn the computer on. If it boots properly and there is no beep code, but you believe something is wrong with your motherboard, consider consulting a professional.
- Often, the easiest way to determine you have a bad motherboard is checking every other component in your computer. After a failed POST, ensure all other components are working before assuming your motherboard is nonfunctional.


References
- ↑ https://www.hitechwhizz.com/2020/06/5-signs-of-failing-power-supply-unit-psu-failure-symptoms.html
- ↑ https://support.cyberpowerpc.com/hc/en-us/articles/360018990833-Testing-your-power-supply
- ↑ Luigi Oppido. Computer & Tech Specialist. Expert Interview. 13 November 2020.
- ↑ https://www.alphr.com/motherboard-failure-diagnosis-solutions/
- ↑ https://youtu.be/9206E_rOduU?t=334
About This Article

1. Turn off your power supply unit and unplug it from the wall.
2. Open your computer case and disconnect all cables from your PSU.
3. Bend a paperclip into a "U" shape, then insert one end into the green pin and another end into a black pin of the PSU's 24 pin connector.
4. Plug your PSU in, turn it on, and check if the fan is moving.
5. For more extensive PSU testing, purchase a power supply testing unit, then turn off your PSU and unplug it from power.
6. Connect the PSU's 24 pin connector to the power supply testing unit, reconnect the PSU to power, and turn it back on.
7. Check that the voltage measurements are in the acceptable ranges.
8. To test your motherboard, turn on your computer, watch for lights on the motherboard, and listen for beep codes.