wikiHow is a “wiki,” similar to Wikipedia, which means that many of our articles are co-written by multiple authors. To create this article, volunteer authors worked to edit and improve it over time.
This article has been viewed 85,731 times.
Learn more...
These instructions will teach you how to start and compile a short Java program using the Indigo release of Eclipse. Eclipse is a free, open-source integrated development environment that you can use to develop Java programs, as well as programs in other languages. This tutorial assumes that you already have Eclipse installed on your computer. The purpose of this tutorial is to help you navigate Eclipse and to show off a few of its many features. Eclipse is easy to learn and will increase your productivity dramatically.
Steps
-
1Begin by creating a new Java project. There are a few different ways of accomplishing this. You can click the arrow next to the left-most icon on the toolbar and select "Java Project" from the drop-down menu. Alternately, you can start a new Java project by choosing "File," then "New," followed by "Java Project." You can also use the shortcut Alt+Shift+N.
-
2Enter a project name. You will see a window titled "Create a Java Project." The buttons "Next" and "Finish" at the bottom of the window will be greyed out until a project name is entered in the first field. To proceed, give your project a name and enter it into this field. For this tutorial, we will use the name "Project1." Enter the name and then click "Finish." Your new project will appear on the left-hand side of the screen under "Package Explorer" among existing projects. Projects are listed in alphabetical order.Advertisement
-
3Start a new Java class. Before you begin writing code, you will need to create a new Java class. A class is a blueprint for an object. It defines the data stored in the object as well as its actions. Create a class by clicking the "New Java Class" icon, which looks like a green circle with the letter "C" in the center of it.
-
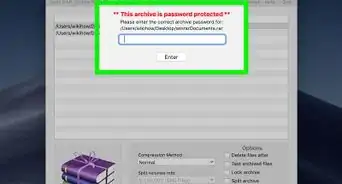
4Enter the name of your class. You will see a window titled "Java Class." To proceed, enter the name of your class into the field "Name." Since this class will be the main class of the simple project, check the selection box labeled "public static void main(String[] args)" to include the method stub. Afterwards, click "Finish."
-
5Enter your Java code. Your new class called Class1.java is created. It appears with the method stub "public static void main(String[] args)" along with some automatically generated comments. A method will contain a sequence of instructions to be executed by the program. A comment is a statement that is ignored by the compiler. Comments are used by programmers to document their code. Edit this file and insert the code for your Java program.
-
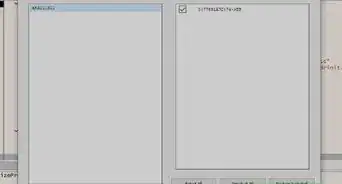
6Watch out for errors in your code. Any errors will be underlined in red, and an icon with an "X" will show up on the left. Fix your errors. By mousing over an error icon, you can see a suggestion box that lists the ways you can fix the error. In this tutorial, we will double-click "Create local variable answer" so that the variable is declared first before it is used.
-
7Ensure that your entire program is free of errors. There are three types of errors you must beware of: syntax errors, run-time errors, and logic errors. The compiler will alert you of the first of these three, the syntax errors. Examples of syntax errors are misspelled variable names or missing semi-colons. Until you remove all syntax errors from your code, your program will not compile. Unfortunately, the compiler will not catch run-time errors or logic errors. An example of a run-time error is trying to open a file that does not exist. An example of a logic error is opening and using data from the wrong file.
-
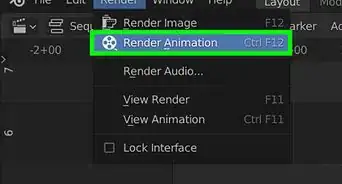
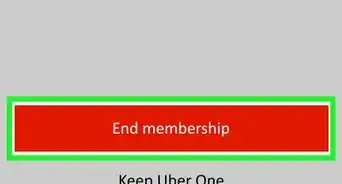
8Compile your program. Now that your program is free from errors, click the triangular icon to run your program. Another way to run your program is to select "Run" from the main menu and then select "Run" again from the drop-down menu. The shortcut is Ctrl+F11.
-
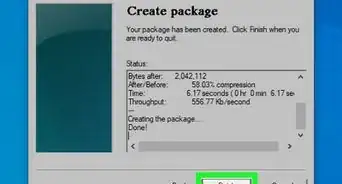
9Verify that the output is what you expected. When your program runs, the output, should there be any, will be displayed on console at the bottom of the screen. In this tutorial, our Java program added two integers together. As two plus two equals four, the program is running as intended.
-
10Fix any run-time or logic errors. As stated previously, the compiler will only catch syntax errors. If the output of your program is different from what you've expected, then there might have been an error even though the program compiled. For example, if the output was zero instead of four, then there was a mistake in the program's calculation.


Warnings
- Be sure to save your work frequently so that you don't lose anything if Eclipse happens to crash.⧼thumbs_response⧽
- Eclipse will not offer suggestions to fix every compiling error you make.⧼thumbs_response⧽