This article was co-authored by Doug Ludemann. Doug Ludemann is the owner and operator of Fish Geeks, LLC, an aquarium services company based in Minneapolis, Minnesota. Doug has worked in the aquarium and fish-care industry for over 20 years, including having worked as a professional aquarist for the Minnesota Zoo and Shedd Aquarium in Chicago. He received his Bachelor of Science in Ecology, Evolution, and Behavior from the University of Minnesota.
There are 9 references cited in this article, which can be found at the bottom of the page.
This article has been viewed 387,064 times.
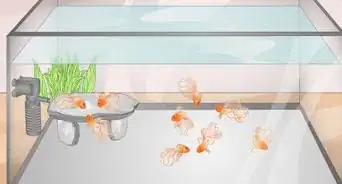
Taking care of a saltwater aquarium is a fun and fulfilling hobby for anyone who loves marine life! You’ll start by choosing fish and a sturdy tank, then create your own saltwater to your fishes’ specific needs and get them used to their new environment. Although starting your aquarium can be expensive, the time and financial investment will be worth it when you’ve created a happy, healthy mini-ecosystem.
Steps
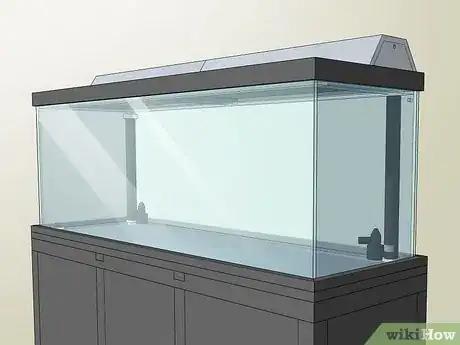
Choosing a Tank, Fish, and Extra Features
-
1Decide what fish you want before buying your tank. You won’t buy your fish until your tank is fully set up, but choosing your fish beforehand ensures that you buy the right tank size and accessories. You’ll also decide how many fish you want, whether you want coral or not, and what special parameters you’ll need to set up.
- Saltwater aquariums can get expensive, so choosing your tank inhabitants beforehand will prevent you from wasting money on an incorrect tank or features.
-
2Choose fish that are hardy and peaceful if you’re a beginner. When you’re just starting, it’s best to choose fish that are tolerant of a fluctuating environment, resistant to parasites, and non-aggressive. You’ll also want fish that are vibrant and fun to look at—and within your budget! You can ask the employees at your local pet store for recommendations. Some species to consider include:[1]
- Clownfish
- Cardinalfish
- Firefish
- Royal Grammas
- Swissguard Basslets
Advertisement -
3Avoid common saltwater fish that are too sensitive or aggressive. Some species of saltwater fish are often recommended for beginner tanks, but you should purchase them with care. Avoid any fish that are picky eaters, classified as aggressive or semi-aggressive, or are sensitive to environment fluctuation. Fish to avoid include:[2]
- Mandarinfish, which are picky eaters
- Bluestreak Cleaner Wrasse, which are picky eaters
- Groupers, which are very aggressive
- Damselfish, which are aggressive and territorial
- Mollies and guppies
-
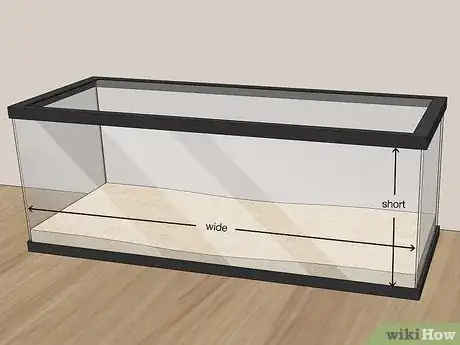
4Choose a short, wide tank. Tanks that are short and wide, as opposed to tall, allow good oxygen flow within the water, better light penetration, and easier cleaning. Your fish will enjoy the extra horizontal swimming space, and you can get more creative with your aquascaping to give them more nooks and niches to explore.
- If you have to go with a tall, narrow tank for space reasons, use powerful circulation tools to move water throughout the tank and encourage oxygenation.
-
5Buy a tank large enough for your fully-grown fish. Look online to figure out how large your fish species will grow in captivity. Then, add up the length and width measurements of your tank and divide them by the fish’s size. The answer should be greater than 4, but larger than 6 is preferable.
- For example, if your fish grows to be 21 inches (53 cm) in captivity and your tank is 3 by 6 feet (0.91 by 1.83 m) long, you’d divide 108 inches (270 cm) by 21 inches (53 cm) to get 5.1. This tank would be big enough.
- As a rule of thumb for how many fish your saltwater aquarium can hold, estimate that you can have 3 inches (7.6 cm) of fish for every square foot (0.3 m) of surface area.
-
6Go for a bigger tank when you’re in doubt. A larger tank gives you a greater margin of error in case you make a mistake—there will be more water to dilute possible pollutants, for example. You’ll also have fewer fish interaction problems and a more stable overall system.
- You’ll have room for more aquascaping as well, with additions like rocks and plants.
- Many aquarium owners who start off with a small tank will soon upgrade to a larger one, resulting in more set-up work and financial investment.
-
7Buy a submersible heater of 3-5 watts per gallon. This should be a minimum size—for a larger tank, you may want a bigger heater. When you place it in the tank, you’ll want to keep the water at 72 to 82 °F (22 to 28 °C), depending on your fish.[3]
- Saltwater fish are very sensitive to temperature change, so it’s important to keep your tank’s water at a constant temperature.
-
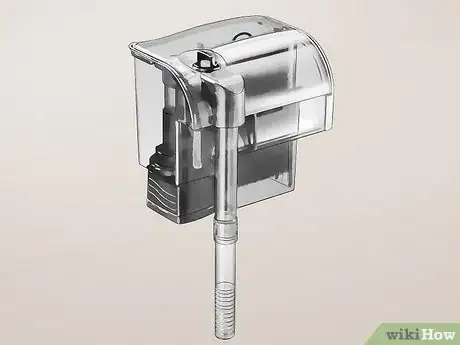
8Purchase a filter to keep your water clean. Look for a filtration system made for saltwater aquariums.[4] Ask a salesperson what size you should get for your chosen tank, and purchase in a store or online for convenience.
- Don’t set up your filter just yet. You’ll install it once you’ve filled your tank.
- Filters can also be called powerheads.
-
9Choose aquarium lighting that’s suitable for your saltwater fish.[5] Buy an aquarium lighting system in a pet store or online and set it to illuminate your aquarium for 8-10 hours a day. Look up what light spectrum you’ll need for your desired fish, or ask a pet store employee for a recommendation.[6]
- Many aquarium lights come with built in timers to turn on and off automatically.
Setting Up Your Saltwater Tank
-
1Choose a large, level area to place your saltwater tank. Find a smooth, firm, level surface to place your tank, such as a steady table. Look over the floor surface as well and make sure that your tank won’t wobble when you touch it or walk by.
- Splashes of saltwater are bound to hit the surrounding floor and table, so place down towels or move important items out of the way.
- Tank water will also evaporate a bit, driving up humidity in the surrounding area. Consider moving nearby furnishings or artwork so they’re not damaged.
-
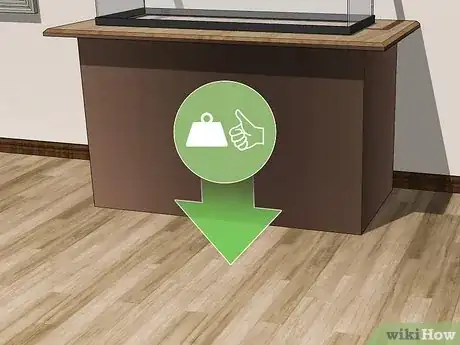
2Make sure your floor can bear the weight of your tank. This is especially important if you live in an apartment or on the second story of a building. Try to set up your tank near a load-bearing wall, perpendicular to your floor joists.
- Weigh your tank and tank stand and add about 8.5 pounds (3.9 kg) for every gallon of water that the tank holds to get the full weight of your aquarium system.
- Ask your landlord, look at your housing plans, or consult a structural engineer if you’re not sure that your floor can bear the weight.
- If necessary, you can reinforce the floor from underneath to prevent sagging and cracking.
-
3Set your tank near an outlet. You’ll need to plug in your tank’s lights, heater and filter. If possible, you may also want to keep your tank near a sink and drain in case you have to quickly fill or empty your tank.
- If you don’t have enough wall outlets for your equipment, you can use a power strip.
-
4Keep your tank away from heat sources. Make sure your aquarium is out of direct sunlight and away from air conditioners, heat vents, and doors to the outside. These can make the water temperature fluctuate and lead to algae issues on your tank walls.[7]
-
5Set the tank at least 5 inches (13 cm) away from the wall. You’ll need to attach external features, such as a filter and protein skimmer, to the back of your aquarium. Leave some open space behind it to accommodate.[8]
- Some features may also be attached below the tank and under the tank stand. Check the directions beforehand to see where to place yours.
Adding Saltwater and Substrate
-
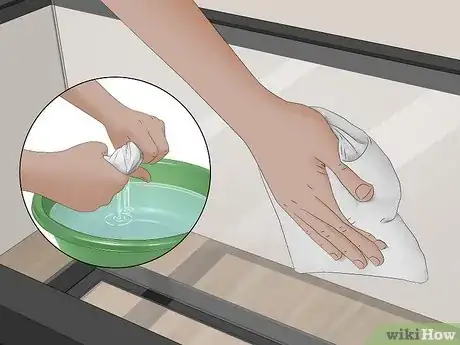
1Clean your empty tank with a cloth and freshwater before you add anything. Dip a clean cloth in warm freshwater and scrub it over the inside of the tank. This will remove any dust or dirt that has seeped into the tank while on display or at the manufacturer.[9]
- Don’t use chemical cleaners on your aquarium. They can leach into your water and harm your fish.
-
2Pour in 2–3 inches (5.1–7.6 cm) of live sand. Live sand has bacteria and tiny invertebrates in it, which help to naturally filter water and make the aquarium a more hospitable environment for your fish. Live sand also looks just like regular sand, adding a natural look to your aquarium.[10]
- You can buy live sand online or at your local pet store.
-
3Use pre-mixed saltwater for a simpler set-up process. You can buy pre-mixed saltwater mixtures online or in most large pet stores. These solutions are ready to be poured straight into your aquarium, with no other mixing and prepping required.[11]
- Make sure to read the directions before you use the saltwater.
- Check your tank’s volume and buy enough saltwater to fill it up completely.
-
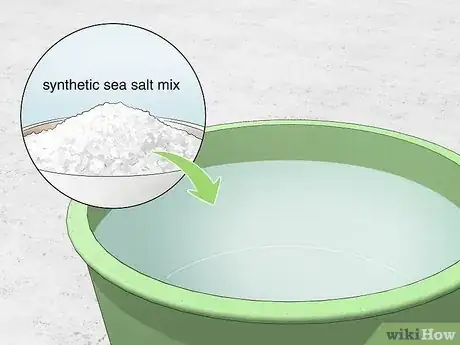
4Create saltwater with a synthetic sea salt mix for a cheaper set-up. Most saltwater aquarium owners choose to make their own saltwater by adding a mix to filtered tap water. You can buy saltwater aquarium mix online or in pet stores for a cheap price, and save it to use again when you need to replenish your tank.
- Consult the directions before you start setting up your tank to make sure you don’t have to take extra steps for your brand.
-
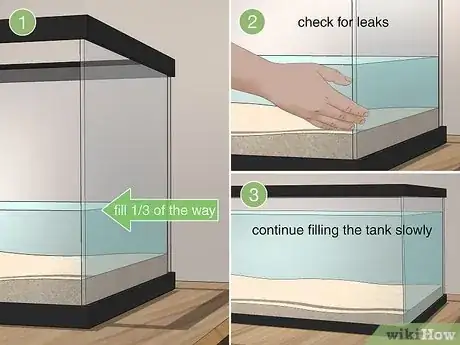
5Fill the tank a third of the way and check for leaks. Run your hands along the outside edges of the tank and look carefully at the area around it. If you don’t see or feel any water, you can continue filling up the tank slowly.[12]
- Set a small bowl in the tank and pour the water directly into it, instead of onto the sand, to keep your sand in place.
- You may want to pour in sink water from a bucket, rather than holding your tank under the sink or filling with a hose.
- If you do feel a leak, dump out the sand and water and return the tank.
-
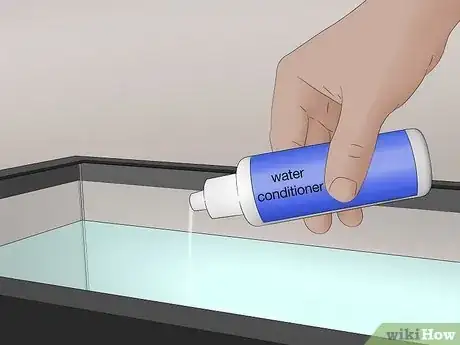
6Pour in a water conditioner to filter out metals and chlorine. Water conditioner is a specially formulated liquid designed to remove heavy metals, chlorine, and/or chloramine from your sink water, making it safe for your fish. You can add the conditioner after you’ve poured your water into the tank. If you’re using a bucket, mix it there beforehand.[13]
- Read the package instructions before you use your conditioner.
- Buy a water conditioner at a pet store, or search for one to buy online.
-
7Add small amounts of salt mix until you get to the right specific gravity. Check the directions on your packet for a salt mix per gallon specification. Start stirring in your salt mix bit by bit. Use a hydrometer or refractometer to measure your tank’s specific gravity, which is an indirect measurement of its saltiness.
- For a fish-only tank, you should aim for a specific gravity level of 1.017-1.021.
- Hydrometers are small, plastic measuring devices that you can buy online or in a pet store. To use, dip the hydrometer in the tank for a water sample and take a reading from the marker.
- If your specific gravity is too low, add a bit more salt. If it’s too high, dump out a bit of water and replace it with filtered fresh water.
-
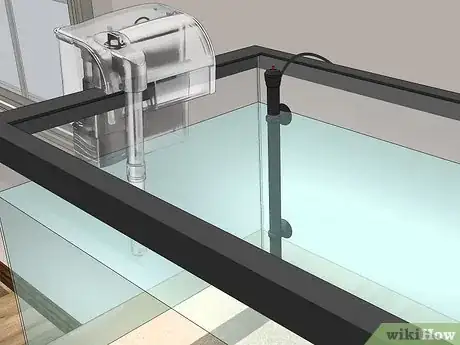
8Place your powerhead filter and heater in to start circulation. Once you’ve reached the right specific gravity, follow the directions on your powerhead, or filter, to place it on the side of the tank. Slip your submersible heater in as well. Plug in both devices to start circulation and heating.
- If possible, place the powerhead so that it makes a bit of turbulence on the water’s surface. This encourages the best possible gas exchange.
-
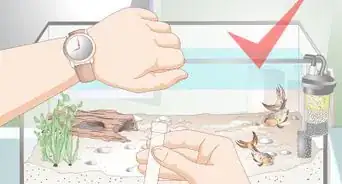
9Let the saltwater circulate and heat for 24-48 hours. Your water is almost ready! Let the tank sit for 1-2 days, giving the salt time to dissolve and letting heater get the tank to your desired temperature. After a day or so, test the specific gravity again to make sure it’s still at the right level.
- Add more salt mix or freshwater to adjust the specific gravity.
- Check the temperature as well, turning the heater up or down as needed.
-
10Add cured live rock to “cycle” the tank. Place 1.5 pounds (0.68 kg) of cured live rock into your tank for every gallon (3.8 L) of water. This kind of rock is the best natural way to “cycle” your aquarium, or create a bio-filtration system. Cured live rocks introduce good bacteria to convert ammonia, which will be produced by your fishes’ waste and respiration, into less harmful compounds.
- Look for cured live rock online and in pet stores.
- The rocks also function as an ammonia source for bacteria to work on. Their porous surfaces, meanwhile, give this bacteria a great home to grow in.
-
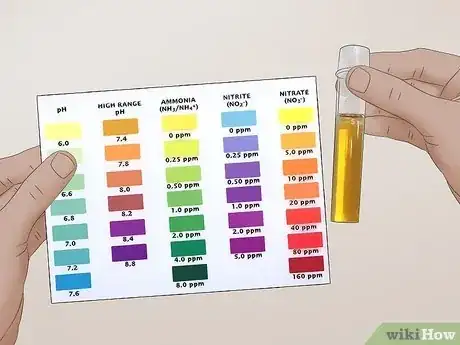
11Test your aquarium’s ammonia, nitrite, and nitrate levels with test kits.[14] While your aquarium is cycling with the cured live rock, all you need to do is keep an eye on its progress with ammonia, nitrite, and nitrate test kits. Test your tank at least once a day.Your tank is done cycling when nitrate is present and the ammonia and nitrate levels are too small to be measured.
- Buy good test kits online or in home improvement stores.
- Throughout the course of the cycle, you’ll see the ammonia and nitrite levels increase and then drop down, along with an increase in nitrates.
-
12Add saltwater rocks and features to decorate your tank. If you want to decorate your tank any more, now is the time! Place rocks, fake plants, or any other features that you want to add. Make sure they’re safe for saltwater environments.
- Clean off any new features with a clean cloth and warm freshwater beforehand.
Buying and Acclimatizing Your Fish
-
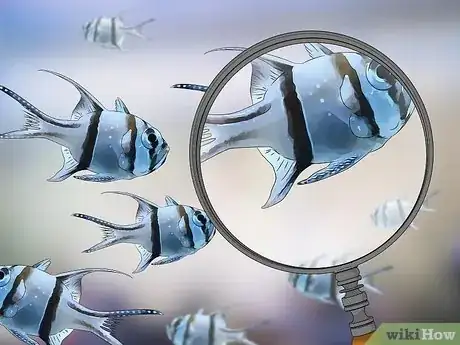
1Purchase your fish in-store so you can check their health. If you buy in-person, make sure your fish and its tankmates are healthy—if its tankmates are sick, there’s a good chance your fish will be too. Ask the salesperson to feed the fish and make sure it responds normally to the food. Some physical and behavioral issues to look out for include:
- Very damaged, missing, or clamped fins
- Cloudy or bulging eyes
- Visible injuries or ulcers on the body
- Mucus
- An emaciated or bloated body
- Faded coloration
- Twitching or trembling
- Erratic swimming or hitting objects in the tank
- Rapid respiration
- Behavior that’s out of character for the species, like a typically shy species seeming outgoing
-
2Buy your saltwater fish online for convenience and a greater selection. If you don’t have a good fish store near you, buying your fish online might be your best option. Make sure to only purchase from reputable sites. Look at their shipping specifications and check for customer reviews and verifications to ensure it’s a good site.
- One of the main drawbacks of buying online is that you can’t see the fish in-person beforehand. If possible, ask to see the fish via photo or video call to judge its condition.
-
3Set a clear container below the tank to be the “acclimation container.” Once you’ve bought your fish, it’s time to acclimatize it and transfer it to the tank! Place a clean, clear container below your tank, such as on the ground or a lower table. The container should be large enough to hold your fish comfortably.
- Acclimatizing is the process of getting your fish used to its new environment, including a new water pH and temperature.
- If you’ve bought a few fish, it’s best to add them one at a time, starting with the least aggressive.
-
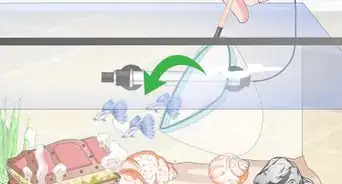
4Place airline tubing between the acclimation container and tank. Stretch a several feet of flexible airline tubing between the tank and the acclimation container. Tie 2-3 loose knots along the tubing and place the tank end 5 to 6 inches (13 to 15 cm) below the water’s surface.
- Wedge the tubing between the rim and cover to keep it in place.
- You can buy airline tubing at home improvement stores and online.
- If you have a flow-control valve or clamp to fit your tubing, you can attach it to the acclimation-container end of the tubing. If you use a valve, you don’t have to tie knots in the tubing.
-
5Pour the fish and water into the container and start the water flow. Place the tank end of your tubing into the output end of your powerhead. Tighten or loosen your knots as needed to bring the flow down, so that 2-3 drips per second are falling into the acclimation container.
- You can also adjust the flow by using your flow-control valve.
- Don’t pour extra freshwater or saltwater into the acclimation container. Pour the fish in with just its shipping water.
-
6Drape a towel over the acclimation container to keep the fish calm. The fish will probably be nervous and scared, and may even try to jump out of the container. Draping a towel or cloth over the container will lessen the stimulation and give it time to get used to its new surroundings.
-
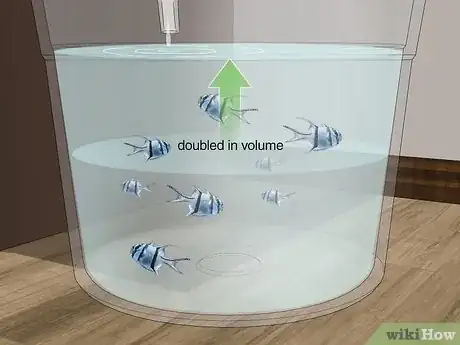
7Let the water drip until there’s twice as much water in the container. Keep an eye on the water in the acclimation container. Once it’s doubled in volume, use a clean bowl or turkey baster to remove about half of the water. Put the tubing back in place and start the dripping once more.
- Depending on how big your acclimation container is, this might take an hour or more. Be patient—proper acclimation is essential to the health of your new fish.
-
8Test the water once it’s doubled again. Once your water level is back up, use test kits to check the amount of ammonia, nitrite, nitrate, pH, specific gravity, and temperature in the acclimation container’s water. If they’re identical to the aquarium’s water parameters, it’s time to transfer your fish!
- If the acclimation container’s water parameters don’t match the aquarium’s, continue your cycle of dripping, removing water, and testing until they do.
-
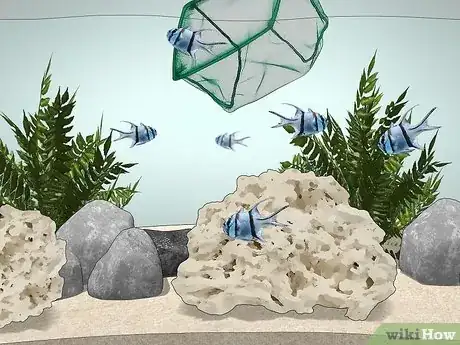
9Move the fish into the tank with a net. Carefully scoop up your fish with a clean fish net and slide it into your aquarium. You can also pour the fish into the tank with its water, especially if your aquarium water needs to be replenished after dripping through the tube.
Taking Care of Your Saltwater Aquarium
-
1Feed your fish the appropriate food several times a day. Do some research into what kinds of food you should feed your fish—some may be fine with a mix of pellets, while others might prefer fresh food from a seafood market. Try to feed them several small servings a day rather than 1-2 large feedings, as this keeps them more satisfied.
- Buy food at your pet store or at seafood markets. Make sure any non-pellet food you give your fish are from saltwater habitats, not freshwater.
- Watch your fish when they feed. They should eat quickly and finish every bite! If you see a fish not eating, talk to your veterinarian.
- Give your fish a different kind of food every few days to ensure they’re getting the right nutrients and staying satisfied.[15]
-
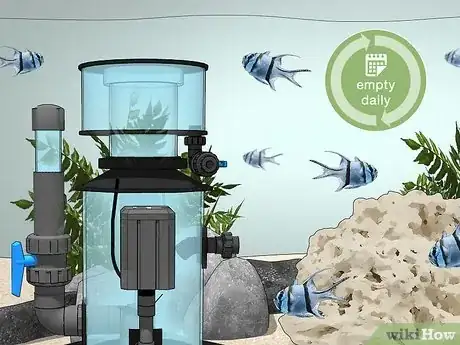
2Set up a protein skimmer and empty its collection cup every day. A protein skimmer collects dissolved organic compounds, like waste, filtering them out of the water to keep it clean and clear.[16] Set yours up according to the package instructions and empty it daily to keep it working well.
- To empty the protein skimmer, simply remove the collection cup, empty it in the sink, and rinse it clean.
- You can buy a protein skimmer wherever fish aquarium products are sold, in pet stores, and online.
- Protein skimmers can attach below the tank, on the rim, or inside the tank.
-
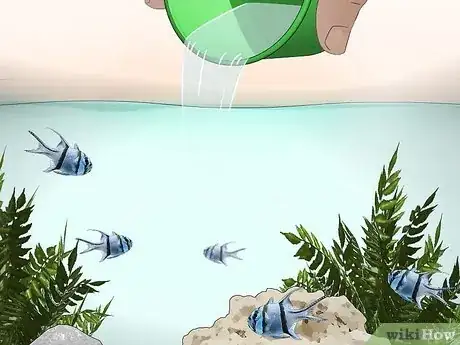
3Replenish evaporated saltwater with purified freshwater every day. Although water will eventually evaporate from your aquarium, the salt will be left behind. To return your water level to normal, simply add purified freshwater to the tank.
- Don’t add new saltwater after evaporation. This will alter the specific gravity of your system.
-
4Clean the algae off the tank every day. Use an algae magnet, brush, or scraper to clean the algae film off of your aquarium glass every day. If the algae builds up at a slower rate, you can switch to every other day, or even weekly.
-
5Test water parameters, change water, and do deeper cleaning weekly. Along with a few quick everyday tasks, there are a few things you can do on a weekly or bi-weekly basis to keep your tank clean and pleasant for your fish. These include:
- Testing the specific gravity, pH, ammonia, nitrite, nitrate, and alkalinity of the water.[17]
- Clean the salt off your aquarium cover, power cords, and the edges of the tank.
- Mix up new saltwater and change about 10% of the aquarium water.
- Clean the neck of your protein skimmer.
-
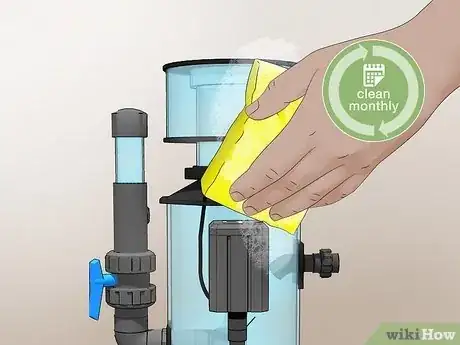
6Wash tank parts every month or two. Do a more thorough cleaning of the important features in your tank every month or so. Incorporate these tasks into your monthly routine:
- Dampen a paper towel with white vinegar to clean calcium deposits from your tank cover and light fixture cover.
- Take apart your protein skimmer and carefully clean all its parts.
- Soak your powerhead, heater, and any other submerged features in a 1:1 solution of water and white vinegar.
-
7Replace the bulbs in your lighting according to package instructions. Check the manual to your lighting system to see when it’s recommended to change your bulbs. If you have LED bulbs, you likely won’t have to change them for at least a few years.
Expert Q&A
-
QuestionDo I need to feed my fish more than one kind of food?
 Doug LudemannDoug Ludemann is the owner and operator of Fish Geeks, LLC, an aquarium services company based in Minneapolis, Minnesota. Doug has worked in the aquarium and fish-care industry for over 20 years, including having worked as a professional aquarist for the Minnesota Zoo and Shedd Aquarium in Chicago. He received his Bachelor of Science in Ecology, Evolution, and Behavior from the University of Minnesota.
Professional Aquarist It's a good idea to give your fish different types of food. Switching the type of food you give your fish every few days can help them eat a well-balanced diet.
 -
QuestionWhat are the benefits of a protein skimmer?
 Doug LudemannDoug Ludemann is the owner and operator of Fish Geeks, LLC, an aquarium services company based in Minneapolis, Minnesota. Doug has worked in the aquarium and fish-care industry for over 20 years, including having worked as a professional aquarist for the Minnesota Zoo and Shedd Aquarium in Chicago. He received his Bachelor of Science in Ecology, Evolution, and Behavior from the University of Minnesota.
Professional Aquarist A protein skimmer helps keep the water in your aquarium clean by collecting dissolved organic compounds, such as waste. The protein skimmer will filter these out, leaving the water clean.
 -
QuestionHow many fish are allowable for a 20 gallon tank and how many live corals can be put into it?
 Community AnswerSome would say two, but to be honest, you can put as many fish as you want, as long as your bio-load isn't too much for your filtration. A good rule of thumb is to have 1 pound live rock per gallon of water. Corrals are alive to and can produce waste but can also get ride of toxins.
References
- ↑ http://www.saltwateraquariumblog.com/5-saltwater-starter-fish-every-beginner-should-avoid/
- ↑ http://www.saltwateraquariumblog.com/5-saltwater-starter-fish-every-beginner-should-avoid/
- ↑ https://www.youtube.com/watch?v=TsMi0RkMym8&feature=youtu.be&t=1m3s
- ↑ Doug Ludemann. Aquarium Care Professional. Expert Interview. 27 August 2019.
- ↑ Doug Ludemann. Aquarium Care Professional. Expert Interview. 27 August 2019.
- ↑ https://www.youtube.com/watch?v=TsMi0RkMym8&feature=youtu.be&t=1m24s
- ↑ https://www.youtube.com/watch?v=TsMi0RkMym8&feature=youtu.be&t=49s
- ↑ https://www.youtube.com/watch?v=TsMi0RkMym8&feature=youtu.be&t=54s
- ↑ https://www.earthsfriends.com/saltwater-aquarium-for-beginners/
- ↑ https://www.youtube.com/watch?v=TsMi0RkMym8&feature=youtu.be&t=1m24s
- ↑ https://www.earthsfriends.com/saltwater-aquarium-for-beginners/
- ↑ https://www.youtube.com/watch?v=TsMi0RkMym8&feature=youtu.be&t=1m28s
- ↑ https://www.youtube.com/watch?v=TsMi0RkMym8&feature=youtu.be&t=1m40s
- ↑ Doug Ludemann. Aquarium Care Professional. Expert Interview. 27 August 2019.
- ↑ Doug Ludemann. Aquarium Care Professional. Expert Interview. 27 August 2019.
- ↑ Doug Ludemann. Aquarium Care Professional. Expert Interview. 27 August 2019.
- ↑ Doug Ludemann. Aquarium Care Professional. Expert Interview. 27 August 2019.
About This Article
To start a saltwater aquarium, buy a short, wide tank to allow good oxygen flow, better light penetration, and easier cleaning. When you’re ready to set up your tank, dip a clean cloth in warm water and scrub it out to remove any dust. Next, pour 2-3 inches of live sand into the tank, then add a pre-mixed saltwater solution, water conditioner, and salt mix. Once the water is ready, place your powerhead filter and heater in the tank to start circulation. Then, add cured live rock to create a bio-filtration system. To learn how to test your saltwater aquarium’s ammonia, nitrate, and nitrite levels, keep reading!


