X
wikiHow is a “wiki,” similar to Wikipedia, which means that many of our articles are co-written by multiple authors. To create this article, volunteer authors worked to edit and improve it over time.
This article has been viewed 10,128 times.
Learn more...
Smudge painting is a great way to advance your Photoshop game. You can do it with either the Smudge tool or the Mixer Brush and using tools like this, you can make your photos look so much more interesting.
Steps
Part 1
Part 1 of 4:
Prepare the Photograph
-
1Select the photograph that you want to apply the effect to. Make sure that you have a clear subject (even if you are going to remove the background). You don't want it to be too busy and confuse your viewer.
-
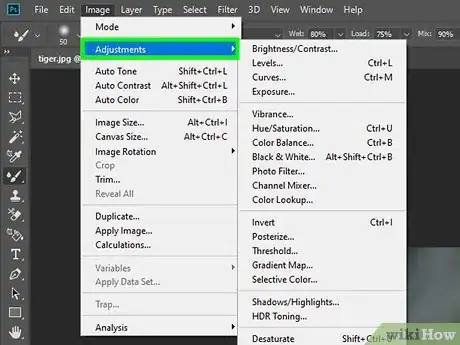
2Edit the image the way that you want to make it so that it will complement the smudging that you will do. Some things that you can do are:
- Increase the vibrance and saturation of the image using adjustment layers.
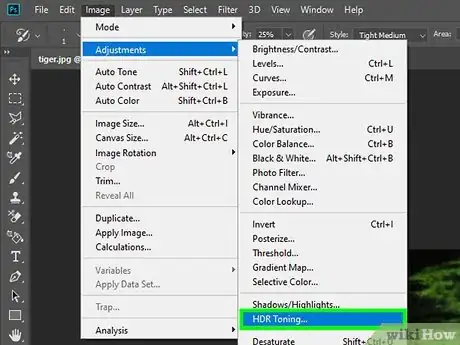
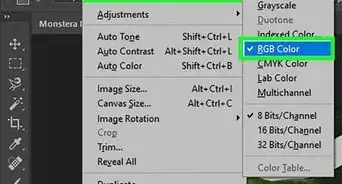
- Increase the vibrance and saturation by using the Image >> Adjustments >> HDR Toning tool.
- Check out the various filters under Filters >> Filter Gallery and see if there are any effects there that will complement your image.
- Remove your subject from the background by selecting the subject, and then you can either delete the background or move it to a separate layer, depending upon your end goal.
- Dodge and burn your image. Help the highlights and shadows in the image by using Dodge and Burn.
Advertisement
Part 2
Part 2 of 4:
Using the Smudge Tool to Paint Your Image
-
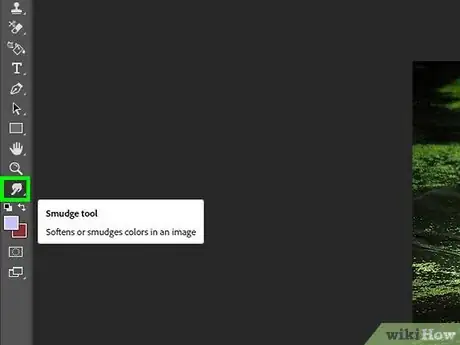
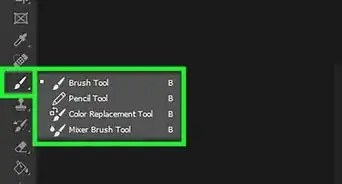
1Click on the Smudge tool icon for smudging your photo.
-
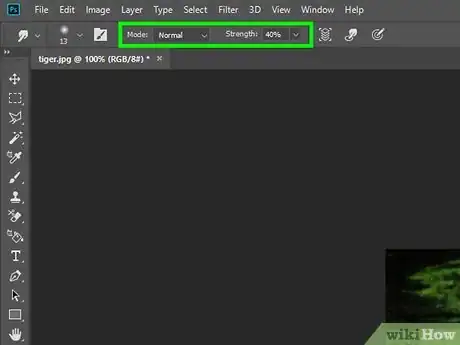
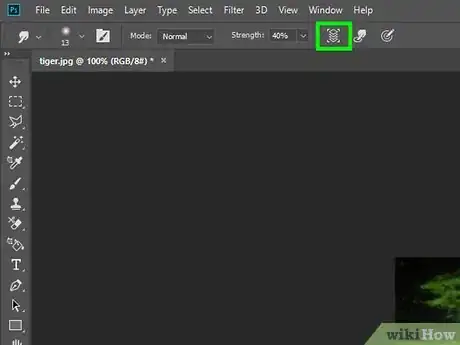
2Make sure the Blend mode is set at Normal and the Strength is at about 40%. If the Strength is set too high, you will be pushing colors a lot further than you want to.
-
3Select 'Sample All Layers' if you want to brush your changes on another layer. This is resource-intensive and will slow your computer down.
- Another option to Sample All Layers is to make your changes directly to your working layer. This is a more destructive approach, but less resource-intensive.
-
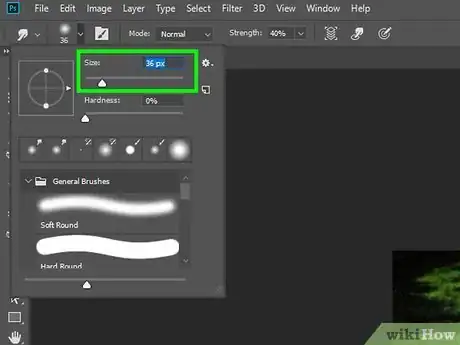
4Resize your brush. You want it to be an appropriate size for what you will be smudging. Set the hardness at about 50 until you get a feel for what works for you.
-
5Start smudging in relatively small areas. Pick an area, like the skin, and start smudging. You want to 'smudge' the various 'areas' of your image. For instance, do the forehead and move your brush in the direction that suits your image. Take into consideration wrinkles, hair, eyebrows, etc. You won't just be using the brush in one direction. Turn the direction that you are smudging as needed.
-
6Don't zoom in overly close to your photo unless you are working on something with fine details, like the eyes. This can be a problem because you usually end up having your image be too close to the original photograph.
-
7Continue doing this throughout the various parts of the image. Don't smudge areas together that can really muddy up the image. Like, don't smudge the hair into the skin or the skin into the eyes.
Advertisement
Part 3
Part 3 of 4:
Using the Mixer Brush to Paint Your Image
-
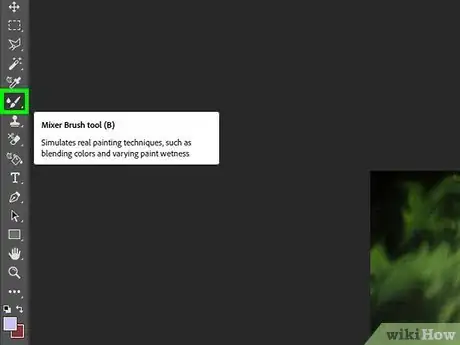
1Select the Mixer Brush tool by pressing ⇧ ShiftB until it is the current tool.
-
2Choose the right Mixer Brush for what you want to do. Unlike the Smudge tool, there are a plethora of Mixer Brushes that you can use. If you don't see them on your computer, do a search on the internet for Photoshop Mixer Brushes. Take into consideration the texture of the resulting stroke. With skin, you will want it to be more smudged with fewer strokes visible, but with hair, you will want some texture/strokes to be seen.
-
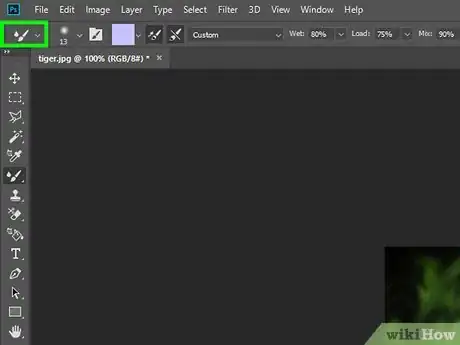
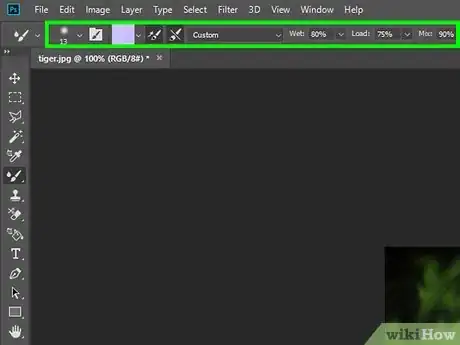
3Adjust your options for the Mixer Brush. Starting from left to right, start changing the options as needed.
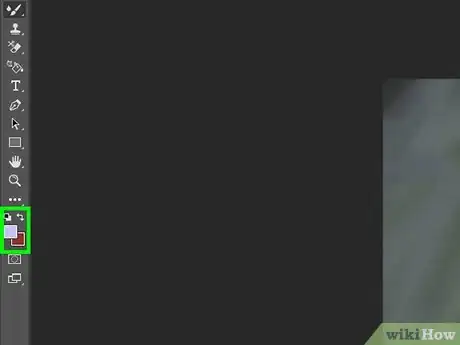
- Make sure that your brush isn't loaded. Most of the time when painting a photograph you will not want any paint loaded onto your brush.
- Be sure that your brush is 'cleaned' after each stroke. Things will get 'muddy' otherwise.
- Choose a brush preset or make your own. You can make all of your own choices or start with one of the ones that come with Photoshop. You can also start with one of their brushes and then change it in the Brush Settings. All these options do is set the other options that you see to the right.
-
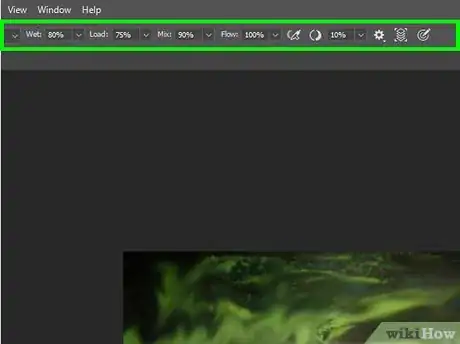
4Adjust brush settings depending on what you need.
- Wet: This is where you choose how 'wet' your canvas is. It depends upon how easily you want the paint to be moved from one place to another. At 100%, it will smear heavily. At 0%, it won't smear at all.
- Load: This applies to if you were using any particular color to load onto your brush. When painting a photograph like this, you will rarely be using paint, so don't worry about adjusting it, unless you are adding color. If, for some reason, you are adding color, start off with it set fairly low and go from there.
- Mix: This sets the color mixing ratio for each stroke. This applies more often to when you are adding color, as in Load. Most of the time, you won't be needing this. If you do use it, start fairly low and see how it works for you.
- Flow: Flow is how much of the paint is applied when you paint. How heavily it is applied. If you don't want the paint to move too far from the source, have it set lower. If you don't mind how far it moves, set it higher.
- Adjust the rest of the options as you gain more experience.
-
5Do it a piece at a time. As in smudging your photo, stick to one area at a time. Don't brush the areas into each other. Wherever you have a definite delineation, be sure to brush the stroke on that line to keep it visible.
Advertisement
Part 4
Part 4 of 4:
Finishing Your Painting
-
1Change your background. Once you have it complete, change the background of your image how you want it. You can blur it out using a different or larger brush, use a Solid Color layer to replace it, find some texture, or a background image that you like.
- For instance, you could isolate your subject, then put a solid color layer behind it with a radial gradient on top of it to help your subject stand out.
-
2Bring out the effects that you want to help your artwork stand out. Do this with Adjustment layers. You could increase the saturation or radiance, change the hue of a shirt, or something like that, or whatever you like to make it your own.
Advertisement
About This Article
Advertisement








-Step-9-Version-2.webp)


