wikiHow is a “wiki,” similar to Wikipedia, which means that many of our articles are co-written by multiple authors. To create this article, volunteer authors worked to edit and improve it over time.
This article has been viewed 34,303 times.
Learn more...
These instructions tell you how to replace a faulty plug-in type DC jack. A novice laptop repair person or someone who has a little knowledge can greatly benefit from using these instructions with some experience replacing hard drives and RAM cards. Within these instructions are steps on how to disassemble the laptop, pulling and installing the new jack, and finally re-assembling the laptop. Read the instructions once before starting to make sure you have a feel for how the repair is to be performed. While taking the laptop apart, take a lot of pictures. This repair is for the computer repair novice, someone who has little experience replacing internal laptop components.
Steps
Dis-Assembly
-
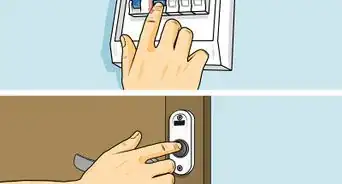
1Turn off the laptop.
- You never want to begin repairing a laptop or any electrical system while the power is still on. It could shock you and/or damage the internal components.
-
2Pull out the battery.
- It is located at the bottom of the laptop. It will have two spring loaded tabs that you pull out while taking the battery out.
Advertisement -
3Hold down the power button for 40 seconds.
- This will discharge static electricity that can damage your laptop's sensitive components.
-
4Unscrew the hard drive and RAM doors.
- Some screws will not come off, they are simply unscrewed, but remain attached to the hole that it is in, when you take the door off.
-
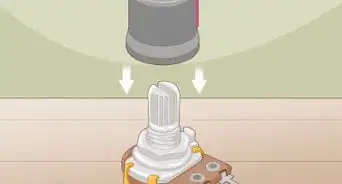
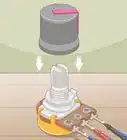
5Pull out RAM cards. Take a picture.
- The RAM card is a small rectangular circuit board, held in to a silver housing.
- Where you see the screwdrivers touching, you must push those tabs out and the RAM card will pop up.
- When pulling these out you want to push the tabs out on each side and the RAM card will pop up and you can pull it out very easily.
- You should never have to force the RAM cards out.
-
6Pull out the hard drive. Take a picture.
- Easily pulled out from its connection.
-
7
-
8
-
9
-
10Unscrew the screws from under the laptop and unscrew the small screws from the battery opening.
-
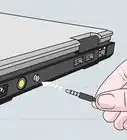
11Pull out the DVD drive.
- Unscrew its screw.
- Put a paper clip in its manual open hole and the DVD drive will be able to be pulled out.
-
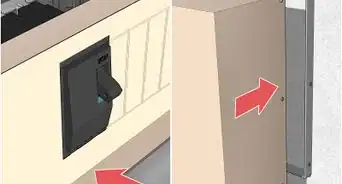
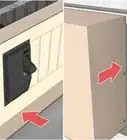
12Pull off top plate slowly. Take a picture.
- Cords from the power button and the touch pad will be attached to the motherboard. These need to be pulled off before you can pull it off entirely.
- Once those have been disconnected pull off the top plat by its edges.
- Once that is off the motherboard will be exposed.
-
13Unscrew the screws attaching the motherboard to the chassis. Take a picture.
-
14Pull the fans power cord from the motherboard. Take a picture
-
15Unscrew the fan from the motherboard.
-
16Pull off any cords connecting to the motherboard and flip it over. Take a picture, possibly more than one in order to get all of the details.
- The DC jack will look like this.
-
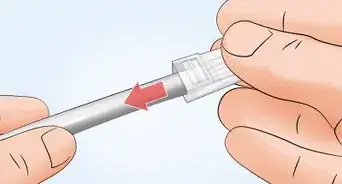
17Pull out the old DC jack from the motherboard and from the chassis (input and output). Take a picture.
-
18Insert the new DC jack to the motherboard and chassis.


Re-Assembly
-
1Place motherboard in place in the chassis that it was taken from before flipping it over.
- The motherboard will have to be played with a little in order to get it in. It will go in in the exact same way it was taken out.
- Sometimes, depending on the laptop that you have, the headphone and mic jacks, the ethernet cord port will have an opening in the chassis that you can fit in.
- During this process, try not to flex the motherboard too much.
-
2Reconnect all cords to the motherboard.
- This usually includes: touch pad, keyboard, power button, USB cords, Wired internet cords, wifi adapter. Anything that you unplugged while taking the motherboard out.
- Reference the pictures you took during dis-assembly
-
3Screw in the fan and plug in its cord.
- The fan will go in same way it came out.
-
4Re-attach the face plate.
- Be sure to plug in its cords while connecting it.
- The joints will be connecting to each other and slicking when they have been connected. That is how you know the chassis and face-plate are connected.
-
5Plug in the keyboard.
- Be sure to plug in its strip to the motherboard before laying it flat and screwing it in.
- This goes in, in the opposite of its removal. You will have to connect the strip to the locking tab.
- After you connect the strip connector to the locking tabs. Give it a very light tug to make sure it is locked in.
-
6Screw in screws to the back of the laptop.
-
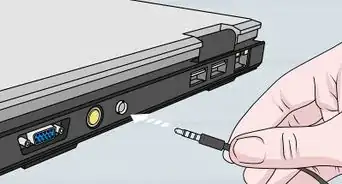
7Insert DVD drive.
- It will slide right in to the slot.
- There is a screw that holds the DVD drive to the bottom of the laptop, it will be a small screw. Screw that in now.
-
8Insert RAM cards.
- Slide Ram into its port the opposite way that it was removed and when you hear a click, its in.
-
9Insert the hard drive.
- The hard drive will slide in very easily just as it was pulled out.
-
10Cover the RAM cards and hard drive with their respective doors and screw those in.
-
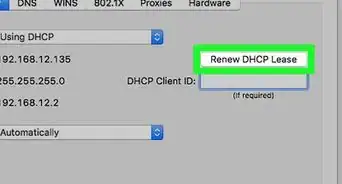
11Troubleshoot as needed:
- If you can't remove the DC jack it may not be a plug in type some must be de-soldered. Before beginning the repair search the type of DC jack within your specific laptop.
- If some screws don't go back in, you may have gotten confused with the screws. Different parts of the laptop carry different sized screws.
- Most times the laptop doesn't need half the screws in it, the screws make it stronger against drops. You can purchase the screws in most electronic and/or computer repair stores.
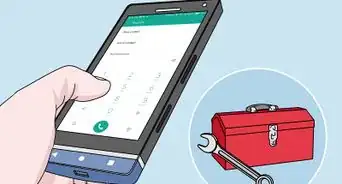
- If after the repair is complete and the laptop still does not charge or turn on, you may have had another problem. Take a look at the Related Article about diagnosing this problem. The problem could have a simple fix.
- If the keyboard is not working, you will have to remove the keyboard and make sure that the strip connector is locked in.
- If the DVD drive doesn't slide into its slot smoothly, don't try to jam it in that could damage a cord. Use the computer chip lifter to move the cords out of the way of the DVD drive.
Warnings
- Be very careful with the tabs locking the keyboard in, they can easily break. The black tabs on each side should only need a small nudge to unlock it.⧼thumbs_response⧽
- Don't apply too much torque to screws, they could strip!⧼thumbs_response⧽
- Motherboards are delicate, be careful not to knock off any integrated circuits (little black boxes) from the motherboard.⧼thumbs_response⧽
- Make sure you take pictures before you start.⧼thumbs_response⧽
Things You'll Need
- 50mm precision screwdriver
- Paper Clip
- Labels
- Egg pan
- Computer chip lifter