This article was co-authored by wikiHow staff writer, Travis Boylls. Travis Boylls is a Technology Writer and Editor for wikiHow. Travis has experience writing technology-related articles, providing software customer service, and in graphic design. He specializes in Windows, macOS, Android, iOS, and Linux platforms. He studied graphic design at Pikes Peak Community College.
This article has been viewed 77,919 times.
Learn more...
Photoshop is one of the most popular image editors. It has a variety of tools that allow you to edit and alter images. One of the more common Photoshop tasks is changing colors of an image. This wikiHow teaches you how to replace a color in an image using Photoshop.
Steps
-
1Open Photoshop. Photoshop has a blue icon with a square that says "Ps" inside. Click the Photoshop icon on your desktop, dock, Windows Start menu, or Applications folder on Mac to open Photoshop.
-
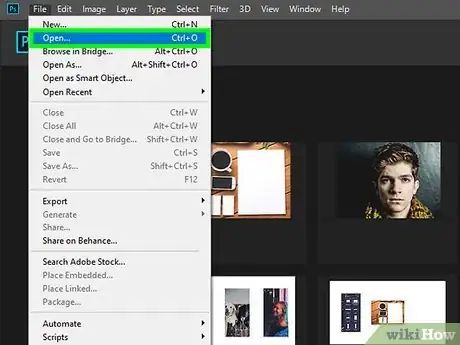
2Open a photo you want to edit. You can click Open and select an image from the title screen when you open Photoshop. Use the following steps to open a photo at any time in Photoshop:
- Click File in menu bar at the top.
- Click Open.
- Select an image you want to edit.
- Click Open
Advertisement -
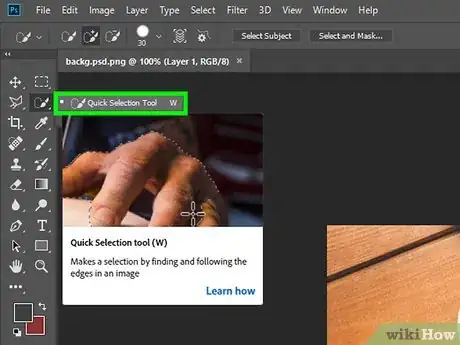
3Select the area of the image you want to change. Photoshop has several tools you can use to select parts of an image. The tools are in the toolbar to the left. Which tool you should use depends on the shape and color of the area you want to select You will see a dotted line around a selected area of an image. The tools you can use to select a color are as follows:
- The Lasso Tool has an icon that resembles a lasso in the toolbar to the left. The lasso tool allows you to make a selection by clicking a dragging to trace the area around the section of the photo you want to select. Click the lasso tool in the toolbar and then click and drag to trace around the colored area. Click the starting point to finish making your selection.
- The Polygonal Lasso Tool tool allows you to make more accurate selections by clicking points along the edge of an area to create anchor points in the outline around your selection. Each anchor point changes the direction of the outline and creates a straight line between anchor points. Click the starting point to complete the selection. The Polygonal Lasso tool is bundled together with The Lasso tool in the toolbar to the left. It has an icon that resembles a triangular lasso. Click and hold the lasso tool to display all bundled tools. Then click The Polygonal Lasso tool.
- The Magnetic Lasso Tool is similar to The Polygonal Lasso tool, except that it tries to guess the shape you are tracing and automatically places anchor points along the edge of the area you are tracing. The Magnetic Lasso tool has an icon that resembles a lasso with a magnet. It is bundled with the Lasso Tool in the toolbar to the left. Click and hold The Lasso tool to display all tools bundled with it. Then click The Magnetic Lasso tool.
- The Magic Wand Tool allows you to click to select an entire area of a similar color. The Magic Wand tool has an icon that resembles a magic wand in the toolbar to the left. Click the Magic Wand tool and then click the area you want to select. If it's not selecting enough of the area you want, increase the number next to "Tolerance" at the top of Photoshop on the left side. If it's selecting too much of the image, lower the tolerance.
- The Quick Select Tool is similar to the Magic Wand tool, except it allows you to click and drag to select multiple areas at the same time. This is useful for selecting a colored area that has different shades of the same color. The Quick Select tool has an icon that resembles a paintbrush painting an area. It is bundled with the Magic Wand tool. Click and hold the Magic Wand tool to see all bundled tools and click the Quick Select tool.
-
4Hold ⇧ Shift while using a selection tool to add to a selection. It's likely that your first pass with one of the selection tools mentioned above didn't select the area you want to change exactly. If there are parts of the image that are not selected that you want to edit, hold "Shift" while using a selection tool to add to your selection.
-
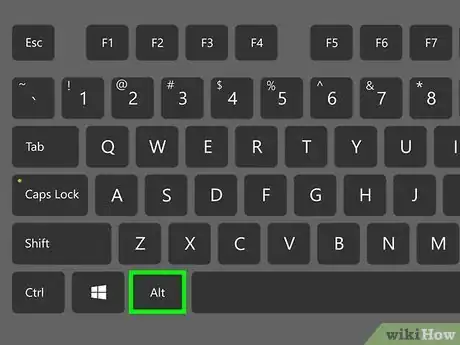
5Hold Alt or ⌥ Option on Mac to remove parts of a selection. If you accidentally select too much of the image, you can remove the excess parts of your selection by holding "Alt" or "Option" while using the selection tools.
-
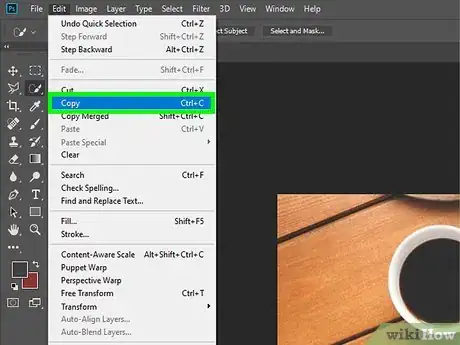
6Copy and Paste your selection as a new layer. Once you are satisfied that your selection has everything you want to change, and nothing you don't want to change, use the following steps to copy the selection and paste it as a new layer:
- Click Edit in the menu bar at the top.
- Click Copy.
- Click Edit.
- Click Paste.
-
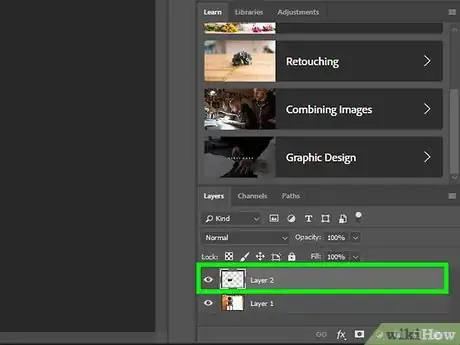
7Click the new layer in the Layers panel. The Layers panel is generally found on the right side. You should see the new layer above the original "Background" layer in the layers panel.
- If you do not see the Layers panel, click Window in the menu bar at the top. Then click Layers.
-
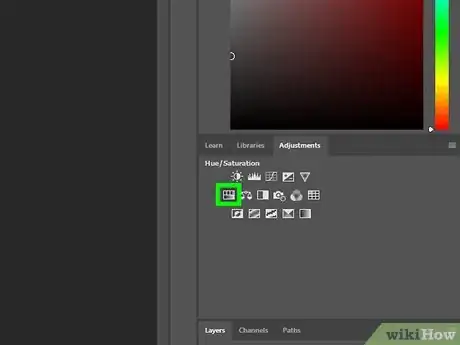
8Add a "Hue/Saturation" adjustment layer. The "Hue/Saturation" has an icon that resembles three bars with different black-and-white gradients. Click the Hue/Saturation adjustment in the Adjustments panel to add a new Hue/Saturation adjustment layer. The Hue/Adjustment layer should be directly above the layer containing the color selection you want to change.
- If you don't see the Adjustments panel, click Window in the menubar at the top and click Adjustments in the drop-down menu.
-
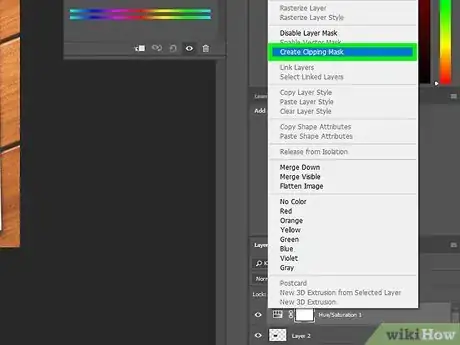
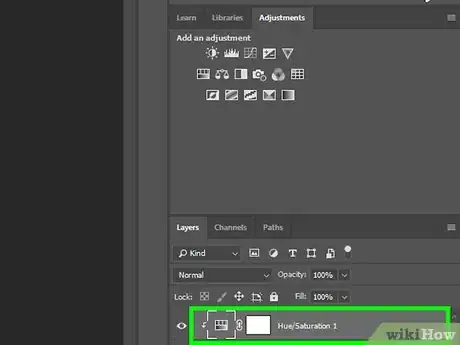
9Right-click the Hue/Saturation layer and click Create Clipping Mask. It should be directly above the layer containing the selection you want to change in the Layers panel. Right-click the Hue/Saturation layer to display a pop-out menu with the option to create a clipping mask. The Hue/Saturation layer should then have an arrow pointing directly to the layer below it. This indicates that the adjustment layer will only make adjustments to the layer below it and not the entire image.
-
10Click the Hue/Saturation layer. This displays control options in the Adjustments panel.
-
11
-
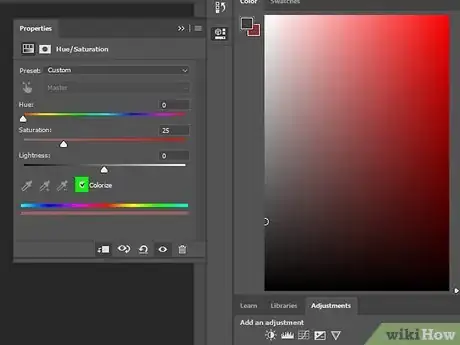
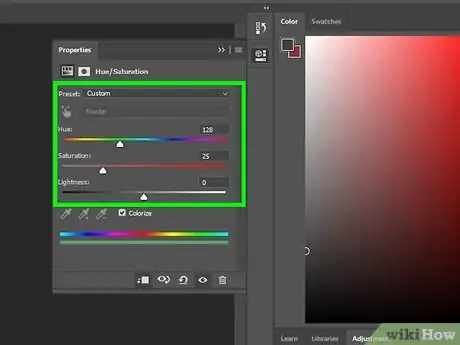
12Click and drag the slider bars to change the color. The Hue/Saturation adjustment has 3 slider bars in the Adjustment panel. The slider bar options are as follows:
- Hue: Use this slider bar to change the color of the layer below the Hue/Saturation adjustment.
- Saturation: Use this slider bar to alter the color intensity. Drag the bar all the way left to make the color brighter. Drag the bar all the way left to make the color grey.
- Lightness: Use the slider bar to adjust the amount of white and black that is in the color. Drag the slider bar all the way to the left to make the color pure black. Drag the slider bar all the way to the right to make the color pure white.
-
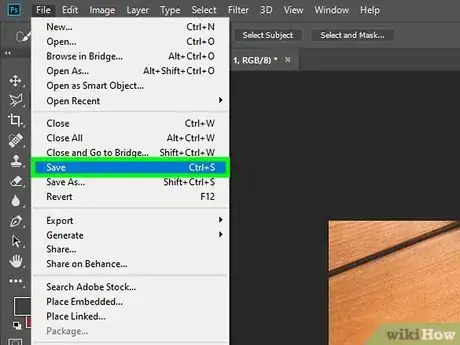
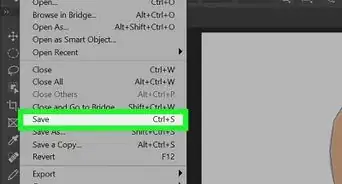
13Save your image. When you are happy with the way the image looks, go ahead and use the following steps to save the image:
- Click File.
- Click Save As.
- Enter a name for the image next to "Filename".
- Select JPEG, or PNG in the "File Format" drop-down menu.
- Click Save.
About This Article
1. Open an image you want to edit in Photoshop.
2. Use one of the Lasso Tools, Magic Wand, or Quick Select tool to select the area you want to change.
3. Copy and paste the selection you want to change as a new layer.
4. Add a "Hue/Saturation" adjustment layer above the layer with the area you want to change.
5. Right-click the "Hue/Saturation" layer and click Create Clipping Mask.
6. Check "Colorize" in the Hue/Saturation adjustment panel.
7. Use the slider bars in the Hue/Saturation adjustment panel to change the color.
8. Save the image when you are finished.

