This article was medically reviewed by Jonas DeMuro, MD. Dr. DeMuro is a board certified Pediatric Critical Care Surgeon in New York. He received his MD from Stony Brook University School of Medicine in 1996. He completed his fellowship in Surgical Critical Care at North Shore-Long Island Jewish Health System and was a previous American College of Surgeons (ACS) Fellow.
There are 12 references cited in this article, which can be found at the bottom of the page.
This article has been viewed 22,386 times.
Fishing is a fun and relaxing pastime. Unfortunately, hooks and lines can sometimes go astray. Fishhook injuries can make you squeamish but are fairly easy to treat and superficial, meaning they don’t go very deep. So long as the injury is not deep or in the eye, it’s usually safe to remove a hook on your own using care, good sense, and one or more special techniques.
Steps
Deciding on Treatment
-
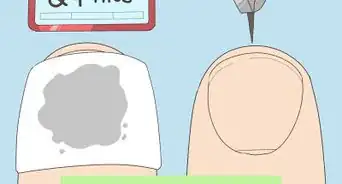
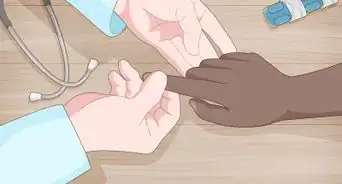
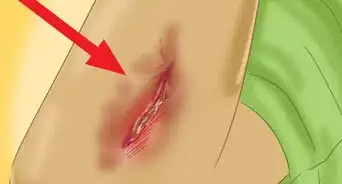
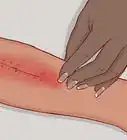
1Assess the wound. First, take a good look the wound and its location. Most fishhook injuries are soft-tissue injuries in the arms, head, or hands. These are fairly simple to treat when they are near the surface of the skin and don’t involve a complex hook or body part like the eye or eyelid.[1]
- Where did the hook strike you? Your arm? Your hand? Your face? The location of the injury is important in deciding how to treat it.
- Also check whether the wound is shallow or deep. Usually, it is possible to remove a hook that is embedded in your skin or just below the skin.
-
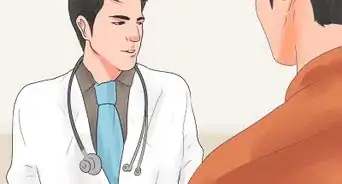
2Don’t try to remove deep snags on your own. It’s generally safe to remove a superficially embedded un-barbed or simple hook on your own. However, deeper wounds will need proper medical care at a hospital or emergency care center.[2]
- See a doctor or health care professional for fishhook injuries that are deep — i.e. in a joint, tendon, or muscle.
- Don’t try to extract multi-barbed or treble hooks on your own, either. These are hooks with extra barbs on the shank or three, separate hooks. Trying to remove them may cause extensive tissue damage. Seek medical help, instead.
Advertisement -
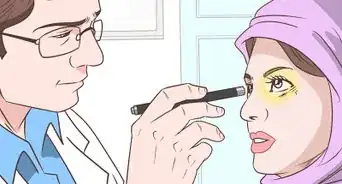
3Don’t remove a hook near your eye. Getting a fishhook in or near the eye can cause blindness and is a very serious injury. Do not try to remove the hook on your own. Instead, take proper precautions, such as not moving the hook, and try to get immediate medical attention.[3]
- Leave the hook be. Touch it as little as you can and do not put pressure on the eye.
- Protect the eye and hook with a cup to keep them from moving. A plastic cup, coffee mug, or any hard and clean concave object can work. Place the cup over your injured eye and hold it in place against your face.
- Cover up the healthy eye, too, as the damaged eye will move along with it.
-
4Use common sense. Apart from the above, use common sense to decide if you should get medical help for your fishhook injury. Check your symptoms and, if in doubt, contact a doctor for advice.[4]
- Seek medical help if you are bleeding severely, can’t stop bleeding, or if the wound is big enough to need stitches.
- Consult a doctor if you feel tingling, numbness, or decreased mobility in the wound area. These are indications of deep tissue damage.
- Seek help if the wound becomes red, swollen, or pus-filled, as these are signs of infection.


Using the Retrograde Method
-
1Wash your hands before self-treatment. If you’re removing the hook on your own, you need above all to keep the wound sterile and prevent infection. Before treating yourself, no matter what method, wash your hands with soap and water or a disinfecting solution. Wash the area around the wound, too, if you can.[5]
-
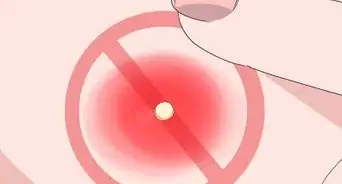
2Apply downward pressure. The retrograde technique is the easiest but least successful way to remove a fishhook. It works best with un-barbed or superficially embedded simple hooks, i.e. with a single barb at the end. Since the hook is near the skin’s surface, you won’t normally need an anesthetic for this procedure.[8]
- With one hand, apply downward force to the shank of the hook, i.e. the mid-point of the curve. This should disengage the hook’s barb so that you can draw it backwards through the skin.
- The force should be gentle. Your aim is to rotate the hook back only slightly.
-
3Pull the hook backward. Once the barb is disengaged, slowly try to pull the hook backward through the skin along the path of entry. Ideally, it should slip out.[9]
- Do not continue to pull if you feel resistance. Stop and consider another method.
- Pulling against resistance can tear or otherwise damage the skin and tissue.
-
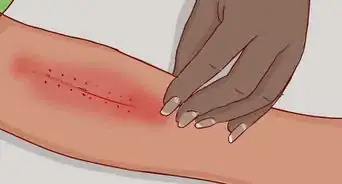
4Dress and treat the wound afterward. After you’ve removed the hook, always treat the area as you would any other puncture wound. This includes cleaning, dressing with antibiotics and bandages, and covering the wound.[10] [11]
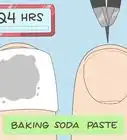
- First, stop the bleeding. Then rinse the wound with clean water. If any dirt or debris remains, try to gently remove it with alcohol-sterilized tweezers. A little bit of hydrogen peroxide can also help to remove small amounts of debris with the foaming action
- Apply antibiotic ointment to the wound, like Neosporin, and cover it with a loose-fitting bandage. The bandage will ensure the wound stays clean and free from bacteria.
- Change the bandage once a day or whenever it gets wet or dirty.
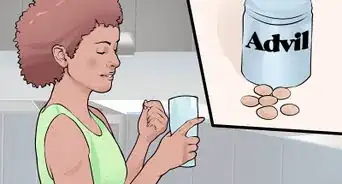
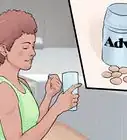
- Puncture wounds can cause a tetanus infection. For fishhook injuries, always call your doctor to make sure your tetanus inoculation is current. If not, you’ll need to get a booster shot within 48 hours.


Using the String-Yank Technique
-
1Tie a string to the hook. The string-yank is a modification of the retrograde technique and is usually more successful. It also doesn’t normally require the use of a local anesthetic. The first thing that you’ll need to do is find some strong string, twine, or line.[12]
- Use some fishing line or silk string, for instance. Regular dental floss can work as well.
- Tie or loop the line around the shank of the hook and then secure the other end to one of your fingers. There should be at least one foot of line.
- Wear eye protection like goggles if at all possible for this method, as the string-yank can cause the hook to fly free. You do not want a flying hook in the eye.
-
2Apply downward pressure to the hook. As in the retrograde method, put light force on the back of the hook to disengage the barb. Gently press down on the shank with your index finger, or any free finger.[13]
- Remove your finger from the hook once you think that the barb is free.
-
3Pull on the string. This next step may hurt a bit. The “yank” of the sting-yank method aims to disengage the fishhook from your skin by applying a modest amount of physical force. Pull in the slack on the line and then, with one strong tug, try to pull the hook free from your skin.[14]
- Yank back at an angle of 30 degrees or so.
- Don’t hesitate. Give it a good jerk and, with luck, the hook should exit along the path of entry.


Trying the Advance and Cut Method
-
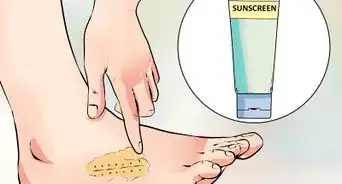
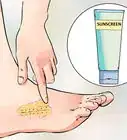
1Prepare the site. The advance and cut method is more aggressive than the previous two and may involve higher levels of pain. For your comfort, and if available, apply a topical anesthetic to the wound site to dull any potential pain.[15]
- Look for a topical gel, ointment, or cream. In the US, some brand names include Xylocaine, Lidoderm, Sting Kill, and Polar Frost.
- As always, make sure that the wound area is clean and dry before application. Read and follow the anesthetic’s instructions for use and recommended dosages.
-
2Grab hold of the hook. The advance and cut method is nearly always successful. However, its main drawback is that it damages the tissue more than the retrograde and string-yank techniques. The hook should only be advanced if the point of the hook is already near the skin surface; otherwise additional damage to deeper structures can occur. [16]
- Use a needle holder, hemostat, or needle-nose pliers to grasp the hook.
-
3Advance the hook and remove the barb. Rather than just pulling out the hook along the path of entry, this method requires you first to push it forward through the tissue and out of the skin, then to remove the barb.[17]
- Wear goggles or some form of eye protection, as the barb is small and can fly when cut.
- Push the hook forward until the barb emerges.
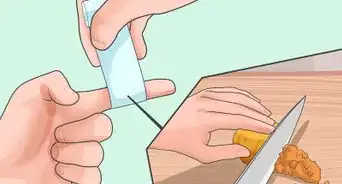
- Next, take pliers, wire-cutters, or another cutting tool and clip off the barb from the fishhook.
- Be sure to re-stabilize the hook before you cut it.
-
4Pull the barbless hook backward. With no barb, the fishhook will not tear or rip tissue as you remove it. You can now draw it out safely, as in the first two techniques.[18]
- Slowly pull on the hook and guide it backward along the original path of entry and where you pushed it forward through the skin.
-
5Cut off the eye of the hook, alternately. There is a variant of the method that involves cutting off the hook’s eye rather than the barb. In this case, clip the eye after you have advanced the hook through the skin.[19]
- Then, continue to push the hook forward and draw it out, rather than pushing it backward through the original entry wound.
- Make sure you disinfect the part of the hook that will be pushed through the skin. Use rubbing alcohol to sterilize and allow it to dry before proceeding.


Warnings
- If you help someone or someone helps you with removing the fishhook, gloves should be worn so that no bloodborne diseases are transmitted.⧼thumbs_response⧽


References
- ↑ http://www.aafp.org/afp/2001/0601/p2231.html
- ↑ https://www.nlm.nih.gov/medlineplus/ency/article/000055.htm
- ↑ https://myhealth.alberta.ca/Health/Pages/conditions.aspx?hwid=aa113094&
- ↑ http://www.webmd.com/first-aid/tc/fishhook-injuries-topic-overview
- ↑ https://www.nlm.nih.gov/medlineplus/ency/article/000055.htm
- ↑ http://www.mayoclinic.org/healthy-lifestyle/adult-health/in-depth/hand-washing/art-20046253
- ↑ http://www.cdc.gov/features/handwashing/
- ↑ http://www.aafp.org/afp/2001/0601/p2231.html
- ↑ https://www.aafp.org/afp/2001/0601/p2231.html#sec-3
- ↑ http://www.mayoclinic.org/first-aid/first-aid-puncture-wounds/basics/art-20056665
- ↑ http://www.aafp.org/afp/2001/0601/p2231.html
- ↑ https://www.uofmhealth.org/health-library/aa132242#aa132242-sec
- ↑ https://www.uofmhealth.org/health-library/aa132242#aa132242-sec
- ↑ https://www.uofmhealth.org/health-library/aa132242#aa132242-sec
- ↑ https://myhealth.alberta.ca/Health/Pages/conditions.aspx?hwid=aa154408&lang=en-ca#aa154408-sec
- ↑ https://myhealth.alberta.ca/Health/Pages/conditions.aspx?hwid=aa154408&lang=en-ca#aa154408-sec
- ↑ https://myhealth.alberta.ca/Health/Pages/conditions.aspx?hwid=aa154408&lang=en-ca#aa154408-sec
- ↑ https://myhealth.alberta.ca/Health/Pages/conditions.aspx?hwid=aa154408&lang=en-ca#aa154408-sec
- ↑ https://www.aafp.org/afp/2001/0601/p2231.html#sec-6


Medical Disclaimer
The content of this article is not intended to be a substitute for professional medical advice, examination, diagnosis, or treatment. You should always contact your doctor or other qualified healthcare professional before starting, changing, or stopping any kind of health treatment.
Read More...