This article was co-authored by wikiHow staff writer, Jack Lloyd. Jack Lloyd is a Technology Writer and Editor for wikiHow. He has over two years of experience writing and editing technology-related articles. He is technology enthusiast and an English teacher.
The wikiHow Tech Team also followed the article's instructions and verified that they work.
This article has been viewed 420,748 times.
Learn more...
This wikiHow teaches you how to remove information about yourself from the WhitePages website. You can remove free information, such as your name and address, by using the free WhitePages opt-out page. If you want to remove Premium information such as background checks and legal history, you'll have to submit a deletion request; doing so requires you to have a Premium account.
Steps
Removing Free Information
-
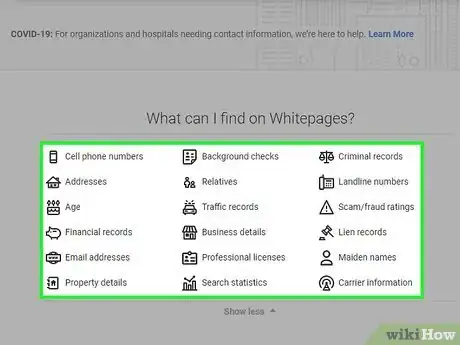
1Understand which information is free. Information such as your name, address, phone number, and age are all free to view (and free to remove). Removing this information from WhitePages will prevent anyone from seeing it.[1]
- If you want to remove information such as your legal history or your foreclosure records, you'll need to use the Premium method instead.
-
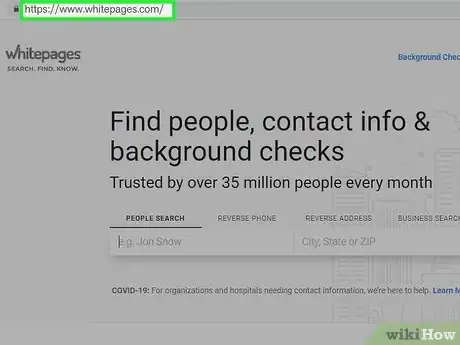
2Open WhitePages. Go to https://www.whitepages.com/ in your computer's web browser.Advertisement
-
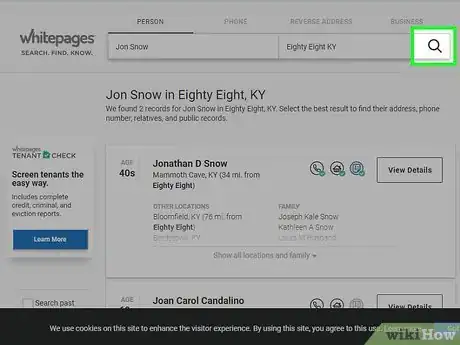
3Enter your name and ZIP code. Type your full, legal name into the left text box at the top of the page, then enter your city's ZIP code in the right text box.
- Alternatively, you can enter your city and state.
-
4
-
5Click View Details. It's a white button to the right of your name. This will open the WhitePages listing.
- If you don't see the correct listing, try removing your middle name (if applicable) and/or changing the city or ZIP code that you used to an older address.
-
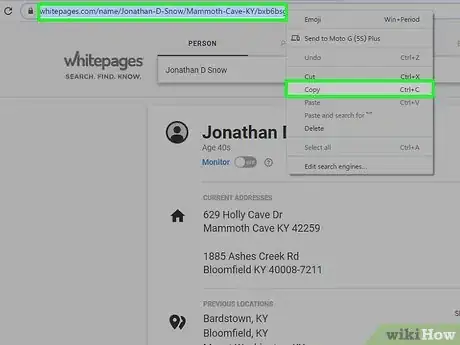
6Copy your listing's address. Click the URL bar at the top of the browser window to select what's written there, then press Ctrl+C (Windows) or ⌘ Command+C (Mac).
- If clicking the URL bar doesn't select the URL, you can instead click and drag your mouse from right to left across the URL.
- Your WhitePages listing's URL should resemble the following: https://www.whitepages.com/name/Your-Name/Your-City/
-
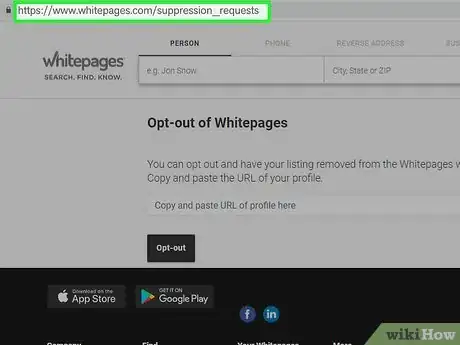
7Open the opt-out form. Go to https://www.whitepages.com/suppression_requests in your computer's web browser, making sure not to copy and paste the link since you already have your listing's URL copied.
-
8Paste in your copied URL. Click the "Copy and paste URL of profile here" text box in the middle of the page, then press Ctrl+V (Windows) or ⌘ Command+V (Mac). You should see your copied URL appear in the text box.
-
9Click Opt-out. It's a black button below the text box.
-
10Click Remove me. This button is below your name on the confirmation page.
-
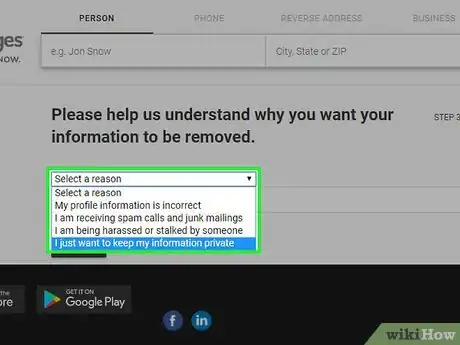
11Select a reason for wanting your listing removed. Click the "Select a reason" drop-down box near the top of the page, then click a reason (e.g., I just want to keep my information private) in the drop-down menu.
-
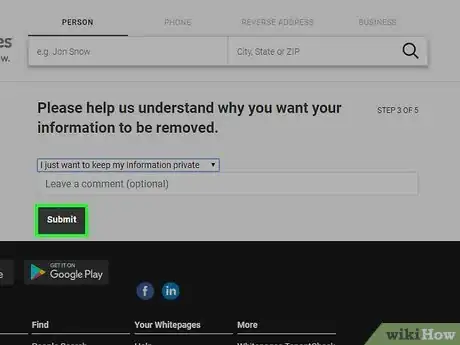
12Click Submit. It's a black button below the "Leave a comment (optional)" text box.
-
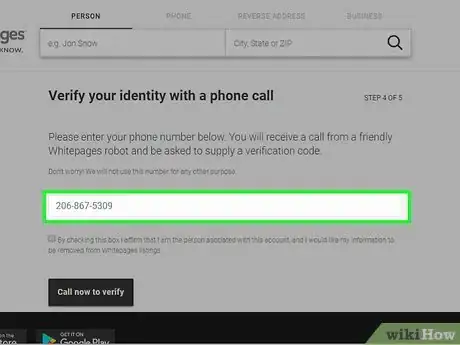
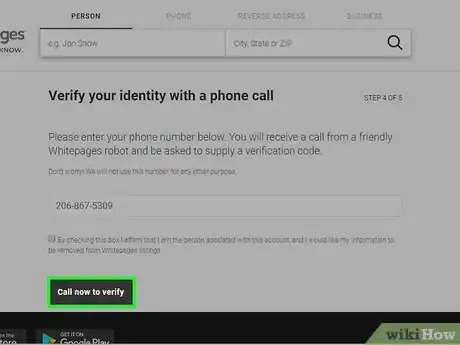
13Enter your phone number. Type your phone number into the text box in the middle of the page.
- WhitePages won't use your phone number for anything other than verifying that you want to remove your listing.
- If you don't want to use your real phone number, try using Google Voice instead.
-
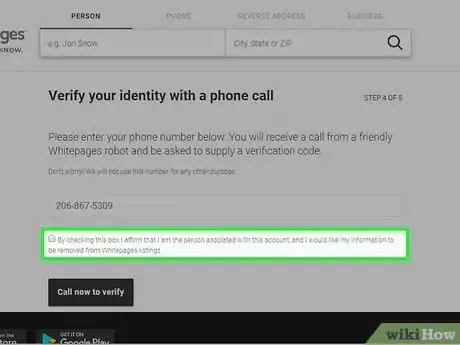
14Check the "By checking this box…" box. This box is below your phone number.
-
15Click Call now to verify. It's a black button near the bottom of the page. This will take you to the verification code page; your phone should begin ringing shortly.
-
16Confirm your WhitePages' listing removal. On the verification code page, you should see a four-digit code. You'll need this code to complete the following process:
- Answer your phone when it begins ringing.
- Listen to the WhitePages automated voice.
- When prompted, enter the four-digit code displayed on the verification code page.
- Wait until the WhitePages call disconnects.
-
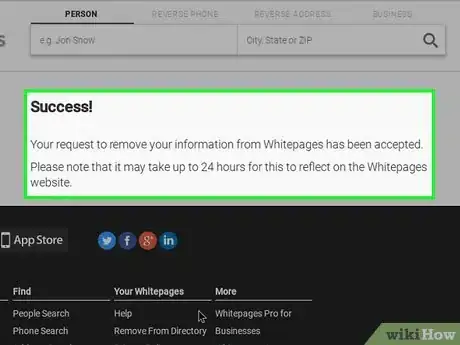
17Check WhitePages in 48 hours. While most of your free information should be removed immediately, you may not see all of it removed until 24 to 48 hours after submitting your request.
- Unfortunately, search engines like Google and Bing may still show snippets of your information for up to two weeks after deleting your WhitePages listing.
Removing Premium Information
-
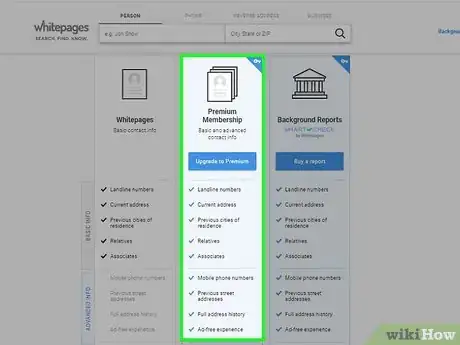
1Understand which information is Premium. While free information includes your name and address, Premium information entails things like background checks, legal records, and foreclosure/bankruptcy incidents.
- You must be a WhitePages Premium member, which costs at least $4.99 per month, to view and remove Premium information about yourself.
-
2Open WhitePages. Go to https://www.whitepages.com/ in your computer's web browser. This will open the WhitePages home page.
- If you aren't logged into your Premium account, click Log in in the top-right corner of the page, enter your email address and password, and click Sign In before proceeding.
- If you aren't a WhitePages Premium member, click Sign up in the top-right corner of the page, click SELECT PLAN below the $4.99/mo membership, and follow the on-screen instructions to create your account.
- You can cancel after your information has been removed to avoid paying more than $4.99.
-
3Enter your name and ZIP code. Type your full, legal name into the left text box at the top of the page, then enter your city's ZIP code in the right text box.
- Alternatively, you can enter your city and state.
-
4
-
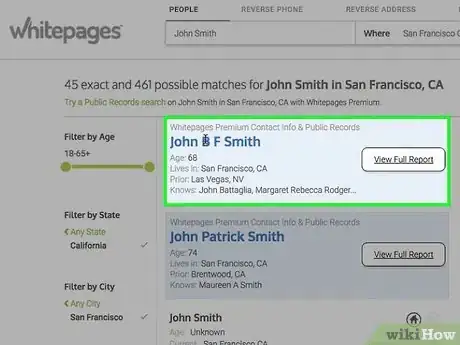
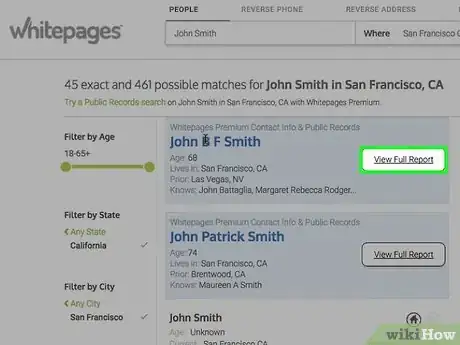
5Find your premium information. Your Premium information should appear inside of a light-blue box, and you should see a blue VIEW FULL REPORT button to the right of your name.
- If you don't see this information, click Show More Premium Results near the top of the page to see if your information isn't being displayed.
- You can also try removing your middle name (if applicable) and/or changing the city or ZIP code that you used to an older address if you don't see your information here.
-
6Copy the address for the Premium report. Right-click the blue VIEW FULL REPORT button, then click Copy Link Address (or Copy link location on Firefox) in the resulting drop-down menu.
- If you're using a Mac, hold down the Ctrl key while clicking the link to prompt the drop-down menu to appear.
- If your mouse doesn't have a right-click button, click the right side of the mouse, or use two fingers to click the mouse.
- If your computer uses a trackpad instead of a mouse, use two fingers to tap the trackpad or press the bottom-right side of the trackpad.
-
7Open the Support Request page. Go to https://support.whitepages.com/hc/en-us/requests/new in your computer's web browser.
-
8Select a request. Click the "Please choose your issue below" drop-down box, then click I need to edit or remove a listing in the resulting drop-down menu.
-
9Fill out the form. To complete your removal request, do the following:
- Enter your Premium account's email address in the "Your email address" text box.
- Enter a subject (e.g., Listing Removal) in the "Subject" text box.
- Enter a brief explanation of why you want your listing removed in the "Description" text box.
- Paste the copied URL into the "Listing URL" text box by right-clicking (or Ctrl-clicking) the text box and clicking Paste.
-
10Click Submit. This blue button is at the bottom of the form. Doing so will submit your request to WhitePages. You should see a confirmation page, and you will also receive a confirmation email.[2]
-
11Check WhitePages in 48 hours. While most of your information should be removed immediately, you may not see all of it removed until 24 to 48 hours after submitting your request.
- Unfortunately, search engines like Google and Bing may still show snippets of your information for up to two weeks after deleting your WhitePages listing.
Community Q&A
-
QuestionDoes removing myself from WhitePages listing remove me from WhitePages premium as well?
 Community AnswerNo. Once you remove yourself from WhitePages basic site, your listing is advertised on the Premium site. It will NEVER give you the URL you need to remove your information. Additionally, they require you to jump through multiple hoops filling out a manual form and giving them even more information to verify (or rather collect more data). But again you need the URL to remove anything. It's a vicious cycle. Contact your state legislators to initiate congressional intervention. It truly is the only way to stop this kind of unauthorized data linking and collection.
 -
QuestionIt appears I have to join to remove my name. Is there something I can do besides join?
 Community AnswerApparently not, I have been trying to remove myself without joining because the purpose is to not have my information out there. Unfortunately, they get you coming and going.
 -
QuestionCan I do this on my mobile phone?
 Community AnswerYes, you can.
Warnings
- Attempting to take legal action against WhitePages is usually futile; WhitePages obtains all of their information by accumulating freely (and legally) available information from various sources online, not by hacking you.⧼thumbs_response⧽
References
About This Article
1. Search for yourself on Whitepages.com.
2. View Details on your entry.
3. Copy the URL in the address bar.
4. Go to https://www.whitepages.com/suppression_requests.
5. Paste the copied URL.
6. Click Opt-out.
7. Follow the on-screen instructions.
