This article was co-authored by Jeff Baldwin. Jeff Baldwin is a Residential Painter and the Owner of Baldwin Custom Painting. With two decades of painting experience, Jeff specializes in high-end residential and small commercial painting projects. Dedicated to quality craftsmanship, Jeff and Baldwin Custom Painting provide bonded/insured, licensed, and lead-safe certified services in residential painting, light commercial painting, and wood refinishing.
There are 8 references cited in this article, which can be found at the bottom of the page.
This article has been viewed 146,274 times.
After years of use and storage, the paint on fiberglass canoes starts to look chalky and faded. Luckily, you can bring your fiberglass canoe back to life relatively easily with a new paint job! First, clean and sand the canoe to prepare it for painting. Make sure to repair any major cracks or gouges with a gelcoat repair kit as well. Then, apply 2 fresh coats of marine paint using a paintbrush and a small paint roller. Your canoe will be looking like new and ready for the water again in just a few days!
Steps
Cleaning the Canoe
-
1Check the forecast and pick 3 days of clear, dry weather to paint your canoe. You’ll be working outdoors for this job and you’ll have to let the canoe dry overnight a couple of times. Make sure you start working on a clear, dry day when there are at least 2 more rain-free days coming up.
- You can move the canoe inside a garage or other covered storage space overnight if you want, but you’ll still have to let the canoe dry for several hours after each coat of paint before you can pick it up to move it.
-
2Put the canoe upside down on a pair of sawhorses outside. Pick an outside area with plenty of room to work, such as a clear yard or driveway. Set up 2 sawhorses and flip the canoe upside down on top of them to expose the entire hull for painting.[1]
- You need to work somewhere outside since you will be using water to clean the canoe as well as making a mess when you sand it. It’s also best to work outside for the ventilation because you’ll be working with chemicals as well.
Tip: Place the sawhorses inside the widest part of the canoe. This will ensure it is as stable as possible, so it won’t get knocked off during power washing, sanding, or painting.
Advertisement -
3Spray the entire canoe down using a power washer. Set up your power washer near the canoe and connect it to a hose. Turn it on and spray down the entire canoe with plain water to remove any dirt and grime.[2]
- If you don’t have a power washer, you can rent one at many home improvement centers or hardware stores.
- Make sure to wear eye protection and closed-toe shoes while operating a power washer. If you are using a gas-powered pressure washer, wear earplugs as well since they are louder than electric power washers.
-
4Let the canoe air dry completely before proceeding. Wait for all the water from power washing to evaporate. Run your hands over the hull of the canoe when it looks dry to make sure.[3]
- You can wipe down the hull with a towel and then let it air dry for a shorter time if you want to speed up the process.
Repairing and Sanding the Canoe
-
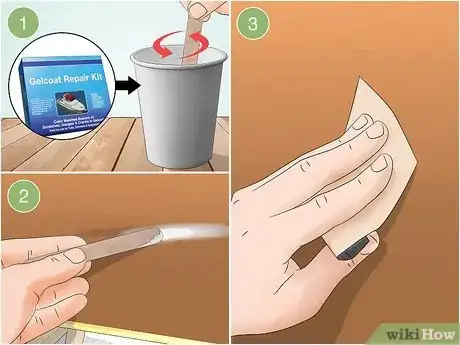
1Repair any deep gouges with a gelcoat repair kit. Examine the hull for any deep cracks or gouges. Mix together a 2-part gelcoat repair kit according to the manufacturer’s instructions and press the gelcoat into the cracks using the mixing stick. Let the gelcoat cure for 8 hours before proceeding with sanding.[4]
- If there are any minor scratches, you don’t need to worry about repairing them. They will disappear as you sand and paint the canoe.
Tip: You could also use a fiberglass repair kit or epoxy repair kit. These types of repair kits all achieve the same end result.
-
2Scrape off any stickers using a utility knife. Use the edge of a utility knife to pry up the edges of any stickers or decals to loosen them. Peel them off in sections as you go until you get them completely off.[5]
- If there is any sticker residue left after you remove the stickers themselves, you can rub it off with acetone.
-
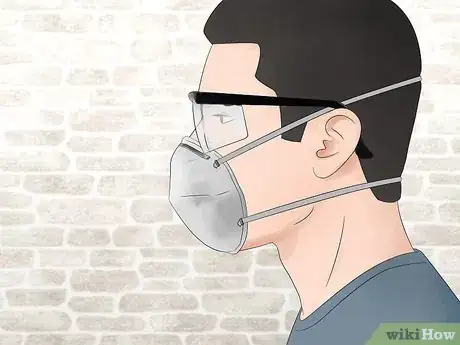
3Put on protective eyewear and a dust mask. Always wear a dust mask and eye protection when you are sanding fiberglass. The particles can be very harmful to your lungs or eyes.
- Work gloves are optional if you want to protect your hands against any slips.
-
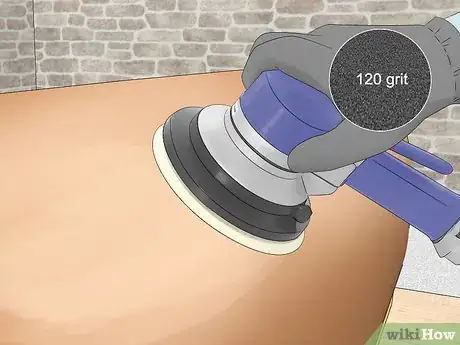
4Use an orbital electric sander and 120-grit sandpaper to rough up the old paint. Fit an orbital sander with a 120-grit sanding disk. Turn on the sander and pass it along the entire hull of the canoe, working lengthways, until you have roughed up the entire old coat of paint.[6]
- You don’t have to worry about removing all the old paint. The goal is to just give the hull and even, rough coat that the new paint will stick to.
-
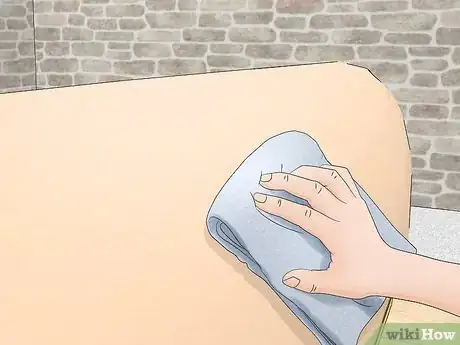
5Wipe down the canoe with a tack cloth to remove all the dust. Use a clean tack cloth to wipe all the dust from sanding off the hull of the canoe. Make sure it is totally clean before you proceed to paint it.[7]
- A tack cloth is a special kind of cloth used for wiping up dust from surfaces before painting. The sticky, or tacky, surface picks up loose particles of dust much better than any other kind of cloth.
Applying Paint to the Canoe
-
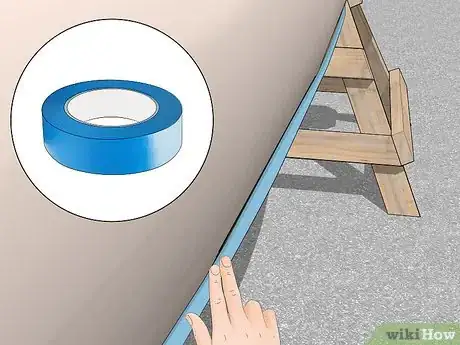
1Tape off all non-fiberglass parts on the canoe with masking tape. Cover up any metal or wood pieces along the hull, such as gunwales and end caps, with masking tape. This will protect them while you paint so you don’t have to worry about getting any paint on them by accident.[8]
- Gunwales are the rims along the top side of the hull and end caps are coverings at the front or back of the canoe where the gunwales meet.
-
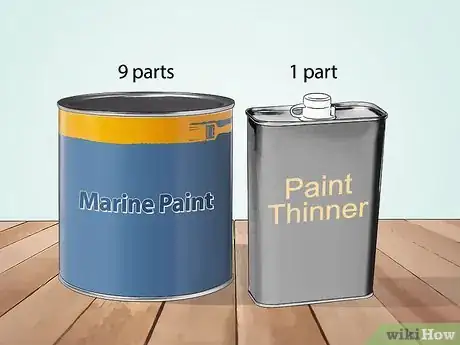
2Mix up to 1 part paint thinner with 9 parts marine paint. This will thin the paint to help it coat the fiberglass better. Use a paint mixing stick to stir the paint thinner and marine paint thoroughly together in a can or paint tray so the mixture is no more than 10% thinner and at least 90% paint.[9]
- It’s OK to use less thinner, but any more than 10% will make the paint too liquidy.
- Marine paint is a type of oil-based paint made specifically for boats. It creates a durable surface that endures prolonged contact with water and is easy to clean. You can buy it at a marine supply shop, paint store, home improvement center, or online.
-
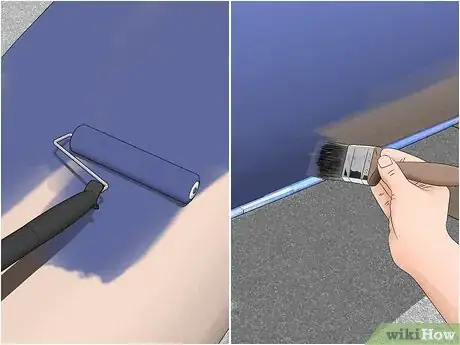
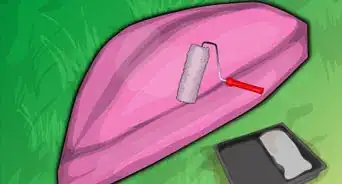
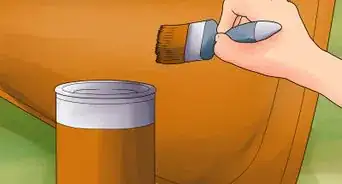
3Apply the first coat of marine paint using a combination of a brush and roller. Use a paint roller to roll on marine paint to the large areas of the hull, working in areas approximately 2 ft (0.61 m) in diameter. Apply paint near the gunwales, end caps, and any other areas where it’s difficult to roll paint onto using a paintbrush.[10]
- If there are any bubbles in the paint that you apply with the roller, you can smooth them out with your paintbrush.
- It’s easiest to use a small paint roller, such as a 4 in (10 cm) roller. You can use a paintbrush of the same size or slightly smaller for the hard-to-roll spots.
- You could also use a sprayer as an alternative method to apply the paint. Just keep in mind this method can be much messier.
-
4Let the first coat of paint dry for 24 hours. The paint needs to dry a full 24 hours before you can recoat it. It will be dry to the touch in 1-2 hours and dry enough to handle in 4-6 hours.[11]
- If you plan to move the canoe into a garage or other storage space to leave it overnight, wait 4-6 hours before picking it up and moving it.
-
5Sand the canoe lightly using 120-grit sandpaper. Give the whole first coat of paint 1 pass using your orbital sander and a 120-grit sanding disk. This will rough it up again so the second coat of paint sticks to it well.[12]
- Remember to wear a dust mask any time you are sanding the canoe so you don’t inhale paint or fiberglass particles.
-
6Wipe away the dust from sanding using a tack cloth. Use a clean tack cloth to wipe down the whole canoe again before you apply a second coat. Any dust particles will interfere with the paint sticking to the hull.[13]
- If you don’t have a tack cloth, you can wipe down the canoe using a clean cloth dampened with acetone to remove the dust.
-
7Apply a second coat of paint using the same method as the first. Work in areas of about 2 ft (0.61 m) in diameter and apply paint using your paint roller. Use your paintbrush to paint around the gunwales, end caps, and any other hard-to-roll areas.[14]
- You can repeat the process for a third coat if you aren’t happy with how it looks yet, but 2 coats is generally enough.
Tip: If you want to give the canoe a simple camouflage pattern, you can dip a sponge into marine paint of a different color and sponge it on top of the solid coat as you like. You could even use multiple colors to make a more complex camouflage design.
-
8Wait at least 48 hours before putting your canoe in the water. The paint will be dry after 24 hours, but wait 48 hours before using the canoe to be extra sure that the paint is fully cured. It’s OK to move the boat inside for storage and drying after 4-6 hours when the paint is dry enough to handle.[15]
- Double-check the manufacturer’s instructions for the marine paint you used for any specific info about drying time.
Community Q&A
-
QuestionWhy can't I spray paint it?
 Community AnswerBecause spray paint is not designed to be used in water so the color will not hold up.
 -
QuestionDo I need a gel coat or epoxy after the final paint job?
 Community AnswerNo. If you need a gelcoat, put it on prior to painting (and be sure to prep the canoe first).
 -
QuestionWhat kind of paint do you recommend to paint a fiberglass canoe?
 Community AnswerRustoleom spray paint works great and is strong against scratches, plus has great color choices.
Warnings
- Wear safety goggles and closed-toe shoes any time you are operating a power washer. If it is a gas-powered model, wear earplugs as well.⧼thumbs_response⧽
- Always wear a dust mask when you are sanding fiberglass to prevent yourself from inhaling any fiberglass particles.⧼thumbs_response⧽
Things You’ll Need
- Pressure washer
- Gelcoat repair kit
- Utility knife
- Acetone
- Orbital electric sander
- 120-grit sanding disk
- Masking tape
- Tack cloth
- Safety glasses
- Earplugs (optional)
- Dust mask
- Paint roller
- Paint tray
- Paintbrush
- Marine paint
- Paint thinner
- Paint mixing stick
- Sponge (optional)
- Clean cloth (optional)
References
- ↑ https://www.youtube.com/watch?v=bxLwWOovafg
- ↑ https://www.youtube.com/watch?v=bxLwWOovafg&feature=youtu.be&t=8
- ↑ https://www.youtube.com/watch?v=bxLwWOovafg&feature=youtu.be&t=65
- ↑ https://www.myccr.com/articles/painting-fiberglass-canoe
- ↑ https://www.youtube.com/watch?v=bxLwWOovafg&feature=youtu.be&t=75
- ↑ https://www.youtube.com/watch?v=bxLwWOovafg&feature=youtu.be&t=180
- ↑ https://www.myccr.com/articles/painting-fiberglass-canoe
- ↑ https://www.myccr.com/articles/painting-fiberglass-canoe
- ↑ https://www.myccr.com/articles/painting-fiberglass-canoe
- ↑ https://www.youtube.com/watch?v=8YlPk7PHn44&feature=youtu.be&t=375
- ↑ https://www.myccr.com/articles/painting-fiberglass-canoe
- ↑ https://www.myccr.com/articles/painting-fiberglass-canoe
- ↑ https://www.myccr.com/articles/painting-fiberglass-canoe
- ↑ https://www.youtube.com/watch?v=8YlPk7PHn44&feature=youtu.be&t=375
- ↑ https://www.boatus.com/magazine/2017/april/10-steps-to-the-perfect-topside-paint-job.asp
About This Article
If your fiberglass canoe’s paint job is starting to fade, you can make it shine again in a few days. All you’ll need is a sander, marine paint, and paint thinner. If your canoe has any deep gouges, you’ll need to repair these with a gelcoat repair kit. You'll also need to remove the old paint job using an electric sander or sandpaper. Once that's done, it's smooth sailing from there. You'll just need to apply a couple coats of marine paint mixed with paint thinner. Let the first coat dry for 24 hours and lightly sand the canoe again before you apply the second coat. Once the second coat is on, your canoe should be good to go in 48 hours! For more tips, including how to protect your canoe’s gunwales and end caps from paint, read on!


