This article was co-authored by wikiHow staff writer, Hunter Rising. Hunter Rising is a wikiHow Staff Writer based in Los Angeles. He has more than three years of experience writing for and working with wikiHow. Hunter holds a BFA in Entertainment Design from the University of Wisconsin - Stout and a Minor in English Writing.
There are 10 references cited in this article, which can be found at the bottom of the page.
This article has been viewed 51,034 times.
Learn more...
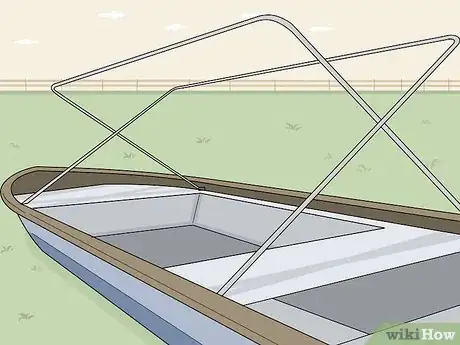
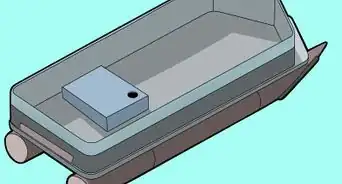
If you’re hunting ducks or other waterfowl, they may be able to see your boat and avoid flying near you. Boat blinds help conceal your boat and make it easier to approach the birds without them detecting you. Boat blinds can either have a solid PVC frame or a metal scissor-frame that’s collapsible when you aren’t using it. No matter which frame you build, add camouflage to it so you aren’t visible while you’re on the water!
Steps
Assembling a PVC Frame
-
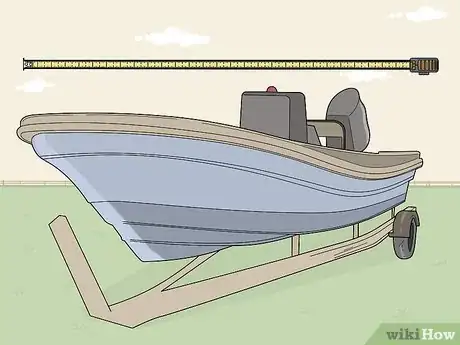
1Measure the inside length and width of your boat. Use a measuring tape to find the width of the inside of your boat near the motor, which is usually the widest point. Once you have the measurement for the width, lock the measuring tape in place so it doesn’t contract and move toward the front of your boat. Find the spot on your boat where the body just starts to get narrower. Measure the length from the back of your boat just in front of the motor to the spot where it narrows.[1]
- Do not measure from the outside edges of the boat since your frame won’t be able to fit inside.
-
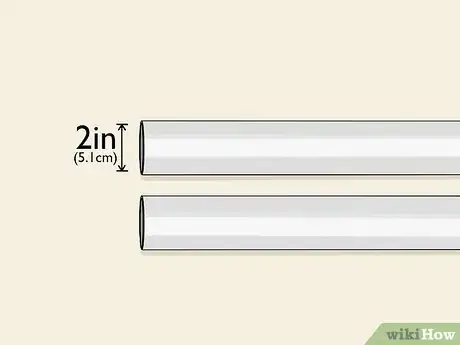
2Cut 2 pieces of PVC pipe that match the inside length of the boat. After you find the length, transfer the measurements onto a piece of PVC pipe with a 2 in (5.1 cm) diameter. Use a hacksaw to cut through the pipe at the mark you made, making sure the cut is as straight as possible. Once you cut out the first piece of PVC pipe, cut another piece that’s the same size so you have 2 side pieces for your frame.[2]
- You can buy PVC pipes from your local hardware store. The employees may be able to cut your length of pipe to size if you need them to.
Advertisement -
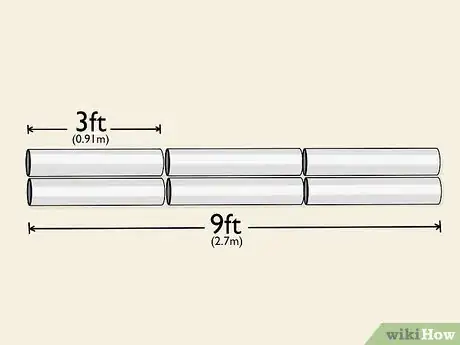
3Split each length of PVC into 3 equal pieces. Take the measurement you found for the length and divide it by 3 to find how long each section should be. Mark the new measurements on your PVC pipes and cut through them with a hacksaw. Cutting your side pieces into smaller lengths lets you add side supports to your frame using T-connections so you blind is more sturdy.[3]
- For example, if the inside length of your boat is 9 feet (2.7 m), then each section of pipe you cut will be 3 feet (0.91 m).
- If you want, you can cut the 3 pieces to size right away rather than cutting out the long pieces first.
-
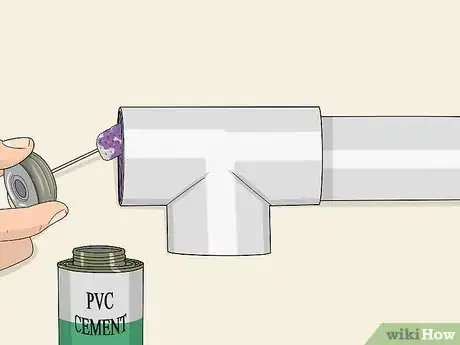
4Glue the pieces back together using T-connections. Fit 2 sections of pipe into the side holes on a PVC T-connection so the top hole points up. Add another T-connection to the end so the top hole points up, and put the third section in the side hole so you have a long horizontal pipe. Once everything fits, apply PVC cement around the end of each pipe section and push it back into the T-connection to secure it. Repeat the process with the other sections of pipe.[4]
- You can buy PVC cement from your local hardware store.
- A T-connection has 2 holes on the side and 1 on the top so you can join multiple pipes together.
- You don’t have to glue the pieces together if you don’t want to, but it reduces the risk of your frame falling apart while you’re using it.
-
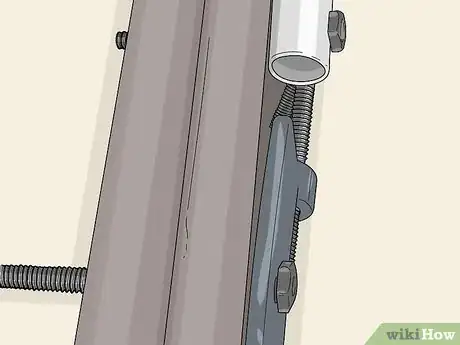
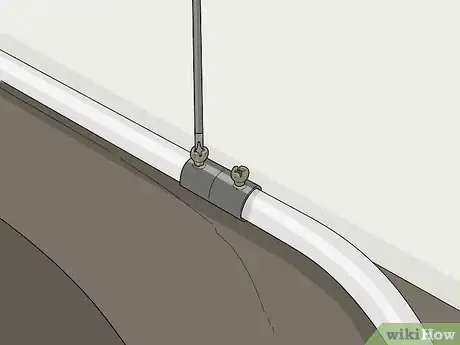
5Attach the PVC pieces to the sides of your boat with conduit clamps. Get conduit clamps that match the size of your pipes to ensure a tight fit against your boat. Hold the length of pipe against the inside of your boat about 6 inches (15 cm) from the top edge. Measure every 2 feet (61 cm) along the length of pipe and make marks on your boat so you know where to place the clamps. Screw in the clamps with an electric screwdriver so they’re secured to your boat.[5]
- Conduit clamps are rounded metal pieces that hold pipes in place so they don’t move around, and you can buy them from your local hardware store.
- You can also screw the conduit clamps into the boat seats if it’s easier than attaching them to the side of your boat.
- If you’re drilling through fiberglass, then cover the area where you’re making your hole with painter’s tape before you start drilling so you don’t accidentally crack or damage your boat.[6]
Tip: Don’t put the clamps too low on the boat’s body since you could cause leaks. Always install them 6 inches (15 cm) or less from the top edge.
-
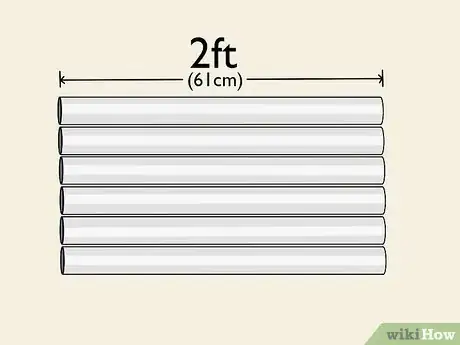
6Add 2 ft (61 cm) vertical pipes into the T-connections. Cut 6 pieces of PVC pipe with your hacksaw so they’re 2 feet (61 cm) long. Push the end of each pipe into the top holes of the T-connections so they stand up vertically against the walls of your boat. Make sure each piece is the same height, or else the rest of your frame won’t line up well. Mark each pipe so you know how far to push it in before applying PVC cement to the ends.[7]
- You can cut the pipes longer if you want to have more coverage from your blind.
-
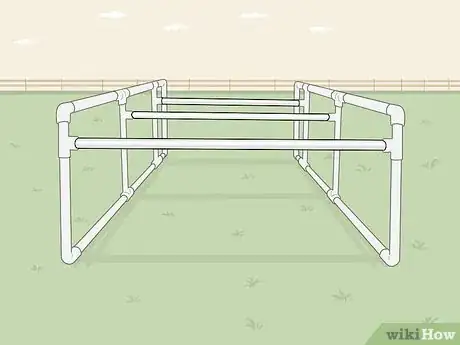
7Put horizontal PVC supports between the tops of the vertical pipes. Fit 4-way pipe connections on top of the vertical pipes so 2 holes run along the length of the boat and 1 hole points toward the opposite side. Use the measurement you took for the inside width of your boat to cut 3 sections of pipe to fit between each side of the frame. Push the ends of each pipe into the 4-way connections on top of the vertical supports so they span the width of your boat.[8]
- Don’t glue your horizontal supports in place since you won’t be able to easily take your frame apart when you aren’t using it.
- If you ever want to take your frame apart, remove the horizontal connections to fold the pipes into your boat. The conduit connections allow you to rotate the pipes and collapse your blind when you aren’t using it.
-
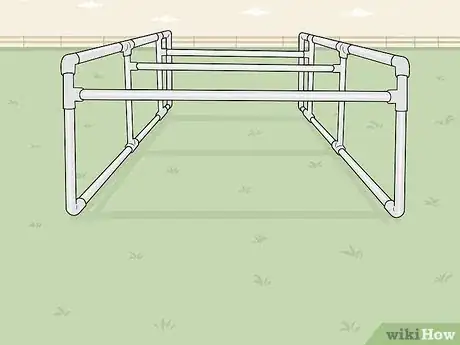
8Install a top rail to the frame. The top rail uses the same size pieces as the bottom pieces of your frame. Take your length measurement from earlier and cut out 6 new sections of PVC pipe with your hacksaw to fit between the 4-way connections. Push the new pipe sections into the 4-way connections so they span the length of the boat and support your frame.[9]
Building a Scissors-Style Frame
-
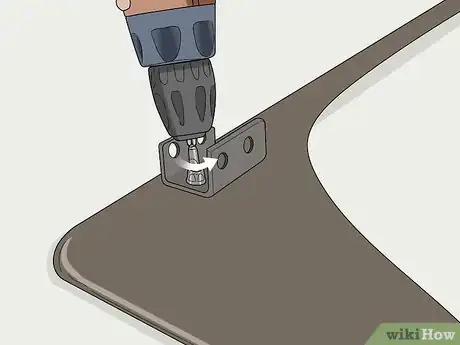
1Screw U-shaped metal brackets in the 4 corners of your boat. Get U-shaped mounting brackets that are at least 3⁄4 inch (1.9 cm) wide. Place your first bracket on top of the frame in the back of your boat near the motor, and drive a screw through it to secure it. Put the second bracket directly across from the first one on the opposite side of the boat. Place the last 2 brackets at the front of your boat before it starts to narrow, and screw them in so they run parallel with the back brackets.[10]
- You can also attach the brackets to any boat seats or platforms if it’s easier for you.
- If you’re drilling through fiberglass, cover the area with painter’s tape first so you don’t crack or damage the boat.[11]
-
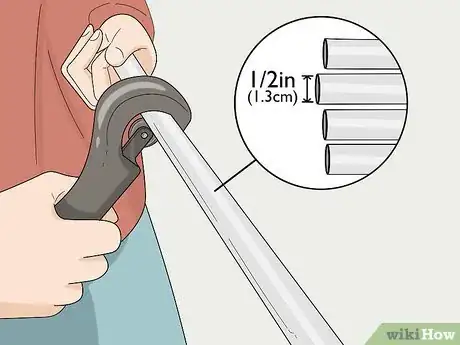
2Cut 4 pieces of metal conduit that match the inside width of your boat. Measure the distance between the center of one of your brackets to the opposite inside edge of your boat. Use 1⁄2 in (1.3 cm) metal conduit, and mark the lengths so you know where to make your cuts. Secure a pipe cutter onto the conduit on your mark and rotate it completely around. Keep rotating the pipe cutter until it makes a clean cut, and continue until you have 4 pieces that are the same length.[12]
- You can buy metal conduits from your local home improvement or hardware store.
-
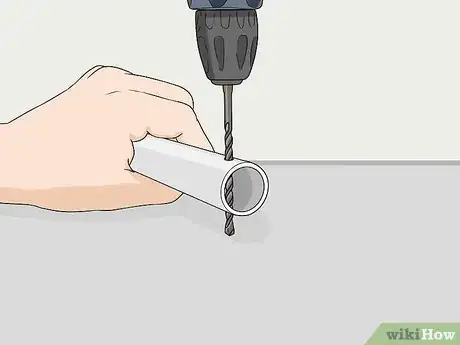
3Drill holes in one end and the center of each conduit. Use a drill with a bit meant for boring through metal. Measure in 1 inch (2.5 cm) from one end of each conduit and drill your hole completely through the other side. Then, find the midpoint of each conduit and drill another hole through the pipe. Drill from the same side of your pipe for each hole, or else your frame won’t fit together.[13]
- Be careful not to bend or damage the conduit while you’re drilling it.
-
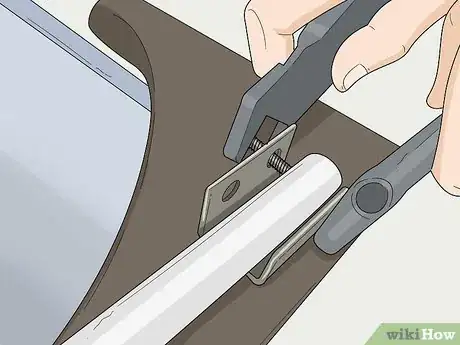
4Attach the conduits to the brackets with nuts and bolts. Place the end of the conduit with the drilled hole so it’s in the center of the bracket on your boat. Push a 1 1⁄2 in (3.8 cm) hex bolt through the holes on the bracket and the conduit and screw a nut onto the other side. Test pivoting the conduit up and down in the bracket to make sure it moves smoothly. Attach the rest of the conduits to the other brackets.[14]
- If the conduit doesn’t move around easily, then try loosening the nut and bolt so it can freely rotate.
-
5Attach 90-degree angle pieces to the top of each conduit with screw couplings. Get 4 90-degree conduit pieces that are the same diameter as your other pieces. Put a screw coupling onto the end of one of your conduits and fit the 90-degree angle into the other side. Point the angled piece down the length of the boat towards the other bracket on the same side. Tighten the screws on the coupling to secure the pieces together. Repeat the process for each other conduit.[15]
- You can buy screw couplings from your local hardware store or online.
Tip: You can also bend straight conduit into 90-degree angles if you have a bending tool.
-
6Secure horizontal sections of conduit between the angled pieces. Measure the length between the open ends of the angled conduit pieces and cut 2 more pieces of your straight conduit to fit between them. Push a screw coupling onto the ends of the angled pieces, and push the straight conduits onto the other side. Secure the horizontal sections in place by tightening the screws.[16]
-
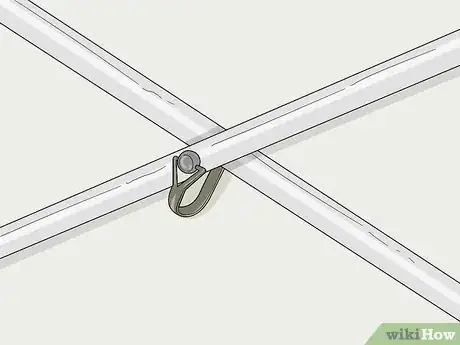
7Place wire lock pins through the center holes on the conduit to hold them in place. Lift up both sides of your frame so they intersect and make an X-shape on each end. Line up the holes in the centers of the conduits and push a lock pin through them. Secure the end of the lock pin in place so your frame doesn’t fall down. When you’re ready to take your frame apart, pull out the lock pins to collapse them. [17]
- You can buy lock pins from your local hardware store or online.
Adding Camouflage to a Frame
-
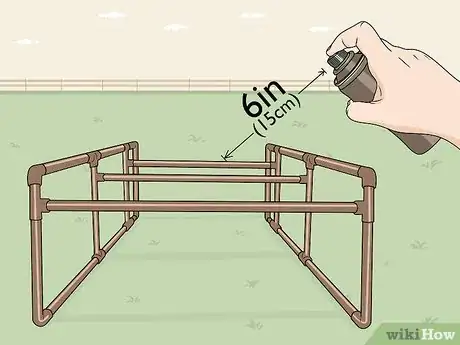
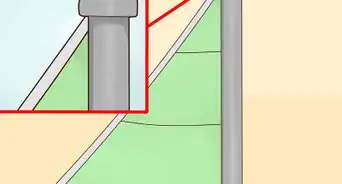
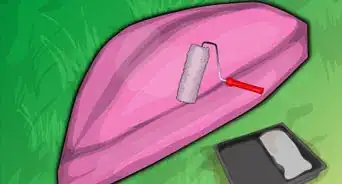
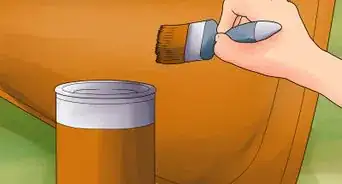
1Paint the frame a matte brown or green color. Use spray paint that’s meant for exterior use and the material you built your frame from. Make sure to use a matte brown or dark green so it blends in with the rest of your camouflage. Hold the spray paint 6 inches (15 cm) from the frame and apply a thin coat in short bursts. Once you apply the first coat, wait about 15 minutes before applying another coat.[18]
- Cover your boat with plastic or cardboard so you don’t accidentally get paint on it.
- You don’t need to paint the frame if you don’t want, but it will make it more difficult to see.
-
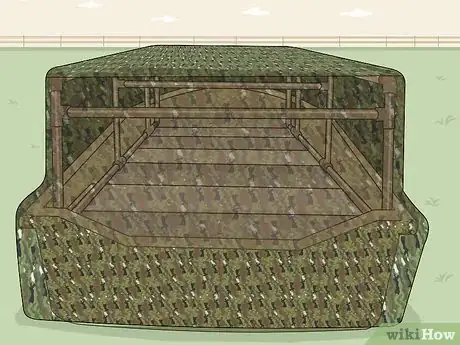
2Cut camouflage netting to fit on the sides of your boat. Measure from the top of the frame down to the bottom of your boat with your measuring tape. Use a utility knife to cut through camouflage netting that’s the same length or slightly longer than the sides of your boat. Make sure the netting is long enough to cover the entire side of your boat so you’re completely camouflaged.[19]
- You can buy camouflage netting from hunting and outdoors stores.
- You can cut the camouflage into smaller sections so it’s easier to attach to your frame, but be sure to use about 1–2 inches (2.5–5.1 cm) extra on each side so you’re able to overlap the pieces.
Variation: If you don’t have camouflage netting, you can also spray paint plastic safety fence brown and green to blend in better. Make sure none of the original fence color shows through the paint, or else you’ll be visible.
-
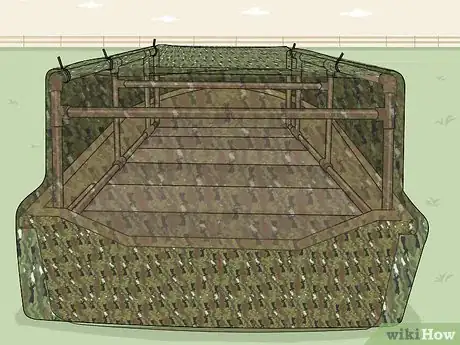
3Hang the netting on the frame using zip ties. Hold the netting up to the top bar of the frame so it extends 3–4 inches (7.6–10.2 cm) above it, and loop a zip tie through the netting. Pull the zip tie tight against your frame to secure the netting in place. Attach a zip tie every 6 inches (15 cm) along the top edge of the frame so the netting doesn’t come undone. Work your way around the boat to completely camouflage it.[20]
- Leave a small 2 ft (61 cm) window at the front and back of your boat so you can still navigate easily.
-
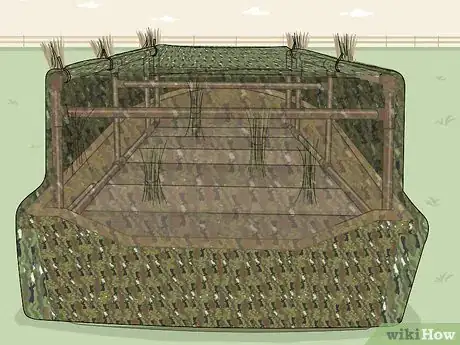
4Attach blind grass onto the netting if you want additional camouflage. Blind grass simulates the natural plant life on the water and can help conceal your boat more. Lay out the blind grass on the outside of the netting and secure it in place every 6–12 inches (15–30 cm) with zip ties. Make sure the bottom of the blind grass extends past the top and bottom of your boat to hide it better.[21]
- You can blind grass online or from hunting specialty stores.
- You can also use dead leaves and branches of the natural plant life in your area if you want.
Warnings
- Always wear safety glasses and gloves while working with an angle grinder to protect yourself from metal shavings and sparks.⧼thumbs_response⧽
Things You’ll Need
Assembling a PVC Frame
- 35–40 feet (11–12 m) of 2 in (5.1 cm) PVC pipes
- PVC T-connections
- 4-way PVC connections
- Measuring tape
- Hacksaw
- PVC cement
- Conduit clamps
Building a Scissors-Style Frame
- 4 U-shaped metal brackets
- 30–40 feet (9.1–12.2 m) of 1⁄2 in (1.3 cm) metal conduit
- 4 pieces of 90-degree angle conduit
- Angle grinder
- Measuring tape
- Drill
- Bolts
- Nuts
- Screw couplings
- Screwdriving
- Lock pins
Adding Camouflage to a Frame
- Brown or dark green matte paint
- Camouflage netting
- Utility knife
- Zip ties
- Blind grass
- Camouflaged motor cover
References
- ↑ https://www.wildfowlmag.com/editorial/building-a-duck-boat-blind-on-a-budget/280115
- ↑ https://www.wildfowlmag.com/editorial/building-a-duck-boat-blind-on-a-budget/280115
- ↑ https://www.wildfowlmag.com/editorial/building-a-duck-boat-blind-on-a-budget/280115
- ↑ https://www.wildfowlmag.com/editorial/building-a-duck-boat-blind-on-a-budget/280115
- ↑ https://www.wildfowlmag.com/editorial/building-a-duck-boat-blind-on-a-budget/280115
- ↑ https://youtu.be/jxCTUf6izPk?t=9
- ↑ https://www.wildfowlmag.com/editorial/building-a-duck-boat-blind-on-a-budget/280115
- ↑ https://www.wildfowlmag.com/editorial/building-a-duck-boat-blind-on-a-budget/280115
- ↑ https://www.wildfowlmag.com/editorial/building-a-duck-boat-blind-on-a-budget/280115
- ↑ https://youtu.be/raMkQihSR4I?t=249
- ↑ https://youtu.be/jxCTUf6izPk?t=9
- ↑ https://youtu.be/raMkQihSR4I?t=236
- ↑ https://youtu.be/raMkQihSR4I?t=296
- ↑ https://youtu.be/raMkQihSR4I?t=277
- ↑ https://youtu.be/raMkQihSR4I?t=290
- ↑ https://youtu.be/raMkQihSR4I?t=290
- ↑ https://youtu.be/pH4WBmvH5lI?t=208
- ↑ https://www.wildfowlmag.com/editorial/building-a-duck-boat-blind-on-a-budget/280115
- ↑ https://www.wildfowlmag.com/editorial/building-a-duck-boat-blind-on-a-budget/280115
- ↑ https://youtu.be/P8KamQlFvxM?t=77
- ↑ https://youtu.be/_UbTIR81DmI?t=493
