This article was co-authored by Nitzan Levy. Captain Nitzan Levy is a Sailor, Social Entrepreneur, and the Founder of Sailors NYC, a recreational sailors’ club based in Jersey City, New Jersey that specializes in cruising boats and a variety of community programs. Capt. Levy has over 20 years of sailing experience and has sailed in many places around the world including: the Atlantic Ocean, the Mediterranean Sea, The Caribbean, and the Indian Ocean. Capt. Levy is a U.S. Coast Guard Licensed Master of vessels up to 50 Tons with Auxiliary Sail and Assistance Towing Endorsements. Capt. Levy is also a NauticEd Level V Captain Rank Chief Instructor, an American National Standards Assessor, an SLC instructor, an ASA (American Sailing Association) Certified Instructor Bareboat Chartering, and an Israeli licensed skipper on Boats for International Voyages.
This article has been viewed 96,985 times.
Ships and boats of all sizes have harnessed the power of wind for centuries. Sailing boats have continued to use sails to this day for recreational sports and hobbies. Whether you’re looking for a calm day on the water or to compete in a race, making your own sail can be a beneficial skill.
Steps
Getting Started
-
1Draw a basic outline. Whether you want to add an emblem or are designing for efficiencies, sketch out what you want the final sail to look like so that you have a jumping off point. Look to other similar boats for inspiration.[1]
- Research the dimensions of similar sails and have an idea of what kind of sailing you’d like to do. This gives basic reference points to research and execute.
-
2Find a suitable workspace. Depending on the size of the vessel, making your sail can be a huge undertaking. Ensure that you have a workspace that can not only house a large piece of material but can also give you room to maneuver while making a lot of noise.[2]Advertisement
-
3Address your sewing needs. Whether you’re a hobbyist or professional, you will need an industrial sewing machine that is able to do a zigzag stitch using V69 thread. It may be wise to let a professional take care of the sewing to ensure safety and maximum durability.[3]
- If you are planning to sew the sail yourself, you will also need a special sewing table to be able to support the industrial sewing machine. This table needs to be about twice the size of a table tennis table in order to support the size of the sail.[4]
-
4Know the boom and mast dimensions. Measure the boat you intend to use the sale for in order to calculate the appropriate size of your sail. If you have a short boom and a tall mast then that is a High aspect. If you have a long boom and a short mast, it is a low aspect.[5]
- Shorter booms give you more maneuverability.
Designing the Sail
-
1Draw the front of the sail. The front of the sail is called the luff curve. The luff curve is the most important part of the sail because the rest of the sail’s integrity depends on it. The luff curve at front of the sail relates to how your mast will bend.[6]
- The luff curve won’t match the curve of the mast. The top third of the luff curve will be slight and the bottom of the curve, close to the boom, will be greater than the mast curve. There are different theories on what the perfect luff curve should be so research how to optimize the luff curve for your prefered type of sailing.[7]
-
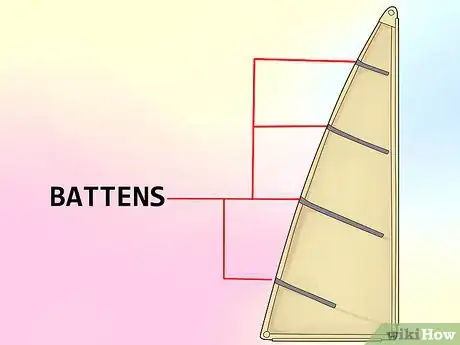
2Add in battens. Battens keep the shape of a sail and come in full or half where full battens are for high performance.[8] Battens are attached to the sail using two types of pockets: pockets that you can't adjust and pockets that you can. Adjustable pockets allow you to adjust your sail more to wind conditions.
- If you want more stability, add more battens; however, use less battens to make your boat easier to manoeuvre and more lightweight.[9]
-
3Evaluate where to add seams. Seams on your sail allow you to be strategic with choosing material that will optimize your sail’s performance. They also allow you to shape your sail more easily. A panel means that you have stitched different materials on a sail.[10]
- Use heavier materials near the bottom of the sail. Seams also help to optimize the amount of material you use.
-
4Make a pattern. Create your sail pattern as you would a dress. Translate your sail into real-dimensions using newspaper, cheap fabric, or another thin piece of paper. Double check all your measurements and cut out your panels when ready. The pattern should be pliable and easily moved in order to cut it out of your sail fabric.[11]
- Tape fabric or newspaper together for more surface area when creating a large sail.
- The luff curve and shaping the seam will create a three dimensional sail so don’t worry if your sail lies flat as you construct your pattern.
-
5Choose a fabric. Research what fabric works best for your sailing needs and budget. Monofilm is an economical choice but ensure you use robust material when constructing the luff and foot of your sail.[12] Pentex taffeta scrim laminate is very durable but on the higher price end. There are also special polyesters and laminated woven fibers.
- Commercial sails are commonly made from a material called dacron, which is a type of polyester.[13]
- Ensure that the material you choose resist stretching and can withstand rips.
- Heavy monofilm and woven sailcloth are common choices.
Assembling the Sail
-
1Start with a central panel. Place your pattern onto your chosen material and outline the edges of the panel. Before cutting any material, understand that the edges of each panel will need to be stuck together and then sewn.[14]
-
2Cut out your pattern. Once you have outlined your pattern onto your material, including battens and seams, you may now cut out your pattern. When creating a seam with shape, you want the shape to be about 35% from the luff.[15]
-
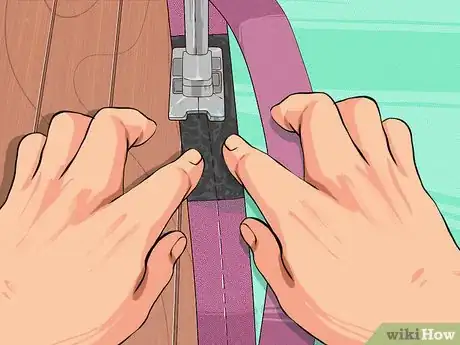
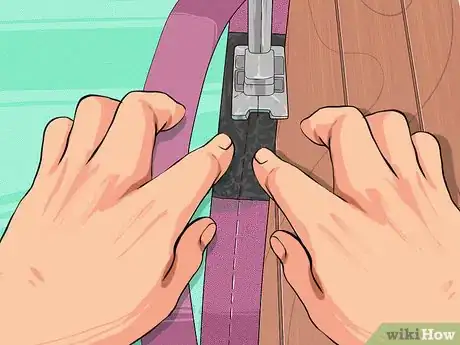
3Stitch the materials. Move from panel to panel while leaving extra cloth at the external edges of the sail. It’s best to trim and adjust the sail shape once all panels are sewn together.
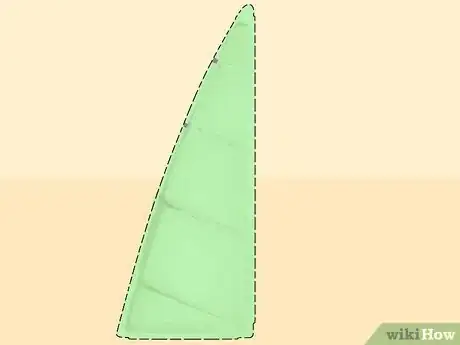
- Stick and sew two panels at a time until the sail is all in one piece. You can now trim it to your design on the table and draw on the batten pockets.
-
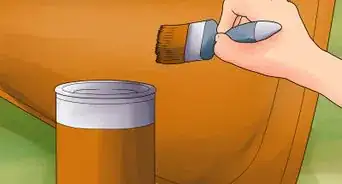
4Reinforce the material. Using dacron tape or reinforced monofilm tape, reinforce the seams. You can also glue a layer of cloth on either side of the material for added strength.[16]
-
5Fortify the foot and the batten pockets. There will be a high degree of force applied to these areas so ensure that they can withstand that amount of tension. Depending on the type of sail, attach the luff once you have dealt with the batten pockets.[17]
-
6Create the sleeve for the mast. Measure the width of existing sails and adjust your sail accordingly. Sleeves can either be a single piece or made from a number of pieces of material but ensure that the head is reinforced and capable to withstand the strain from the mast tip. Create your sleeve so it fits down to the foot batten.[18]
- Create an adjustable head for your sleeve if this is your first attempt at a sail.
- Use pulleys from old sails or get them from a sail maker.
Expert Q&A
-
QuestionWhat should I look for to ensure my sail is durable and strong?
 Nitzan LevyCaptain Nitzan Levy is a Sailor, Social Entrepreneur, and the Founder of Sailors NYC, a recreational sailors’ club based in Jersey City, New Jersey that specializes in cruising boats and a variety of community programs. Capt. Levy has over 20 years of sailing experience and has sailed in many places around the world including: the Atlantic Ocean, the Mediterranean Sea, The Caribbean, and the Indian Ocean. Capt. Levy is a U.S. Coast Guard Licensed Master of vessels up to 50 Tons with Auxiliary Sail and Assistance Towing Endorsements. Capt. Levy is also a NauticEd Level V Captain Rank Chief Instructor, an American National Standards Assessor, an SLC instructor, an ASA (American Sailing Association) Certified Instructor Bareboat Chartering, and an Israeli licensed skipper on Boats for International Voyages.
Sailing Instructor When you're looking at your sail, the edges should be strong, with no broken seams. Also, the fabric shouldn't be dirty or wrinkled—new sails should be straight, beautiful, and white.
 -
QuestionCan I reinforce my small boat sail with eyelets across the bottom width?
 Community AnswerSmall sails have three points of contact. This "triangular" shape allows the sail to form an air pocket. Therefore, the bottom width is not a great place for eyelets and not recommended. Reinforced eyelets on your three points should work.
 -
QuestionCan I use cardboard?
 Community AnswerNo.
Warnings
- Create a budget to ensure you optimize your resources.⧼thumbs_response⧽
- Design with safety first, do not cut corners to favor aesthetics or cost.⧼thumbs_response⧽
Things You'll Need
- Sailcloth, polytarp, nylon or Dacron sail material
- Industrial sewing machine
- V69 thread
- Measuring tape
- Sail pattern
- Double sided adhesive tape
- Shears
- Dacron tape or reinforced monofilm tape
References
- ↑ http://www.sailrepair.co.uk/makingsail.php
- ↑ http://www.sailrepair.co.uk/makingsail.php
- ↑ http://www.sailrepair.co.uk/makingsail.php
- ↑ http://www.sailrepair.co.uk/makingsail.php
- ↑ http://www.sailrepair.co.uk/makingsail.php
- ↑ http://www.sailrepair.co.uk/makingsail.php
- ↑ http://www.sailrepair.co.uk/makingsail.php
- ↑ http://www.startedsailing.com/sail-battens.html
- ↑ http://www.sailrepair.co.uk/makingsail.php
- ↑ http://www.sailrepair.co.uk/makingsail.php
- ↑ http://jezebel.com/5916905/how-to-turn-your-dress-idea-into-reality-by-making-your-very-own-custom-pattern
- ↑ http://www.sailrepair.co.uk/makingsail.php
- ↑ Nitzan Levy. Sailing Instructor. Expert Interview. 24 April 2020.
- ↑ http://www.sailrepair.co.uk/makingsail.php
- ↑ http://www.sailrepair.co.uk/makingsail.php
- ↑ http://www.sailrepair.co.uk/makingsail.php
- ↑ http://www.sailrepair.co.uk/makingsail.php
- ↑ http://www.sailrepair.co.uk/makingsail.php
- ↑ Nitzan Levy. Sailing Instructor. Expert Interview. 24 April 2020.
About This Article
To make a sail, first sketch the luff curve using your boom and mast measurements. Next, choose a scratch-resistant material that works best for your budget and sailing needs, such as Monofilm or Pentex taffeta scrim laminate. Then, place your pattern onto your material and outline the panel, battens, and seams. Once you have your sail’s shape, cut out the panels, and stitch them together, leaving extra cloth at the edges for seams. For more tips from our Nautical co-author, such as how to reinforce your sail against the elements, read on!

