This article was co-authored by wikiHow staff writer, Nicole Levine, MFA. Nicole Levine is a Technology Writer and Editor for wikiHow. She has more than 20 years of experience creating technical documentation and leading support teams at major web hosting and software companies. Nicole also holds an MFA in Creative Writing from Portland State University and teaches composition, fiction-writing, and zine-making at various institutions.
This article has been viewed 349,335 times.
Learn more...
Are you having trouble downloading music in Soulseek? If you can't search, download, or upload in Soulseek, you'll usually need to open the listening port in your firewall, router, and/or VPN. If you can connect but your download speeds are slow, there are several tricks you can use to configure Soulseek for the fastest downloads. This wikiHow article will teach you everything you need to know about optimizing Soulseek for fast downloads, including step-by-step instructions for port forwarding for Windows and Mac.
Things You Should Know
- If you can't upload or download, try enabling UPnP and NAT port mapping in your Soulseek options.
- Soulseek generates a random listening port that you may need to allow through your firewall, router, and/or VPN.
- You can increase your download speeds by setting your maximum download rate to "0," which translates to "unlimited" in Soulseek.
Steps
Port Configuration and Forwarding
-
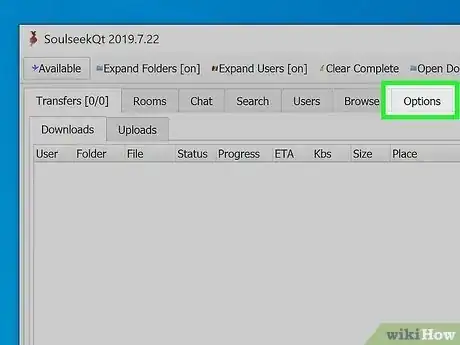
1Click the Options tab at the top of Soulseek. This opens all of your Soulseek configuration options.
- If you're setting up Soulseek for the first time, having trouble downloading, or need help using Soulseek with a VPN, use this method to properly configure your ports.
- If Soulseek is working fine but your downloads are slow, skip down to Get Faster Downloads.
-
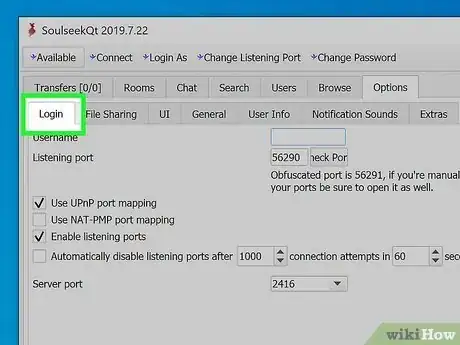
2Click the Login tab. You'll see your basic Soulseek information, including your username, listening port, and the server port.
- In some cases, you'll have to open the listening port on your router, firewall, and/or VPN to download and upload files.
Advertisement -
3Click Check Ports to see your listening port. The listening port is the port through which you can accept incoming connections, so you'll need to make sure this port is allowed through your router and firewall.
- When you click the button, you'll see the results of the test in a web browser tab. If you see the port number, "TCP open," and "Your router and Soulseek client is configured correctly," you don't need to open any ports to use Soulseek.
- If the port isn't open or something is misconfigured, you'll see the message "Port CLOSED. Your router and/or Soulseek client needs to be configured correctly." In this case, you usually won't be able to download or upload anything until the port is open.
- Even if you can download music but not upload, you risk being banned by other Soulseek users, so you'll want to fix the problem.
-
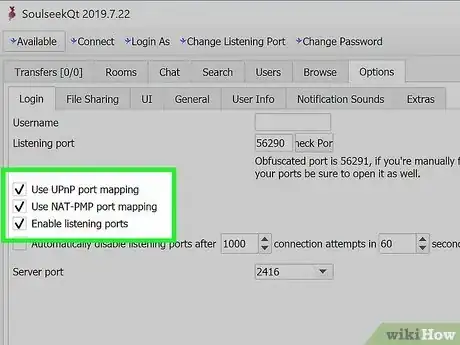
4Enable UPnP and NAT port mapping to fix the "Port CLOSED" error. Before you spend time opening the ports manually, enabling these two options might help you resolve the issue.[1]
- Click the Options tab, and then the Login tab.
- Check the box next to "UPnP port mapping."
- Check the box next to "NAT-PMP port mapping" (especially important if you're using a Mac and/or connected to an AirPort wireless router).
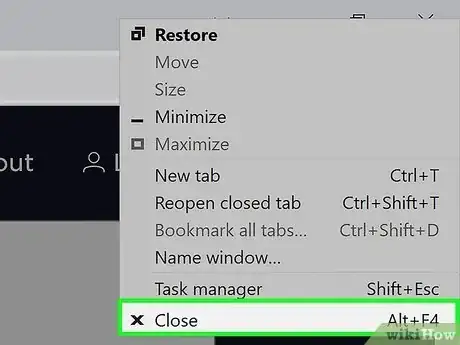
- Close Soulseek. Make sure it's really closed and not just minimized.
- Reopen Soulseek and go to Options > Login.
- Click the Check Ports button again. If the issue is resolved, great! If not, continue with this method.
-
5Allow Soulseek through your firewall. If the port check still fails, your Windows or macOS firewall might be blocking Soulseek.
-
Windows:
- Press the Windows key, type firewall, then click Windows Defender Firewall.
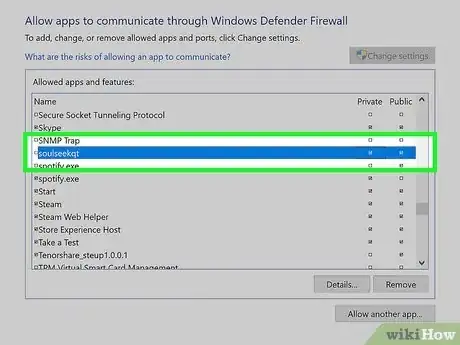
- Click Allow an app or feature through Windows Defender Firewall.
- Scroll down to SoulseekQt and check the box next to "Public" and/or "Private," depending on your internet settings.
- Click OK to save your changes.
-
Mac:
- Open System Preferences and select Security & Privacy.[2]
- Click Firewall.
- Click Firewall Options.
- If Soulseek is already added, use the up and down arrows to allow connections.
- If not, click + and select Soulseek to add it. Then use the up and down arrows to allow connections.
-
Windows:
-
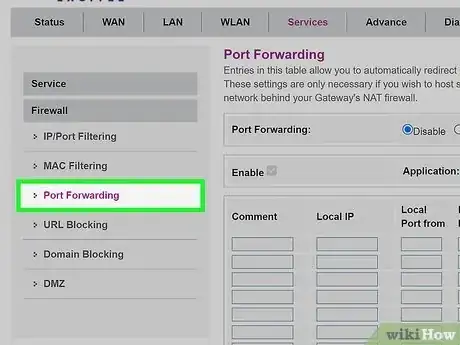
6Allow the Soulseek ports through your router. If your ports still show as closed, you'll need to allow the Soulseek ports through your router. Most routers have a Port Forwarding section in which you can specify the ports you want to open. Use this guide to navigate to your router's port forwarding settings and open the listening port and obfuscated port for Soulseek.
-
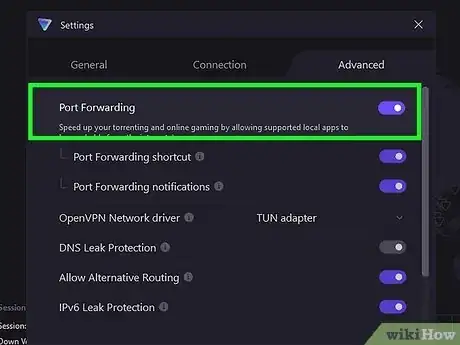
7Enable port forwarding in your VPN (if you're using one). If you're connected to a VPN, it may be blocking the Soulseek listening port. VPN services like Hide Me, Mullvad, and AirVPN all allow you to enable port forwarding, which may resolve the issue.
- If your VPN allows you to do so, open both the Soulseek listening port and the obfuscated listening port (just below it) in your VPN client.
- Some VPNs only allow you to forward a random port (Private Internet Access being one of them), which means you'll need to change your listening port every time you want to use Soulseek with your VPN.[3]
We'll show you how to do this with Private Internet Access, but you'll find similar options
- Disconnect from the VPN, open your Settings, click the Network tab, and check the box next to "Request Port Forwarding."
- Select a server that allows port forwarding. PIA US servers don't allow it, but servers in Canada, UK, and many other countries do.
- Once connected, you'll see the randomly selected open port above your VPN IP at the top of the PIA window. Click to copy it to your clipboard.
- Return to Soulseek and go to Options > Login, then paste the copied port number into the "listening port" field.
- Make sure you've enabled UPnP and NAT port mapping if you haven't already.
- Close Soulseek (don't minimize it) and re-open it. Check your ports again.
- Some VPNs don't offer port forwarding at all. If you're using a VPN that doesn't have port forwarding, you won't be able to use Soulseek with it.
-
8Disable advanced security features if you're using Xfinity. Beginning in 2020, Xfinity's xFi advanced security features have been blocking Soulseek ports automatically. If you use Xfinity, try disabling Advanced Security while using Soulseek. Here's how:
- In the Xfinity app, click the Account tab.[4]
- Click xFi Advanced Security.
- Select Turn Off under "xFi Advanced Security.
Get Faster Downloads
-
1Check your internet speed. To get an idea of how fast you might be able to download and upload on Soulseek, run an internet speed test. Go to https://www.speedtest.net and click Go to see your download and upload speed in Mbps.
- Keep in mind that your download speeds are not only depending on your own internet speed, but the connection speed of the person you're downloading from. Even if your connection is super-fast, you might be downloading from somebody with a slower connection or somebody who's limiting their upload speeds.
- If you can't search or download from Soulseek at all, check out Port Configuration and Forwarding first.
-
2Set your maximum download speed to "0." To do this, just click the Downloads tab and enter a "0" into the field at the bottom, then check the box next to "Limit Download Speed." While making this value "0" might seem counterintuitive, 0 represents "unlimited" in Soulseek, so you'll get the maximum download speed possible based on your internet connection speed and your peer's upload speed.
- While the "Limit Download Speed" box is checked, make sure you don't enter a value other than 0 into the box. For example, if you enter a "1" here while the box is checked, your download speeds will be capped at 1 kbps, which will result in extremely slow downloads and aborted transfers.
-
3Close other apps while you're downloading. If you're trying to do too many bandwidth-intensive activities while downloading, your Soulseek download and upload speeds will suffer. Especially if your connection is on the slower side, avoid streaming videos and music, as well as playing network-intensive games while you download.
- Similarly, make sure other devices sharing the same internet connection are also not hogging your bandwidth. For example, if your smart TV is connected to the same Wi-Fi as your computer and somebody is streaming a movie, you'll likely notice a speed decrease in Soulseek.
-
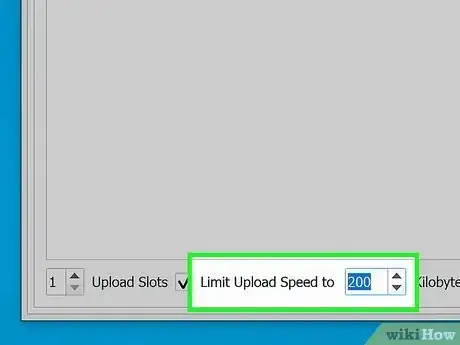
4Reduce your upload speed. By default, your Soulseek upload speed is set to 0 (unlimited). If someone is downloading music from you at the same time that you're trying to download something important, you can decrease your upload speed to allow more bandwidth for your downloads.
- Just don't lower your upload speed too much, as slow speeds might cause other users to abort their downloads and look for a faster connection. Some users may even ban you if your upload speed is too low. For broadband connections, setting your upload limit to 200 kbps is a safe option—people can still download from you, and you'll still have plenty of room to work with.
-
5Limit upload slots while downloading. Your download speeds may suffer if you're uploading to too many people at once. If you click the Uploads tab, you'll see the "Upload Slots" option at the bottom of the window. By default, this value is set to "1," which one person can download from you at a time. If you've increased this number, consider decreasing it to 1 until you've downloaded everything you need for the day.
- This ensures that you're getting the most out of your internet connection for the purpose of your downloads.
- Don't leave your upload slots limited for long. Soulseek users may accuse you of leeching.
-
6Troubleshoot your internet connection if your speeds are still slow.
- Move closer to the router (if you're using Wi-Fi). Wireless interference can affect your download speeds, so make sure you're as close to your Wi-Fi router as possible while downloading.
- Unplug your router for 30 seconds and then plug it back in. After a few minutes, reconnect and try downloading again.
- If your speeds remain slow, try connecting your computer to the router with an ethernet cable instead of using Wi-Fi. Ethernet connections can be faster than Wi-Fi and may clear up download speed issues.
-
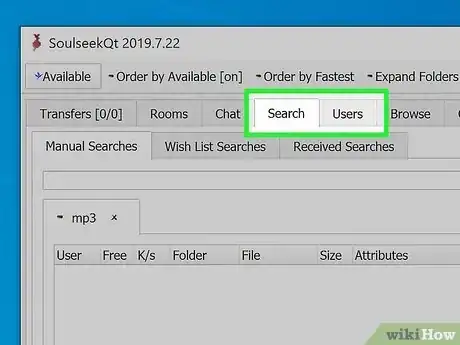
7Download from people who have faster connections. When you search for something in Soulseek, you'll see the average upload speed for each user whose files return in your search. If you're searching for something obscure, you'll usually have fewer peers to choose from. However, if possible, always choose the Soulseek user with the fastest connection and available upload slots to ensure speedy transfers.
Community Q&A
-
QuestionWhat if every download attempt I make shows, "failed," in red?
 Community AnswerTry to exit all the tabs and restart your computer or device, let it load and try again.
 -
QuestionWhy do users have yellow padlocks on their folders?
 Community AnswerA variety of personal reasons, they may just not want to share it or believe it to be rare and want to trade it for something they're unable to find.
Warnings
- Sharing copyrighted material without permission is a copyright violation and can carry civil and criminal penalties. Be careful.⧼thumbs_response⧽
