X
This article was co-authored by wikiHow staff writer, Jack Lloyd. Jack Lloyd is a Technology Writer and Editor for wikiHow. He has over two years of experience writing and editing technology-related articles. He is technology enthusiast and an English teacher.
The wikiHow Tech Team also followed the article's instructions and verified that they work.
This article has been viewed 774,650 times.
Learn more...
This wikiHow teaches you how to rip the songs from an audio CD onto your computer. You can use both iTunes and Windows Media Player to do so.
Steps
Method 1
Method 1 of 2:
Using iTunes
-
1Insert the CD into your computer. Place the audio CD that you want to rip logo side-up in your computer's CD drive.
- If a pop-up window appears when inserting the CD, close it before proceeding.
- If you're using a Mac (or a Windows computer that doesn't have a CD drive), you'll need to attach an external CD drive to your computer for this step.
-
2Open iTunes. Click or double-click the iTunes app icon, which resembles a multicolored musical note on a white background.
- If you don't have iTunes installed, download and install it before proceeding.
Advertisement -
3Click the "CD" button. It's in the top-left corner of the iTunes window. This will take you to the CD's page.
-
4Click Import CD. This button is in the upper-right side of the page. Clicking it prompts a pop-up window to appear.
-
5Select an audio format. Click the "Import using" drop-down box at the top of the drop-down menu, then click the format in which you want to import the audio CD's contents.
- For example, you would click MP3 encoder to rip the music to MP3 files on your computer.
- By default, iTunes will save the CD's files as AAC files, which are playable with most audio players and actually have higher inherent quality than MP3 files.
-
6Select an audio quality if necessary. Click the "Setting" drop-down box, then click the quality with which you want to import the files.
- For example, if you want to import the audio files in extremely high quality, you would click the Higher Quality option in the drop-down menu.
-
7Click OK. It's at the bottom of the pop-up window. Doing so prompts iTunes to begin importing your CD.
-
8Wait for the songs to finish importing. Once the import is complete, iTunes will make a confirmation chime, and the progress bar will disappear from the top of the iTunes window.
-
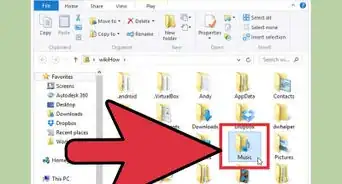
9Go to and open the album in your library. Click Music in the upper-left side of the iTunes page, then scroll down to the imported CD's album and click the album once to open it.
-
10Right-click one of the songs. It doesn't matter which song you right-click as long as the song is in the album you imported. A drop-down menu will appear.
- On a Mac, click once the song, then click File in the upper-left corner of the screen.
-
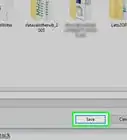
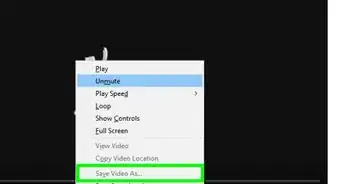
11Click Show in Windows Explorer. This is in the drop-down menu. Doing so opens the folder location of the imported songs; at this point, you're free to move, rename, copy, or edit them as you please.
- If you're using a Mac, click Show in Finder here instead.


Advertisement
Method 2
Method 2 of 2:
Using Windows Media Player
-
1Insert the CD into your computer. Place the audio CD that you want to rip logo side-up in your computer's CD drive.
- If a pop-up window appears when inserting the CD, close it before proceeding.
- If you're using a computer that doesn't have a CD drive, you'll need to attach an external CD drive to your computer for this step.
-
2
-
3Open Windows Media Player. Type windows media player into the Start window, then click Windows Media Player at the top of the Start window.
- If you don't see Windows Media Player at the top of the Start window, it isn't installed on your computer. You'll need to install and use iTunes instead.
-
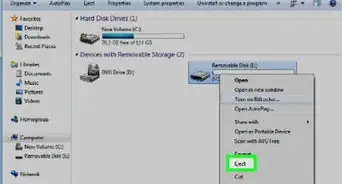
4Select your CD. Click your CD's name in the left-hand side of the Windows Media Player window.
-
5Click Rip settings. It's at the top of the Windows Media Player window. A drop-down menu will appear.
-
6Select More options…. This is in the Rip settings drop-down menu. A new window will open.
-
7Select a format. Click the "Format" drop-down box, then click the format you want to use (e.g., MP3) in the drop-down menu.
- Windows Media Player's default format (WMA) isn't compatible with some audio players, so it's best to choose a more popular format like MP3.
-
8Select a rip location. Click Change... in the "Rip music to this location" section, then select a folder (e.g., Desktop) and click OK.
-
9Click OK. It's at the bottom of the window. Doing so will save your settings and close the window.
-
10Click Rip CD. This tab is at the top of the Windows Media Player window. Your CD will begin ripping to your specified file location.
-
11Wait for the CD to finish ripping. Once Windows Media Player alerts you that the process is complete, you can proceed.
-
12Find your music files. Go to the folder location you selected, double-click the "Unknown artist" folder, and double-click the album folder inside. This will display all of the music files your ripped; at this point, you're free to move, rename, copy, or edit them as you please.


Advertisement
Community Q&A
-
QuestionWill the songs on the CD remain there? It's just copying, right?
 Community AnswerThe songs will remain on the CD. It will just copy them to the desired path on your computer.
 -
QuestionDo I need to put a folder in the library first?
 Community AnswerNot necessarily. There is already a folder created by the library. What you can do is to rename that folder from the default 'untitled' to a name of your choice.
 -
QuestionHow do I do it on a laptop?Community AnswerUse the same process as a PC (computer). You can't rip from a CD if the laptop doesn't have a CD drive.
Advertisement
Warnings
- Unfortunately, ripping a CD via Windows Media Player will result in a group of untitled tracks (e.g., "Track 1", "Track 2", etc.). You'll need to re-title these by hand, as WMP's album information lookup tool no longer works.⧼thumbs_response⧽
Advertisement


About This Article
Jack Lloyd
wikiHow Technology Writer
This article was co-authored by wikiHow staff writer, Jack Lloyd. Jack Lloyd is a Technology Writer and Editor for wikiHow. He has over two years of experience writing and editing technology-related articles. He is technology enthusiast and an English teacher. This article has been viewed 774,650 times.
How helpful is this?
Co-authors: 40
Updated: May 6, 2021
Views: 774,650
Categories: Downloading Music
Advertisement