This article was co-authored by wikiHow staff writer, Jack Lloyd. Jack Lloyd is a Technology Writer and Editor for wikiHow. He has over two years of experience writing and editing technology-related articles. He is technology enthusiast and an English teacher.
The wikiHow Tech Team also followed the article's instructions and verified that they work.
This article has been viewed 601,792 times.
Learn more...
This wikiHow teaches you how to prevent others from seeing a photo or album of yours on Facebook. You can make photos private on both the website version and the mobile version of Facebook. Keep in mind that you cannot edit the privacy options for photos, videos, and albums that you didn't upload to your profile.
Things You Should Know
- To make one photo private on a computer, click its privacy icon at the top and select "Only me."
- On an Android, iPhone, or iPad, select a photo, tap the three dots, choose "Edit privacy," then select "Only me.
- Make an entire album private on any platform by clicking the three dots and choosing the "Only me" option from the Privacy menu.
Steps
Making a Single Photo Private on Desktop
-
1Open Facebook. Go to https://www.facebook.com/ in your browser. This will open your News Feed if you're logged into Facebook.
- If you aren't logged into Facebook, enter your email address and password to do so.
-
2Go to your profile. Click your name in the top-right side of the Facebook page.Advertisement
-
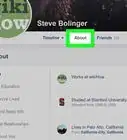
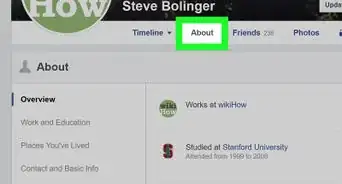
3Click the Photos tab. You'll find this below the cover photo that's at the top of your Facebook page.
-
4Select a photo category. Click a category tab (e.g., Your Photos) near the top of the page.
-
5Select a photo. Click a photo that you want to make private. This will open the photo.
- The photo must be one that you uploaded, not just one of you that someone else uploaded.
-
6Click the "Privacy" icon. This icon generally resembles a silhouette of a person (or two people) that you'll find below and to the right of your name in the upper-right side of the photo. A drop-down menu will appear.
- If clicking this icon results in a menu that says Edit Post Privacy, click Edit Post Privacy to go to the post, then click the privacy icon at the top of the post before continuing.
-
7Click More…. It's in the drop-down menu.
-
8Click Only Me. This option is in the expanded drop-down menu. Doing so will immediately change your photo's privacy so that only you can see it.


Making a Single Photo Private on Mobile
-
1Open Facebook. Tap the Facebook app icon, which resembles a white "f" on a dark-blue background. This will open your News Feed if you're logged in.
- If you aren't logged in, enter your email address and password before continuing.
-
2Tap ☰. It's either in the bottom-right corner of the screen (iPhone) or at the top of the screen (Android). A menu will appear.
-
3Tap your name. This option is at the top of the menu. Doing so opens your profile page.
-
4Scroll down and tap Photos. It's a tab below your information section.
-
5Select a photo category. Tap a category (e.g., Uploads) near the top of the screen.
-
6Select a photo. Tap a photo that you want to make private. This will open the photo.
- Make sure that your selected photo is one that you uploaded, not just one in which you're tagged. You can't adjust the privacy options for photos that aren't yours.
-
7Tap ⋯. It's in the top-right corner of the screen. A menu will appear.
- On Android, tap and hold the photo instead.
-
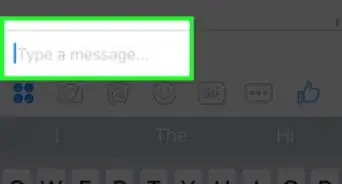
8Tap Edit Privacy. This option is in the menu. Doing so opens a new menu.
- For some photos, you'll tap Edit Post Privacy here instead.
- If you don't see this option, the photo in question is in a user-created album and cannot be made private. You'll need to make its album private instead.
-
9Tap More. It's at the bottom of the menu.
- Skip this step if there's an Only me option in your menu.
-
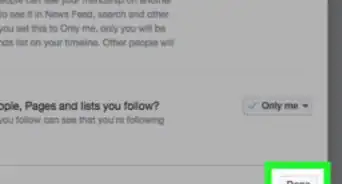
10Tap Only me. This option is in the menu.
-
11Tap Done. It's in the top-right corner of the screen. Doing so saves your photo preferences and hides it from everybody except you.


Making an Album Private on Desktop
-
1Open Facebook. Go to https://www.facebook.com/ in your browser. This will open your News Feed if you're logged into Facebook.
- If you aren't logged into Facebook, enter your email address and password to do so.
-
2Go to your profile. Click your name in the top-right side of the Facebook page.
-
3Click the Photos tab. You'll find this below the cover photo that's at the top of your Facebook page.
-
4Click the Album tab. It's in the upper-right side of the "Photos" page. This will open a list of photo albums that are on your Facebook profile.
-
5Find an album that you want to make private.
- Some Facebook albums are built into the Facebook website, and thus cannot be made private.
- The "Mobile Uploads" album (or the "iOS Photos" album for older uploads from an Apple phone) cannot have its privacy edited.
-
6Click ⋯. It's in the lower-right corner of the album cover. Doing so brings up a small menu.
- If you don't see the three-dot icon on your selected album, it can't be made private; however, you can make its individual photos and videos private instead.
-
7Click Edit. This option is in the menu. The album's page will open.
-
8Click the "Privacy" drop-down box. You'll find this at the top of the page. A drop-down menu will appear.
-
9Click Only me. It's in the drop-down box.
- If you don't see this option, click See all lists... to expand the menu.
-
10Click Save. This blue button is in the upper-right side of the page. Doing so saves your settings and changes your album to be viewable only for you.


Making an Album Private on Mobile
-
1Open Facebook. Tap the Facebook app icon, which resembles a white "f" on a dark-blue background. This will open your News Feed if you're logged in.
- If you aren't logged in, enter your email address and password before continuing.
-
2Tap ☰. It's either in the bottom-right corner of the screen (iPhone) or at the top of the screen (Android). A menu will appear.
-
3Tap your name. This option is at the top of the menu. Doing so opens your profile page.
-
4Scroll down and tap Photos. It's a tab below your information section.
-
5Tap Albums. This tab is in the upper-right side of the screen. Doing so opens a list of all of the albums that you have on your Facebook profile.
-
6Find an album that you created. You can only make private the albums that you uploaded to Facebook.
- If the photos that you want to make private are in a stock Facebook album (e.g., "Mobile Uploads"), you can still hide the individual photos in it.
-
7Tap ⋯. It's in the top-right corner of the album.
- If you don't see this option, the album's privacy cannot be edited.
-
8Tap the current privacy setting. This privacy setting will usually say Friends or Public; it is in the middle of the screen. Tapping it prompts a menu to appear.
-
9Tap Only me. It's in the menu. Doing so will save your selection and close the menu.
-
10Tap Save. This option is in the top-right corner of the screen. Your photo album preferences will be saved, meaning that only you will be able to see the album.


Community Q&A
-
QuestionHow do I make my photos post in public but not be sharable?
 Community AnswerYou can't. If something is posted in public, everyone can see it, and that means the wrong people could possibly find it and share it elsewhere. It's best to post content in private if you don't want your photos to be shared.


About This Article
To make photos private on Facebook, start by opening the app and tap the 3 horizontal lines to view the options menu. Next, tap your name at the top, scroll down, and select “Photos.” Once you’ve opened your photos, tap one that you want to make private. When it loads, tap the 3 horizontal dots on the top-right corner or tap and hold the photo to bring up an options menu. From the menu, tap “Edit post privacy,” and choose “Only me” to hide it from everyone else. If you want to make whole albums private, select the album from your photos, tap the 3 vertical dots, and hit “Edit album.” Then, change your privacy setting to “Only me.” For more tips, including how to make your Facebook photos private using the desktop site, read on!