This article was co-authored by Ryaan Tuttle. Ryaan Tuttle is a Home Improvement Specialist and the CEO of Best Handyman, Inc. in Boston, Massachusetts. With over 17 years of experience, he specializes in building home service businesses, focusing on creating scalable and efficient brands. With the help of his global team, the companies have achieved over 10+ million in sales and received recognition through magazine features, and enjoy partnerships with wikiHow and Jobber field service software. Boston Magazine and LocalBest.com have named Best Handyman Boston the Best Handyman in Boston. Ryaan holds Construction Supervisor and Home Improvement Contractor Licenses.
There are 7 references cited in this article, which can be found at the bottom of the page.
This article has been viewed 21,951 times.
If you run out of nails while using a nail gun, you can easily reload it with a new nail strip. Be sure to read over the instructions so you load your particular gun correctly. For example, if you are loading Trim, Ridgid, or Dewalt Nail Guns, connect the gun to an air compressor first. Then, simply slide the nail strips into the magazine with the nail gun facing upside down. By following proper safety equipment, you can load a nail gun without harming yourself or the machine.
Steps
Keeping Safe
-
1
-
2Ensure the nail gun is turned off when you load it. Do not plug in your nail gun until after you finish loading it with a new nail strip. Double-check the power switch is in the off position, as well.[3]
- This way, you cannot accidentally release a nail as you are getting the machine ready.
Advertisement -
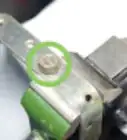
3Read the user manual of your particular nail gun to locate the magazine. Before you operate the nail gun, review the loading instructions so you don’t injure yourself or load the nails incorrectly. When reviewing the instructions, determine where the magazine is and what type of nail strip to purchase. Typically, the magazine is located along the bottom of the machine.[4]
- The instructions also detail where the pusher or latch is and whether or not you should connect the gun to an air compressor.
- In general, nail gun loads roughly the same way but the location of the magazine and type of nail strip may vary from model to model. For instance, some models have the magazine along the top of the machine, while others may be located near the handle.
- The pusher is usually located at the end of the magazine.
- Make sure to follow the instructions in the manual to properly lubricate the nail gun before you use it.
-
4Position the nail gun upside down before you load it. To avoid any flyaway nails, point your nail gun toward the ground when you are ready to load it. Since most of the magazines are located on the bottom of the machine, this also makes it easier to load.[5]
-
5Purchase the correct nail strip for your particular nail gun. After you review the user’s manual for your nail gun, visit a home supply store or tool shop, and get the correct nail strips for your machine. This is a strip of nails glued loosely together that feeds into the magazine of your nail gun. Typically, each strip has 10-20 nails. If you don’t use the correct nails, they can get jammed in the machine.[6]
- If you are having trouble determining what nail strip you need, ask a store associate for assistance. They can help you pick out the right one.


Loading Trim, Ridgid, and Dewalt Nail Guns
-
1Check the gun’s magazine to ensure there are no nails inside. Before you add another nail strip to your machine, first open up the magazine to inspect for leftover nails. To do this, locate the magazine, remove the pusher, and look inside. If you find any, remove them with your fingers.[7]
- If there is a loose nail inside the magazine, you can get the strip jammed when you reload.
-
2Connect your nail gun to an air compressor. Follow the instructions of your particular machine to ensure you connect the compressor correctly, as the directions may vary from model to model. In general, push the tip of the air compressor tube into the coupler of your nail gun and replace the sleeve over top of the coupler.[8]
- The coupler is the hole you insert the tube into, and the sleeve is a metal casing that covers the coupler.
-
3Slide the nail strip into the magazine with the nails pointing forward. Slide the pusher out of the magazine, and line up the nail strip with the magazine of your gun. Push the nail strip into the magazine with moderate pressure, and continue pushing the nail strip into the magazine until you hear a clicking noise. Ensure the nails are pointed toward the front of the gun and the strip is angled according to the directions.[9] [10]
- The nail strips should easily slide into place without much force.
-
4Replace the pusher in the magazine to hold the nail strip in place. The pusher of the magazine holds the nail strip in place and loads the individual nails into the drive mechanism. Once the strip of nails is in place, replace the pusher so it rests against the last nail.[11]
- This way, the nail strip will not fall out as you use the machine.
- If you nail gun dents the wood but doesn’t drive a nail, remove the nail strip and check for any jams in the magazine.


Inserting Brads into a Stanley Staple Gun
-
1Squeeze the latch and pull down on the magazine. The latch is located on the nail gun's magazine, and it keeps the nails in place. Many staple guns can also be used with nail strips as a way to easily drive nails into a wall. Check your instructions to ensure your model works for this. To access the magazine, squeeze the latch on the outside of it and slightly push the magazine forward so it drops down.[12]
- Typically, brads are the only kind of nails that are compatible with staple guns.
-
2Drop the brads into the channel. Ensure your brads are compatible with your specific model before you put them into the machine. Then, simply place the strip of brads into the magazine channel. The gun should have arrows on the magazine to show you which way to load the brads. As you do this, tilt the staple gun to the side so the strip of brads is flush against the inner wall.[13]
- If the brads aren’t flush, adjust the nail strip with your fingers until they are.
-
3Place the latch back in place while ensuring the brad still stays in place. After you ensure the strip of brads is flush against the channel wall, replace the latch by sliding it over the outside of the magazine.[14]
- This way, the brad strip will not fall over as you use the nail gun.


Warnings
- If you do not wear safety goggles and handle the nail gun with care, you can get injured when loading or using it.⧼thumbs_response⧽


References
- ↑ Ryaan Tuttle. Home Improvement Specialist. Expert Interview. 18 June 2021.
- ↑ https://www.familyhandyman.com/tools/air-tools/how-to-use-a-trim-nailer-gun/view-all/
- ↑ https://www.bhg.com/home-improvement/remodeling/how-to-use-a-nail-gun/
- ↑ https://www.osha.gov/Publications/NailgunFinal_508_02_optimized.pdf
- ↑ https://youtu.be/ogJl8ghEIPk?t=26s
- ↑ https://bestofmachinery.com/how-to-load-a-nail-gun/
- ↑ https://bestofmachinery.com/how-to-load-a-nail-gun/
- ↑ https://youtu.be/UOH_8F7cDgU?t=53s
- ↑ Ryaan Tuttle. Home Improvement Specialist. Expert Interview. 18 June 2021.
About This Article