This article was co-authored by wikiHow staff writer, Darlene Antonelli, MA. Darlene Antonelli is a Technology Writer and Editor for wikiHow. Darlene has experience teaching college courses, writing technology-related articles, and working hands-on in the technology field. She earned an MA in Writing from Rowan University in 2012 and wrote her thesis on online communities and the personalities curated in such communities.
The wikiHow Tech Team also followed the article's instructions and verified that they work.
This article has been viewed 28,743 times.
Learn more...
Are you running low on storage space on your PC or Mac? If you use Dropbox to store files, you can use Selective Sync or Smart Sync to choose which folders save to your computer and which stay safe in the cloud. This wikiHow article will show you how to delete Dropbox folders from your hard drive and prevent them from automatically syncing using the Dropbox's desktop app.
Steps
Using Selective Sync
-
1Find and click the Dropbox icon in your notification area. It looks like a tiny box next to the battery, wi-fi, and sound icons on your desktop. Clicking will open a pop-up window.
- On Windows, your notification area is located in the lower-right corner of your taskbar at the bottom of your screen.
- On a Mac, you can find it on your gray menu bar in the upper-right corner of your screen.
- Selective Sync is available for every Dropbox account, including free ones, as long as you have the Dropbox app.
-
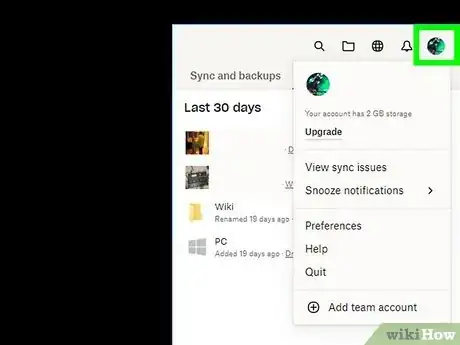
2Click your avatar icon in the pop-up. This button is located in the upper-right corner of the pop-up window. It will open a drop-down menu.Advertisement
-
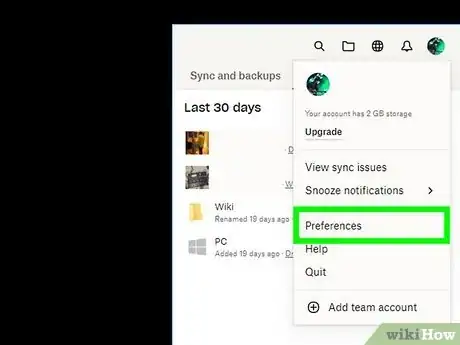
3Click Preferences. It will open your app settings in a new pop-up window.
-
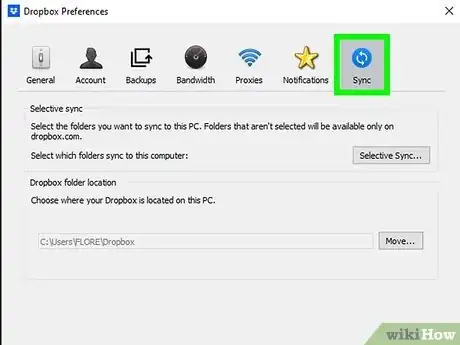
4Click the Sync tab. The Sync icon looks like two rotating arrows in a blue circle icon.
-
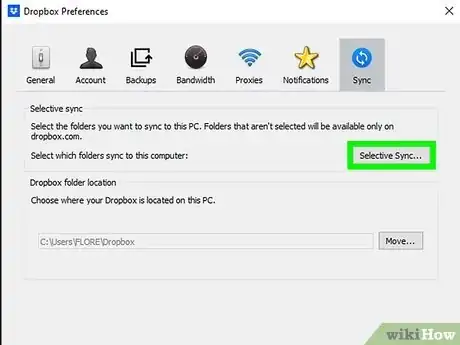
5Click the Selective Sync button. It will open a new pop-up and show you a list of all your Dropbox folders. Here you can select which folders to automatically sync to your computer.
- All unchecked folders will be deleted from your computer and kept only online.
- On some versions of the Dropbox app, this button may be named Choose folders to sync or Change Settings under the Selective Sync heading.
-
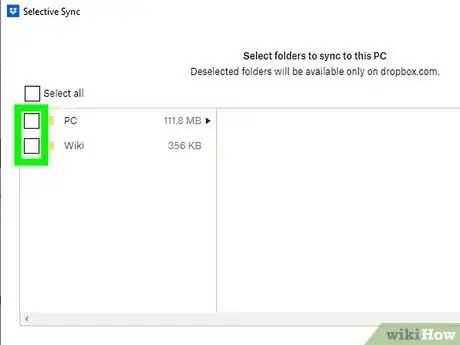
6Click and uncheck the box next to every folder on the list. This will delete all the unchecked folders from your computer, and keep them only online. Since you want to keep files Online Only, uncheck these folders so they aren't stored locally on your computer.
-
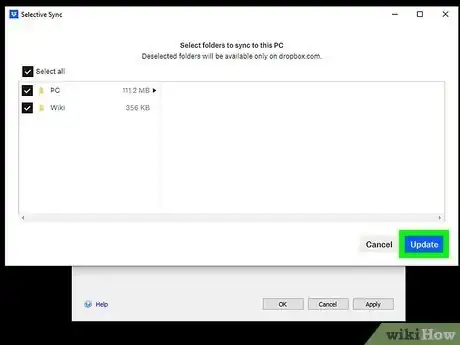
7Click Update. It's in the lower-right corner of the window. You will have to confirm your action in a new pop-up.
-
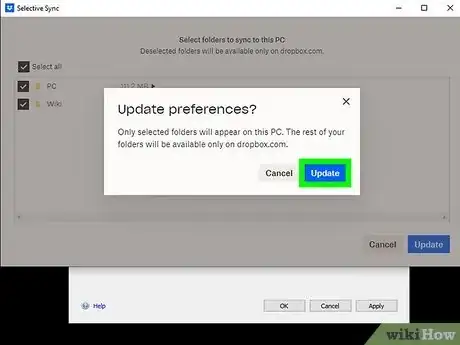
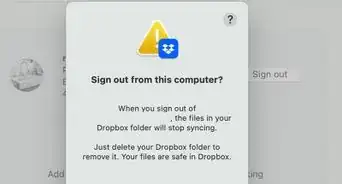
8Click Update to confirm. This will delete all the unchecked folders and all of their contents from your computer. They will still be available online on the web and on all your other devices.[1]
- To view these folders, you have to visit Dropbox online since they will not appear on your computer.
- Alternatively, you can download these files to your local storage and make them offline as well as online.
Using Smart Sync
-
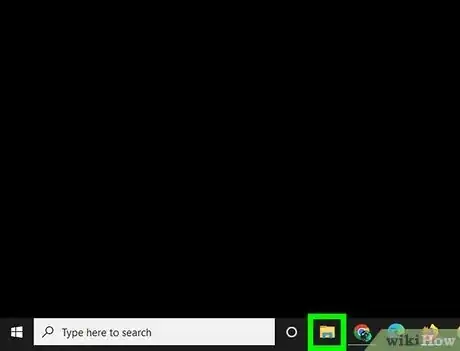
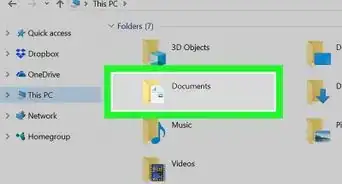
1Open Finder (Mac) or File Explorer (Windows) . You can find the icons to open Finder in the Dock on Mac or open File Explorer from the Start menu in Windows.
- Smart Sync is only available for DropBox Plus, Family, Professional, and Business accounts using the Dropbox app.
-
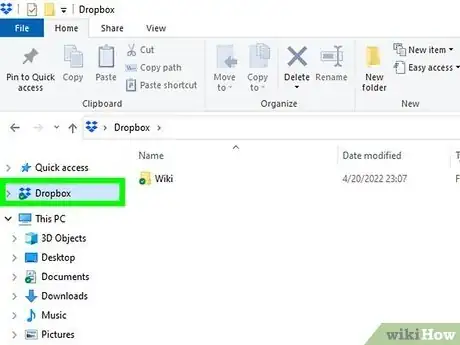
2Go to your Dropbox folder. You can navigate to it by clicking the folder icon in the panel on the left side of the window.
-
3Right-click the file(s)/folder(s) you want to set to online-only. You can repeat this process for every file or folder that you want to remove from your local storage.
-
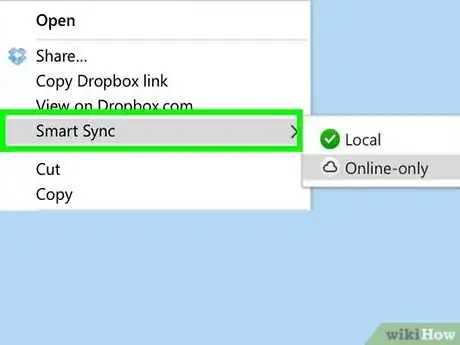
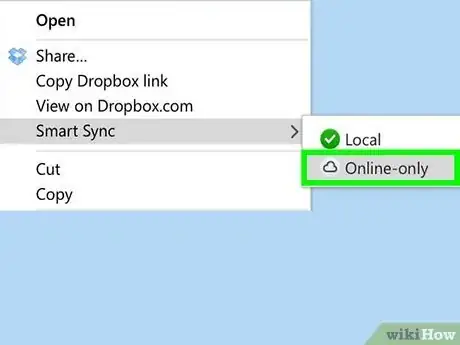
4Hover your mouse over Smart Sync and click Online Only. This will change the folder to an "online only" status and remove any local copies from your computer.[2]
References
About This Article
1. Click the Dropbox icon in your notification area.
2. Click the gear icon.
3. Click the Sync tab.
4. Click Selective Sync or Choose folder to sync.
5. Uncheck all the folders.
6. Click Update.
7. Click Update again to confirm.
