This article was co-authored by Emily Fazio. Emily Fazio is a Home Improvement and DIY Specialist and the author behind Merrypad, a home improvement and DIY lifestyle blog. Emily develops content for Discovery including HGTV.com and DIYNetwork.com, among other influential interior design and homesteading websites. Her partnerships include companies such as Legrand, Sherwin-Williams, Stihl, and Kohler. Emily studied at St. Bonaventure University.
There are 9 references cited in this article, which can be found at the bottom of the page.
This article has been viewed 674,349 times.
Hanging a new door in a door frame seems like a simple task, but doing it incorrectly can result in uneven gaps in the spaces around the door, or worse, a door that won't even latch. Following these steps will help you to avoid possible problems.
Things You Should Know
- Buy a door that fits the opening. Allow for a gap of 1⁄8 inch (3.2 mm) on the knob side and above the door, and a gap of 3⁄8 to 1⁄2 inch (9.5 to 12.7 mm) under the door.
- Hold the hinges on the door's edge and trace around them to mark the locations of the recesses. Cut the hinge recesses in the door and drill the pilot holes.
- Screw the hinges on the door. Then, mount the hinges to the door frame and check that the door opens and closes correctly.
Steps
Choosing a Door
-
1Measure the door opening.
- If your home is very old, first check if the top corners are square. One corner could be up to 1/4" (6 mm) higher than the other. Use a large framing square if you have one or use a square piece of cardboard.
- Measure the width of the opening in three places, because if a doorjamb is bowed, the width will be less in the center.[1]
- Measure the height of the opening at both sides of the doorway. If they are not the same, check if the floor is level. If the floor is higher at one side, the door should be cut to have this angle at the bottom. [2]
-
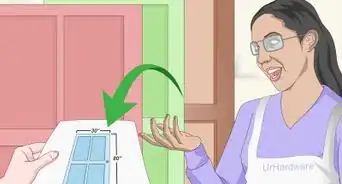
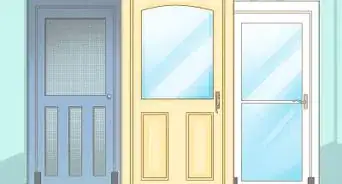
2Buy a door to fit your frame. Interior doors are normally sold only in widths of 28", 30", 34" and 36" (71cm, 76cm, 86cm, 91cm). Almost all are 80" (203" high, so the door may have to be cut at the bottom. The door should be only slightly narrower, (about 1⁄8 inch (0.32 cm), than the finished opening. If the width of the door you buy is slightly too wide you can cut it to fit. .Advertisement
-
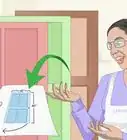
3Mark the door for trimming.
- Allow for a gap of 1⁄8 inch (3.2 mm) along the doorknob side and above the door. If a gap is too narrow the door may not close in hot, humid weather because it will expand.
- Allow for a gap of 3⁄8 to 1⁄2 inch (9.5 to 12.7 mm) under the door. If the floor is not level, cut the door at an angle to allow for gap that is the same on both sides.
- Allow for a larger gap at the bottom if the door swings out over a carpet.
Altering the Door to Fit
-
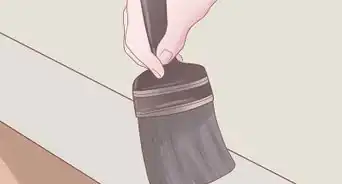
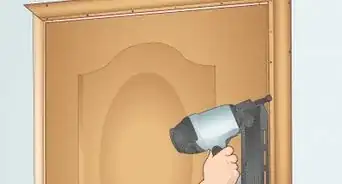
1Trim the door to fit your frame if necessary.Saw, plane, or use a belt sander to remove the wood up to the pencil marks, then sand the edges until they are smooth. It is better to trim too little than too much.[3]
- If you’re replacing an old door, you can lay the old door on top of the new door and trace around it to easily mark where your cuts will be.
- If you must take off more than about 1⁄8 inch (0.32 cm) of the door, use a circular saw. For smaller amounts, use a plane or a belt sander.
-
2Check if the door fits, with about an 1/8" gap on one side. With shims under the door and someone else to help you hold it up, place the door in the frame and see if it fits properly. If it doesn't fit, you will need to trim it again until the fit is perfect.
-
3Mark the locations of the hinges. Place the door on its edge with the hinge edge facing upward. Hold the hinges on the door's edge to trace around them to mark the locations of the recesses.
- Before marking the locations, determine the direction that the door will open. The recesses will be narrower than the door's width, but how much narrower depends on the width of the hinges. The door should open into the room, and you must be able to reach the light switch when entering, that is, the door knob side should be the side with the light switch.
- Hold one hinge 7 inches (18 cm) from the top of the door and trace around it with a sharp pencil.
- Hold the other hinge 11 inches (28 cm) from the bottom of the door and trace around it.[4]
-
4Cut hinge recesses (mortises) in the door. Use a hammer and chisel to make the recesses. Chisel out the wood until the hinge is flush with the door's edge.[5]
- Be careful. If you chisel out too much, it will be hard to fix.
-
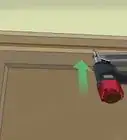
5Drill pilot holes in the door.[6] With each hinge flap in its mortise, mark the screw positions with a pencil. Remove the hinges and use a drill bit that is slightly thinner than the screws to drill pilot holes where they are marked by the pencil. To center the pilot holes perfectly, you could use a special bit called a Vix-Bit, available at many hardware stores and home centers. To center the holes perfectly you could also mount each hinge with one screw and then drill the other 2 pilot holes.
Attaching the Door to the Frame
-
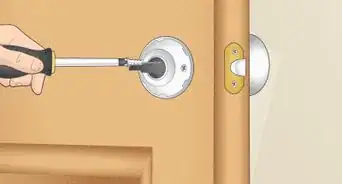
1Screw the hinges onto the door. This is best done with a drill, but can also be accomplished with a screwdriver if necessary.
- The hinges must be perfectly flush with the door edge when screwed on, and with no angle..
-
2Mark the hinge positions on the frame. Place objects such as screwdrivers or shims at the bottom of the doorway. Have somebody hold the door in the frame in exactly the position that you want it to hang. Draw around the hinges with a sharp pencil.
-
3Chisel hinge recesses. After carefully putting the door aside, cut mortises in the door frame in the same way that you did on the door. Take one hinge apart and hold the loose flap in each of the recesses in the frame to check that that it is the correct depth.[7]
-
4Mount the hinges to the door frame.
- While holding the door in place with the hinges in the recesses, drill pilot holes through the centers of all the holes in both hinges. Use a Vix-Bit if you have one.[8]
- While holding the door in place with the hinges in the recesses, drill pilot holes through the centers of all the holes in both hinges. Use a Vix-Bit if you have one.[8]
-
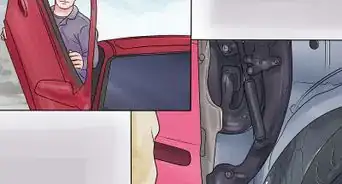
5Check that the door fits and closes correctly.
- If there is no gap at the top or the side of the door, use a plane or belt sander to create a gap.
- If the door does not completely close, the hinges may be mounted at a very slight angle. To correct this, loosen the screws that mount the door to the frame. Slip in a thin strip of cardboard to change the angle, then tighten the screws. You may have to make it thicker by using 2 or 3 thin strips.
-
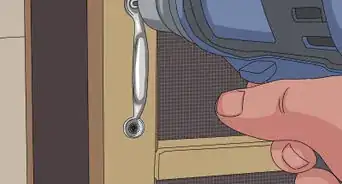
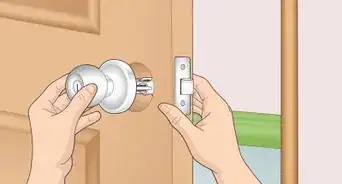
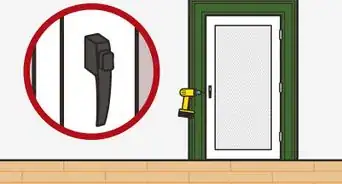
6Mount the latch and doorknob. Follow the instructions in the package. If the frame already has a strike plate, measure how high it is from the floor and mark the corresponding position on the door. install it.[9]
- Many doorknob kits come with a template to help you drill and chisel out the door to install the latch and doorknob. Mount the strike plate. It will be in the box with the doorknob and latch.
Community Q&A
-
QuestionHow do you stop a door from swinging open?
 Community AnswerYou can remove the hinge pin, either from the top or the bottom, bend it slightly and reinstall. This will stop the ghosting whether opening or closing.
 -
QuestionWe are working with an existing door and frame, but just reversing the swing. The door now sticks in several spots. How can we fix this?
 DonaganTop AnswererPlane or sand the door where it sticks.
 -
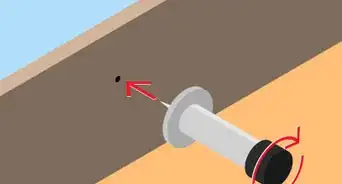
QuestionHow do I cut a hole for the handle?
 Community AnswerUse a hole saw; you can get them in a set or purchase only the size you need for your hole. You need a drill to attach the hole saw to, so take that into consideration when planning for your job.
Warnings
- When using a chisel, saw, or drill, make sure that you are wearing safety goggles and clear the area of potential hazards. If you’re using a drill, keep your hair, jewelry, and any loose articles of clothing away from the bit. Find a steady standing position and remember to watch your fingers when you start working.[10]⧼thumbs_response⧽
Things You'll Need
- Hinges
- Screws
- Pencil
- Tape measure
- Panel saw
- Carpenter's plane or belt sander
- Medium chisel
- Hammer
- Drill, with drill bits
- Sandpaper
- Wooden wedges
- Safety goggles
- Supports to rest the door on, such as sawhorses or buckets


References
- ↑ https://www.familyhandyman.com/doors/installation/how-to-replace-an-exterior-door/
- ↑ https://www.familyhandyman.com/doors/tips-for-hanging-doors/
- ↑ https://www.familyhandyman.com/doors/installation/how-to-cut-off-wood-door-bottoms/
- ↑ https://www.familyhandyman.com/doors/tips-for-hanging-doors/
- ↑ https://www.todayshomeowner.com/video/how-to-cut-mortises-for-door-hinges-with-a-chisel/
- ↑ https://www.bobvila.com/articles/pilot-holes/
- ↑ https://youtu.be/o4gRXFKe8wE?t=246
- ↑ https://youtu.be/o4gRXFKe8wE?t=717
- ↑ https://www.thisoldhouse.com/doors/21016617/how-to-hang-an-interior-door
About This Article

To hang a door correctly, start by measuring the doorway, then purchase a door that's slightly smaller than the opening so the door can be opened and closed properly. Next, place the hinges on the long edge of the door and use a drill and screws to secure them. Then, use a pencil to lightly trace the hinge positions on the door frame and mark pilot holes. Lastly, use a drill to affix the hinges on the frame with screws. For tips on trimming a door to make it fit into the frame opening, read on!