X
wikiHow is a “wiki,” similar to Wikipedia, which means that many of our articles are co-written by multiple authors. To create this article, volunteer authors worked to edit and improve it over time.
The wikiHow Tech Team also followed the article's instructions and verified that they work.
This article has been viewed 92,344 times.
Learn more...
Formatting an SSD drive is useful in the event you want to sell the drive, dispose of the drive, or install a new operating system. You can format an SSD drive using a Windows or Mac computer.
Steps
Method 1
Method 1 of 2:
Formatting an SSD Drive in Windows
-
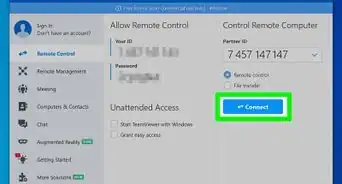
1Verify that the SSD drive you want formatted is either installed in your computer, or attached to your computer via USB cable.
-
2Go to “Start” and click on “Control Panel.”Advertisement
-
3Click on “System and Maintenance,” then click on “Administrative tools.”
-
4Open the “Computer Management” application.
-
5Click on “Disk Management” in the left pane of the Computer Management window.
-
6Click on the name of your SSD drive in the list of drives displayed on-screen.
-
7Right-click on the SSD drive, then select “Format.”
-
8Select your preferred values from the “File system” and “Allocation unit size” drop-down menus.
-
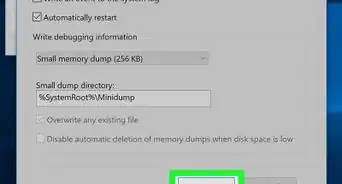
9Place a checkmark next to “Perform a quick format,” then click on “OK.” Your computer will format your SSD drive.


Advertisement
Method 2
Method 2 of 2:
Formatting an SSD Drive on Mac OS X
-
1Verify that the SSD drive you want formatted is either installed in your computer, or attached to your computer via USB cable.
-
2Open Finder to verify that the SSD drive displays in your list of devices.
-
3Click on “Applications,” then click on “Utilities.”
-
4Launch the “Disk Utility” application.
-
5Click on the name of your SSD drive in the left pane of Disk Utility.
-
6Click on the “Erase” tab, then take note of the value next to “Partition Map Scheme,” which is located at the bottom of the window.
-
7Verify that the value next to Partition Map Scheme reads, “Master Boot Record” or “Apple Partition Map,” then click on the “Partition” tab.
- If the value next to Partition Map Scheme reads, “GUID Partition Table,” select “Mac OS X Extended (Journaled)” from the Format drop-down menu, click on “Erase,” then skip to step #13.
-
8Select the number of partitions you want from within the “Partition Layout” drop-down menu.
-
9Type a name for the partition, or SSD drive, under “Partition Information,” then select “Mac OS Extended (Journaled) from the Format drop-down menu.
-
10Click on the name of the SSD drive in the middle window, then click on “Options.”
-
11Select “GUID Partition Table,” then click on “OK.”
-
12Click on “Apply,” then click on “Partition” to verify that you want to format your SSD drive.
-
13Wait for Disk Utility to format your SSD drive. The name of the drive will display in Finder when complete.[1]


Advertisement
Community Q&A
-
QuestionI only want to enable the operating system and programs on the SSD drive?
 jonas ilverCommunity AnswerYou can use the chrome recovery utility to format storage devices on a Chromebook.
Advertisement
Warnings
- If using a Windows computer, avoid defragmenting or performing a full format on your SSD drive. Since SSD drives have a limited number of read-write cycles, opt for the quick format option to help maintain the overall efficacy of your SSD drive.⧼thumbs_response⧽
Advertisement


About This Article
Advertisement