This article was co-authored by wikiHow Staff. Our trained team of editors and researchers validate articles for accuracy and comprehensiveness. wikiHow's Content Management Team carefully monitors the work from our editorial staff to ensure that each article is backed by trusted research and meets our high quality standards.
The wikiHow Tech Team also followed the article's instructions and verified that they work.
This article has been viewed 24,073 times.
Learn more...
This wikiHow teaches you how to send photos to the apps you have on your iPhone or to transfer them to your computer.
Steps
Importing Photos to Apps
-
1Open the Photos app. It’s an icon that looks like a flower with multicolored petals.
-
2Tap Select. It’s in the upper right corner of the screen.Advertisement
-
3Tap a photo. A checkmark will indicate it’s selected.
-
4Tap the square icon with an upward arrow. It’s in the lower left corner of the screen.
-
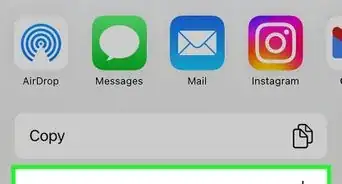
5Scroll right through the selection of apps.
- If you do not see the app you’re looking for you can tap More. It's an icon that has three horizontal dots on it and is all the way to the right. This will allow you to add the app that you can send your photos to.
- You can also press and hold on the 3 lines next to an app to move it within the list. This way you can make the apps you use frequently appear first when you select an app.
-
6Tap an app. This will allow you to send, post, or share a picture in that app.
-
7Add text to the post or message. This can be a description of your photo or anything else you want friends who view it to know.
- You may also be required to enter information such as the recipient or a subject line for such apps as Mail and Messages.
-
8Tap the Send or Share button for that app. Your picture will be posted or sent to a friend depending on the app.


Importing Pictures to a Mac
-
1Connect your iPhone to your Mac. You can use your charger cable to connect via the USB port.
-
2Wait for the Photos app to open on your Mac. If it doesn't happen automatically, click the magnifying glass at the top-right corner of your screen, type in "photos" and click on the Photos app from your options.
- If you have a passcode on your iPhone, you will need to enter it to proceed.
- If this is the first time you’ve connected to your Mac, tap Trust This Computer on your iPhone.
-
3Click the Import tab. You can see all your photos from your iPhone in this tab.
- This is only necessary if you weren’t automatically directed to the Import tab when you connected your iPhone.
-
4Click on the photos you want to import.
- If you want to import all your photos not already on your Mac, then you can click Import All New Photos in the upper- right corner.
-
5Click Import Selected. It’s in the upper right area of the app and your photos will be imported to your Mac.
- After the import is finished, you will have the option to delete the imported photos from your iPhone by clicking Delete Items. If you wish to keep them, click Keep Items.


Importing Pictures to a PC
-
1Connect your iPhone to your PC. You can use your charger cable to connect via the USB port.
-
2Open Windows Photos. The icon is two mountain peaks in a square.
- Photos may open on its own when you plug your phone in.
-
3Click the square button with a downward arrow. It’s towards the top-right corner of the window and displays photos to import.
- If Photos opened automatically when you connected to the computer, then you will not need to push the import button.
- If you get a message saying “There’s nothing to import,” enter your passcode into your iPhone then Try Again.
- If this is the first time you’ve connected to your PC, you may also have to tap Trust This Computer on your iPhone.
-
4Click the photos you want to import. A checkmark will indicate they’re selected.
- Photos that have not previously been imported will be automatically selected. You can push Clear All at the top of the window if you’d rather pick photos yourself. You can also press Clear by a month to clear just that month’s photos.
-
5Click Continue.
-
6Choose how and where you want the pictures imported. By default, it will go to your Pictures file, but you can change the destination.
- You can also choose if you want the pictures organized into folders by the month or day. Additionally, you can check the box by “Delete imported items from Apple iPhone after importing” if you do not wish to keep the photos on your iPhone.
-
7Click Import. The photos will be exported from your iPhone to the file of your choosing on your PC.
- A message from Photos will pop up when the process is complete.


Community Q&A
-
QuestionI am trying to import photos from my iPhone to Picasa program on my laptop. The message I get is "Zero photos available." I have connected the phone to the USB port and opened the Picasa program, what is wrong?
 MinoriteCommunity AnswerFirst, Picasa is deprecated. Second, there is a chance that it can't import or open HEIC photos correctly. Connect your device via USB, open File Explorer and navigate to iPhone (connected as an external drive in Explorer sidebar) > DCIM folder, and copy photos from 100APPLE, 101APPLE, etc. albums. Then use any free HEIC converter and convert photos from HEIC to JPEG. iMazing is a good offline one, but there are hundreds of others.
 -
QuestionWhy won't it import all of my photos?
 Community AnswerThe iPhone won't import photos in the form of files they do not recognize, duplicates, or files that are too big. For example, high-quality photos, long videos, or sometimes what seem to be perfectly ordinary photos. It takes longer, but select a large number of photos the device you are saving them to, click Share, and then click Save Photos.


About This Article

1. Open Photos.
2. Tap Select.
3. Tap a photo.
4. Tap the square icon with an upward arrow.
5. Scroll right through the selection of apps.
6. Tap an app.
7. Add text to message or post.
8. Tap the Send or Share button.