This article was co-authored by Travis Page and by wikiHow staff writer, Travis Boylls. Travis Page is the Head of Product at Cinebody. Cinebody is a user-directed video content software company headquartered in Denver, Colorado that empowers brands to create instant, authentic, and engaging video content with anyone on earth. He holds a BS in Finance from the University of Colorado, Denver.
The wikiHow Tech Team also followed the article's instructions and verified that they work.
This article has been viewed 562,441 times.
This wikiHow article teaches you how to edit a basic video to fit common editing practices on YouTube. You can download and use Windows Movie Maker to do this on a Windows computer, while Mac users can edit videos with iMovie. If you have already uploaded a video to YouTube, you can use the YouTube video editor to cut sections of a video, blur objects or faces, replace audio, or add end screens to your video.
Steps
Using YouTube Video Editor
-
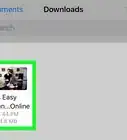
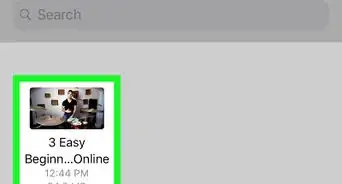
1Open a video in YouTube video editor. YouTube video editor is a tool you can use to make minor changes to videos you have already uploaded to YouTube. It's not as robust as other videos editors. However, it can be used to make remove sections of a video, replace audio, or blur faces or objects to avoid copyright strikes or other legal complaints. Use the following steps to open a video in YouTube Video Editor:
- Go to https://studio.youtube.com/ in a web browser and log in.
- Click Content in the menu panel to the left.
- Hover over the video you want to edit.
- Click the pencil icon that says "Details" below the mouse cursor.
- Click Editor in the menu panel to the left.
-
2Use the slider bar to the left to zoom in and out. Once you are in the video editor interface, you can use the slider bar to the left above the timeline at the bottom to zoom in and zoom out. It's the slider bar next to an icon that resembles a magnifying glass. Click and drag the slider bar towards the magnifying glass with a minus sign (-) to zoom out. Click and drag the slider bar towards the magnifying glass with a plus sign (+) to zoom in.Advertisement
-
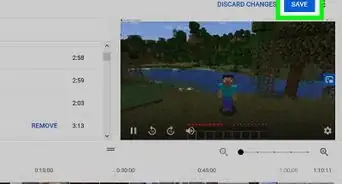
3Trim the video to remove parts of a video. You can use the Trim feature to remove sections of a video. This is useful a section of your video gets a copyright claim or another content violation. Once you have trimmed your video, you will not be able to replace the audio. Use the following steps to remove sections of a video using the Trim feature:
- Click Trim above the timeline at the bottom and to the left.
- Click anywhere within the section of the video you want to cut.
- Click Split at the bottom of the screen.
- Click and drag the blue bars at the beginning, end, or middle of the timeline to remove sections of a video. The dark areas of the timeline are the parts that will be cut.
- Click Preview at the bottom of the screen to view the video with the cuts.
- Click Save in the upper-right corner to save the edits.
-
4Add audio to a video. This feature allows you to add or replace the audio during a section of your video. This is useful if the music in your video gets flagged as copyright. Use the following steps to add music to your video:
- Click where your want to add music in the timeline.
- Click the plus icon (+) next to the music note icon in the timeline.
- Use the search bar at the top of the music panel on the left to search for music.
- Click the play triangle icon next to a song to preview it.
- Click Add next to a song to add it to your video.
- Click the icon that resembles three slider bars in the audio clip in the timeline.
- Drag the slider bar next to "Mix Level" to adjust the volume of the audio clip.
-
5Add a face blur to your video. Face blur is useful if you upload a video to YouTube and someone informs you that they don't want to be in the video. YouTube automatically detects faces in the video and applies the face blur automatically. Use the following steps to add face blur to your video:
- Click the plus (+) icon next to the icon that resembles blurry dots in the timeline.
- Click Face blur and wait for YouTube to process the video.
- Click the face(s) you want to apply a face blur to.
- Click Apply in the lower-right corner.
-
6Add a custom blur. A custom blur is useful for blurring out specific objects that you don't want in your video (i.e, license plates, trademark logos, private information, etc). You can set it so that YouTube tracks the object you want to blur automatically, or you can set the blur in a fixed position. Use the following steps to add a custom blur to your video:
- Click where you can to apply a blur in the timeline.
- Click the plus (+) icon next to the icon that resembles blurry dots in the timeline.
- Click Custom Blur.
- Click and drag the edges of the blue bar in the timeline to adjust the duration of the blur.
- Click and drag the blur in the video preview to the left to place the blur in the video.
- Click and drag the blue dots around the blur to adjust the size of the blur.
- Click the radio option next to "Rectangle" or "Oval" to select the shape of the blur.
- Click the radio option next to "Track object" or "Fixed blur position" is to indicate the blur behavior.
-
7Add an end screen to the video. End screens can encourage your viewers to click another video, playlist, channel, link, or subscribe to your channel. Use the following steps to add an end screen to your video:
- Click the plus (+) icon next to the icon that resembles a video screen in the timeline at the bottom.
- Click an end screen type you want to add.
- Click one of the options for your end screen in the panel to the left.
-
8Click Save. It's the blue button in the upper-right corner. This saves your video. You will still keep all the views and comments the video previously had, but going forward, viewers will view the video with the edits you made.
- It may take up to 3 hours for the changes to take effect in your video.


Using Windows Movie Maker
-
1Download Windows Movie Maker. Although Windows Movie Maker is no longer supported by Microsoft, you can download it for free from a third-party site.
- Windows Movie Maker is similar to the old YouTube editor.
-
2Open your video in Movie Maker. Go to the video that you want to edit on your computer, then do the following:
- Right-click the video.
- Select Open with
- Click Movie Maker
-
3Add other content to Movie Maker. If you're piecing together several clips of a video or adding photos to your completed project, you can add the necessary files to Windows Movie Maker:
- Click the Home tab.
- Click Add videos and photos
- Select a video or a photo (or hold down Ctrl while clicking individual files to select multiple files at once).
- Click Open
-
4Organize your videos and photos. You can rearrange the order of video clips by clicking and dragging them left or right on the timeline.
- Dragging a video clip or a photo to the far-left will place it at the beginning of the video, while dragging it to the far-right will place it at the end of the video.
-
5Add a title. While not all videos need an introductory title slide, placing one at the beginning of the video allows you to list information about the video or its contents. To do so:
- Click Title on the Home tab's toolbar.
- Highlight the "My Movie" text in the preview section on the left side of the window.
- Type in your preferred movie title.
-
6Select a title transition. You can do this by clicking one of the options in the "Effects" section of the toolbar that appears at the top of the window while your title slide is selected.
- Hovering your mouse cursor over an "Effects" option allows you to preview the transition on the left side of the window.
- You can also adjust your title slide's length by clicking the title's icon in the timeline and then changing the number in the "Text duration" text box.
-
7Insert transitions between pieces of content. Jumping from one video to the next (or moving from a video to a photo) can be jarring, but Windows Movie Maker has several options for inserting a smooth transition:
- Click the video clip or photo before which you want to place a transition.
- Click the Animations tab.
- Select a transition, or preview a transition by hovering over it with your mouse.
- If you want to place a transition in the middle of one video, you can click and drag the black vertical bar over to the section where you want to place the transition, right-click the bar, click Split, and then insert the transition.
-
8Cut sections of your video. Many YouTube videos cut out uninteresting or lengthy sections of videos in order to present a cleaner, more polished look. This kind of edit is called a "jump cut", and you can recreate it in Windows Movie Maker:
- Move the bar to the beginning of the section that you want to cut.
- Right-click the bar, then click Split
- Move the bar to the end of the section that you want to cut.
- Right-click the bar and click Split again.
- Click the section that you want to cut, then press Delete.
-
9Export your video. Once you've finished editing your video, you can save it as a whole video file by doing the following:
- Click the Home tab if you aren't already on it.
- Click Save movie
- Click Recommended for this project in the drop-down menu.
- Enter a name for the video file.
- Click a folder in which you want to save the file (e.g., Desktop) on the left side of the window.
- Click Save
-
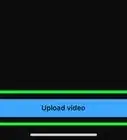
10Upload your video to YouTube. Once your video finishes exporting to a file, all that's left to do is upload the file to YouTube and publish it there.
- If you haven't verified your YouTube account, you won't be able to upload videos that are more than 15 minutes long.


Using iMovie
-
1Open your video in iMovie. Find the video that you want to upload to YouTube on your computer, then do the following:
- Click the video file once to select it.
- Click File
- Select Open With
- Click iMovie
-
2Add other files to your iMovie presentation. If you have additional video clips or photos that you want to place in iMovie, you can do the following to add them:
- Click the Media tab at the top of iMovie.
- Click the "Import" button, which resembles a downward-facing arrow.
- Select a content location (e.g., your Mac).
- Select a video or a photo (or hold down ⌘ Command while clicking individual files to select them all at once).
- Click Import Selected
-
3Rearrange your content. In the timeline of content near the bottom of the iMovie window, click and drag your video clips or photos left or right to move them closer to or farther from the beginning of the movie.
-
4Add a title. While unnecessary, adding a title will help organize your video, and it also gives you the chance to explain what will be in the video:[1]
- Click the Titles tab above the browser section of iMovie.
- Select a title template to preview its animation.
- Click and drag the title template onto the timeline above the video where you want the title to play.
- Double-click the title's text in the viewer, then replace it with your preferred title text.
-
5Insert transitions between pieces of content. Especially if you're working with more than one video clip at a time, you may want to add transition animations between them in order to smooth out the video:
- Click the Transitions tab above the browser section.
- Select a transition to preview it.
- Click and drag a transition to rest between two video clips, then drop the transition there.
-
6Cut sections of your video. Many YouTube videos cut out uninteresting or lengthy sections of videos in order to present a cleaner, more polished look. This kind of edit is called a "jump cut"; you can use this style of editing in iMovie by doing the following:[2]
- Select the clip from which you want to cut content.
- Move the vertical bar (also called the "Playhead") to the beginning of the section that you want to cut.
- Click Modify, then click Split Clip (or press ⌘ Command+B).
- Move the vertical bar to the end of the section that you want to cut, then split the clip there as well.
- Select the section that you want to cut, then hold down Control while clicking the section to prompt a drop-down menu.
- Click Trim Selection in the drop-down menu.
-
7
-
8Upload your video to YouTube. Once your video finishes exporting to a file, all that's left to do is upload the file to YouTube and publish it there.
- If you haven't verified your YouTube account, you won't be able to upload videos that are more than 15 minutes long.


Expert Q&A
Did you know you can get expert answers for this article?
Unlock expert answers by supporting wikiHow
-
QuestionIs iMovie a decent editing program for YouTube videos?
 Travis PageTravis Page is the Head of Product at Cinebody. Cinebody is a user-directed video content software company headquartered in Denver, Colorado that empowers brands to create instant, authentic, and engaging video content with anyone on earth. He holds a BS in Finance from the University of Colorado, Denver.
Brand & Product SpecialistAbsolutely, iMovie is a pretty good starting point if you're new to editing. It does have its limitations, though. If you get tired of using iMovie, Final Cut Pro and Adobe Premiere are great upgrades. They're a little more complicated than iMovie, but they give you a lot more freedom when it comes to editing your work.
Support wikiHow by unlocking this expert answer.
-
QuestionDo you need to edit a video on a computer?
 Community AnswerNot necessarily. You can edit your video in YouTube from your mobile device too, but it's much more difficult.
 -
QuestionCan I edit a video from someone else's YouTube to add to my playlist?
 Community AnswerYou should probably ask them before you use any of their content, but once you do that, you should be fine.
Warnings
- As of September 2017, YouTube's built-in video editor is no longer available.[4]⧼thumbs_response⧽


References
- ↑ https://help.apple.com/imovie/mac/10.1/#/mov4d3dce7ba
- ↑ https://help.apple.com/imovie/mac/10.1/#/movf8b8fc9b2
- ↑ Travis Page. Brand & Product Specialist. Expert Interview. 27 June 2019.
- ↑ https://support.google.com/youtube/answer/183851?hl=en
About This Article

1. Install Windows Movie Maker.
2. Open the video in Movie Maker.
3. Add other photos and videos.
4. Drag photos and videos to the desired order.
5. Add a title and transition effect.
6. Insert transitions between pieces of content.
7. Cut sections that aren’t needed.
8. Export the project to a new video file.
9. Upload the video to YouTube.