This article was co-authored by wikiHow staff writer, Darlene Antonelli, MA. Darlene Antonelli is a Technology Writer and Editor for wikiHow. Darlene has experience teaching college courses, writing technology-related articles, and working hands-on in the technology field. She earned an MA in Writing from Rowan University in 2012 and wrote her thesis on online communities and the personalities curated in such communities.
wikiHow marks an article as reader-approved once it receives enough positive feedback. In this case, 100% of readers who voted found the article helpful, earning it our reader-approved status.
This article has been viewed 2,351,688 times.
Learn more...
Do you want to be able to share your videos with friends, family, and perfect strangers? Uploading videos to YouTube is quick, easy, and absolutely free. This wikiHow article teaches you how to upload videos to YouTube using your computer, phone, or tablet.
Things You Should Know
- Upload a video from YouTube Mobile by tapping the plus icon and "Upload video." Any video that's under 60 seconds and has either a square or vertical aspect ratio will be uploaded as a Short.
- On a computer browser, click the video camera icon and select "Upload video" to add a video to YouTube. All videos will be uploaded at the highest resolution possible and that may take time to process.
- Don't upload videos that aren't yours. If YouTube sees that you've uploaded copyrighted content, they will flag your account and ban you.
Steps
Using Mobile App
-
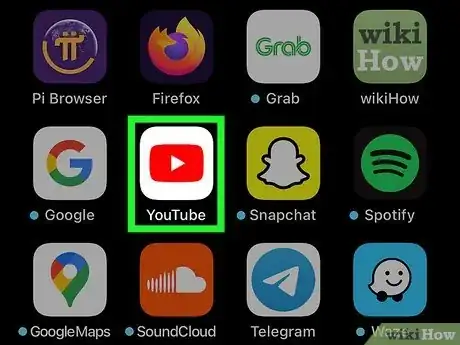
1Open the YouTube app. It has a red-and-white icon with a rectangle and sideways triangle inside, labeled "YouTube."
- You can't upload apps using the YouTube Studio mobile app. You can, however, manage your past videos and see your channel's statistics, like comments, views, and monetization.
- You may also be able to share the video directly from your phone or tablet's File Manager, Photos, or Gallery app. Open the video, tap the Sharing icon, and then select YouTube if you see the option. At that point, skip down to Step 6.
- YouTube should come preinstalled on all phones and tablets, but if you don't have it, you can download it from the App Store (iPhone/iPad) or Play Store (Android).
- Connect to a Wi-Fi network before uploading the video to avoid data charges.
- If you aren't signed in automatically, you'll need to select your Google account or sign in with the email address and password associated with your YouTube account.
-
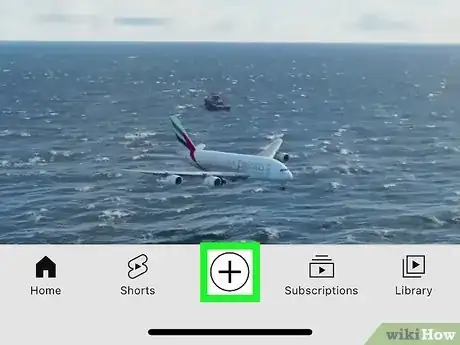
2Tap +. This plus sign is centered at the bottom of your screen and will prompt a menu to open.Advertisement
-
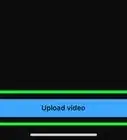
3Tap Upload a video. It's usually the second item on the menu next to an upload icon.
- Your Camera Roll will open so you can pick from previously recorded videos.
- If it's your first time uploading a video from your phone or tablet, you may have to give the app permission to your photos, camera, and/or microphone before you can continue.
-
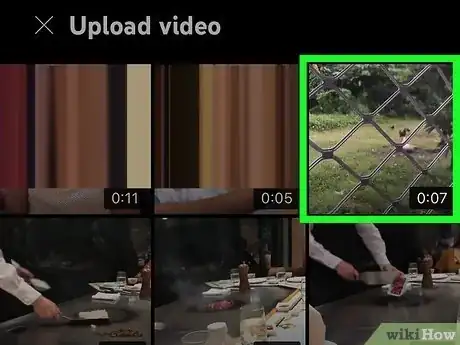
4Tap the one you want to add. It will start playing to show you a preview of what you're uploading.
- Videos shorter than 60 seconds and with a square or vertical aspect ratio will be uploaded as Shorts. For other videos, you can tap Edit into a Short to trim your video and upload it as a Short.
- You can upload videos up to 15 minutes in length by default. If you want to upload longer videos (up to 12 hours), you must verify your account first.
- You can upload a file that is up to 256 GB or 12 hours long. If you have a larger file, try compressing it.
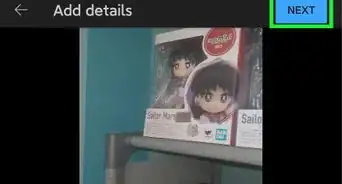
- Tap Next on the preview to proceed.
-
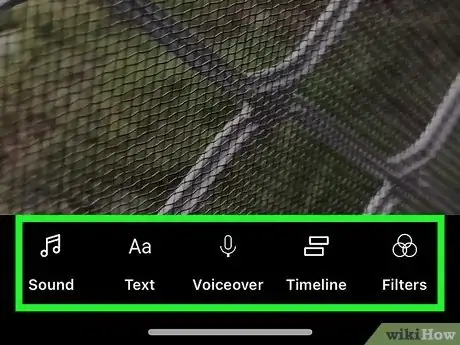
5Add enhancements to the video (optional). If you'd like to make some last-minute edits, you have a few options, like adding sounds, text, altering the video's timeline, and adding filters.
- To add music or sound to the video, tap Sounds' and tap Text if you want to add text anywhere. You can alter the length and speed of the video by tapping the Timeline icon, and add artistic filters by tapping Filters.
-
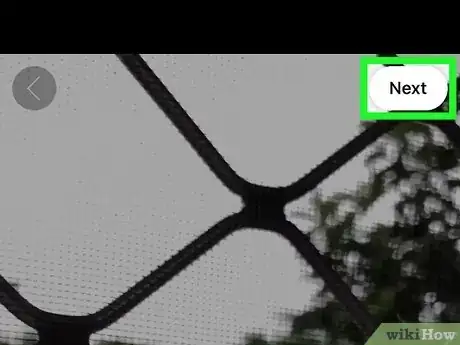
6Tap Next to continue. You'll see this in the top right corner of your screen.
-
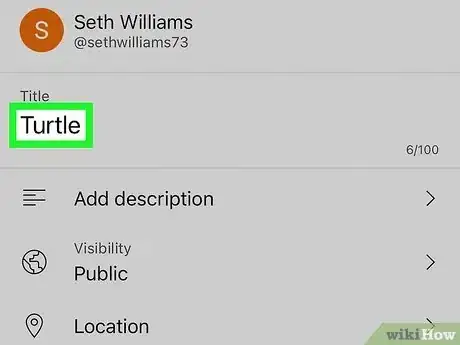
7Enter a title. The title can be up to 100 characters long and should reflect the content of your video.[1]
-
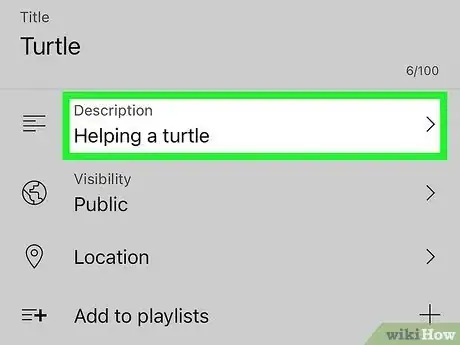
8Enter a description. The description is optional but recommended. Info in the description will appear below your video while viewing. You can use this space to add some unique information about the video, the creator, or other projects. Add keywords to this area to make your video appear in relevant searches.
-
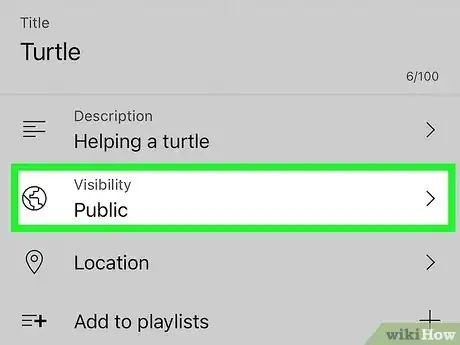
9Select a privacy level from the "Visibility" menu. There are three options in the privacy menu you can select from. The privacy options are as follows:
- Public: This makes your video public searchable and viewable to anyone on YouTube.
- Unlisted: Your video will not publicly listed, but anyone with the video link can still view the video.
- Private: This allows only you to view the video when you are signed in to your account.
-
10Select your audience. Tap Audience and choose if your video was made for kids or not.
-
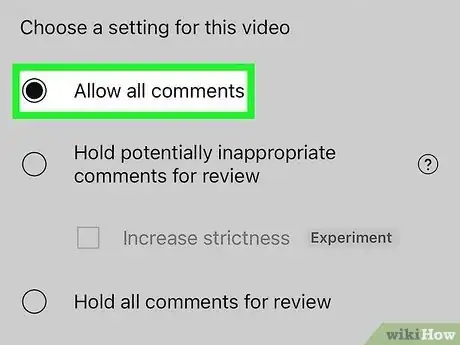
11Choose your comment preference. Tap Comments and select an option:
- Allow all Comments will let anyone comment on your video.
- Hold potentially inappropriate comments for review means that comments with questionable words, phrases, or from accounts that have been flagged as spam in the past may not post immediately on your video, but will appear in YouTube Studio for you to approve them. You can also tap Increase strictness as an experimental option, which will mark more words and phrases as questionable.
- Hold all comments for review means that every comment on your video will need to be reviewed by you before they are posted.
- Disable comments will turn off commenting on your video.
-
12Tap UPLOAD. You'll see this at the bottom of the screen. This uploads the video to YouTube, and any videos shorter than 60 seconds will be uploaded as a Short. Once the upload is complete, it will appear in your Videos list.
- If you'd like to add tags to your video to make it easier for people to find, tap the three-dot menu on the video, select Edit, and then list tags in the "Tags" field separated by commas.
Using a Computer
-
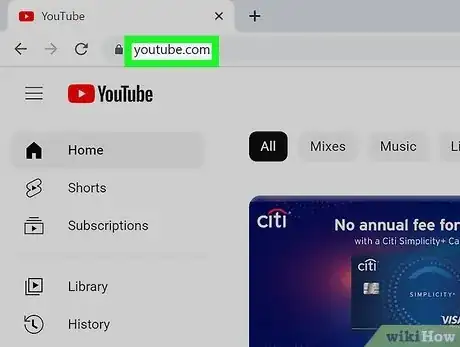
1Go to https://www.youtube.com in a web browser. You can upload a video directly from the YouTube web page.
- If you're not already signed in to your YouTube account, click SIGN IN at the top-right corner of the page to do so now. Select your YouTube account and enter your password, or click Use another account and sign in with the email address and password associated with your YouTube account.
-
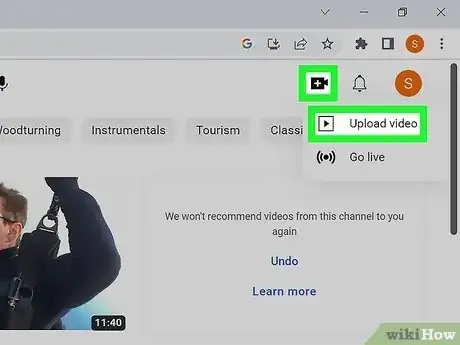
2Click the camera icon with a plus (+) sign and click Upload Video. It's in the upper-right corner next to your profile image. This takes you to the YouTube Studio web page with an "Upload Video" window in the center of the page.
-
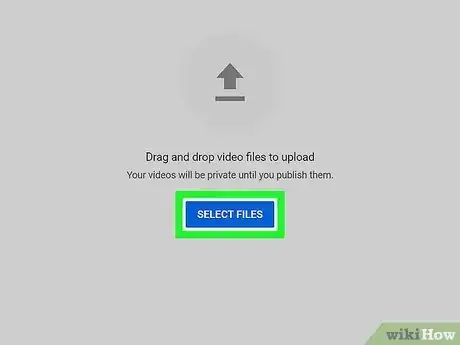
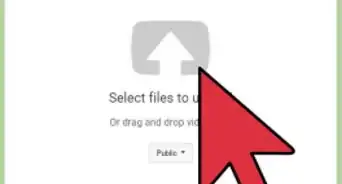
3Drag your video file to the arrow on the window. Alternatively, you can click the blue SELECT FILE button, browse to the file on your computer, and then click Open. Either of these options will begin preparing the video for upload.
- You can upload videos up to 15 minutes in length by default. If you want to upload longer videos (up to 12 hours), you must verify your account first.
- If you want to upload a video DVD to YouTube, save the movie to your computer first.
- If the video is on your phone, transfer it to your computer wirelessly or with a USB cable.
- YouTube supports uploaded video in the following formats: MOV, MPEG4, MP4, AVI, WMV, MPEGPS, FLV, 3GPP, WebM, DNxHR, ProRes, CineForm, HEVC (h265).[2]
-
4Add a video title and description. The title is required, and the description is optional but recommended. The title can be up to 100 characters long. Use this space to create a catchy title that accurately reflects the video. Use the large box labeled "Description" to add a description for the video. Info in the description will appear below your video while viewing. You can use this space to add some unique information about the video, the creator, or other projects. Add keywords to this area to make your video appear in relevant searches.
-
5Click a thumbnail you want to use. The video's thumbnail is the still photo that represents the video on your channel and in search results. Click one of the suggested thumbnails to use it as a thumbnail.
- Alternatively, you can click Upload Thumbnail and select your own image to use as a thumbnail. Click the image you want to use and click Open.
- You can change or edit your thumbnail whenever you want.
-
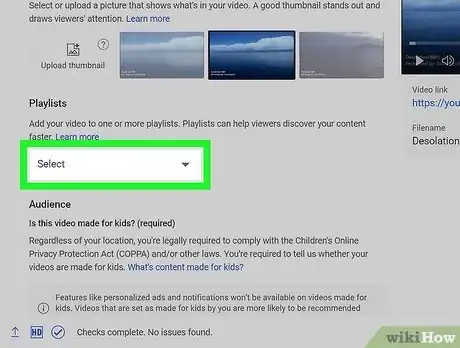
6Add the video to a playlist (optional). If you want to add your video to a playlist, click the "Playlist" drop-down menu and select a playlist you have created to add your video to. You can select more than one playlist.
-
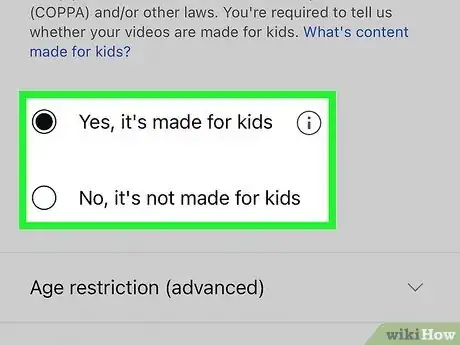
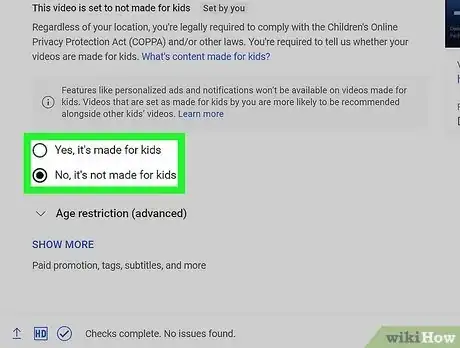
7Select if the video is made for kids or not. YouTube now requires you to mark any videos that are made for kids under the age of 13. If your video is made for kids, click the radio button next to "Yes, it's made for kids." If your video is not made for kids, click the radio button next to "No, it's not made for kids."
- Properly marking if your video is made for kids is required by law under the Children's Online Privacy Protection Act (COPPA). Improperly marking your video could cause YouTube to take action against your account or possibly get your fined by the FTC. See How to Comply with COPPA on YouTube for more information.
- Additionally, if your video is specifically made for viewers over the age of 18, you can set an age restriction for your video. To do so, click Age Restriction (advanced). Then click the checkbox next to "Yes, restrict my video to viewers over the age of 18."
-
8Click More Options (optional) and click Next. "More Options" is the blue text at the bottom of the "Details" window. This displays more options you can add to your video. When you are finished, click Next in the lower-right corner. The additional options are as follows:
- Paid Promotions: If your video has paid promotions, check the box that says "My video contains paid promotion like a product placement or endorsement." You can also check the box that says "Add a message to my video to inform viewers of paid promotion."
- Tags: Tags are keywords that let other users find your videos easily. Type the tags you want to use in the box that says "Add Tags". Use words associated with your video, (e.g., if your video is of Dancing Elephants, use "elephants," "dancing," and "funny"). Videos with similar tags will often appear together in the "Recommended" sidebar.
- Language, Subtitles, and Closed Captions: To select a langauge for your video, use the drop-down menu labeled "Video language" to select the language. To add closed captions or subtitles to your video, select a closed caption certification in the drop-down menu that says "Caption certification". To upload closed captions or subtitles, click the blue text that says Upload Subtitles/CC and select if your subtitles have timing. Then select the subtitle file and click Open. See How to Embed Subtitles in Videos for more information about how to make subtitles and upload them to YouTube or embed them in videos.
- Recording Date and Location: To add a recording date, click Recording date to specify when the video was created in the pop-up calendar. To add a location to the video, click Video location and type an address or name of a place the video was recorded. Select the location from the search results.
- License and distribution: Click License to choose a copyright license for the recording. Check "Allow Embedding" to allow other people to post your video on other locations and websites. Check "Publish to subscriptions feed and notify subscribers" if you want to notify your subscribers about the video.
- Category: To select a category, click Category and select a category for your video. Some categories may have additional boxes you can fill out.
- Comments and ratings: Use the drop-down menu labeled "Comments visibility to select how you want the comments to be managed. You can allow all comments, hold potentially inappropriate comments for review, hold all comments for review, or disable the comments. Use the drop-down menu labeled "Sort By" to select if you want the comments to be sorted by top-rated, or newest. Check "Show how many viewers like and dislike this video" if you want that information to be displayed below the video.
-
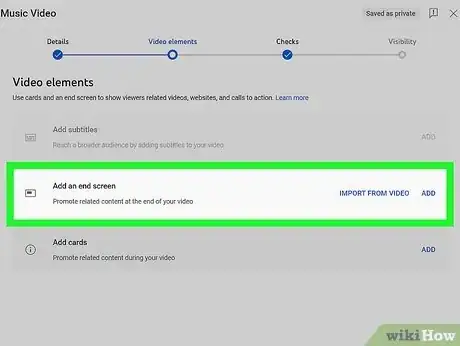
9Add an End Screen or cards to your video (optional) and click Next. An end screen is a screen that appears at the end of the video to promote related material on your channel. Cards allow you to promote your material during the video. To add an end screen or cards to your video, click Add to the right of "Add an End Screen" or "Add Cards" on the video elements page. Follow the instructions to add an end screen.
- You must wait until after the standard definition portion of your video is processed before you can complete this step.
-
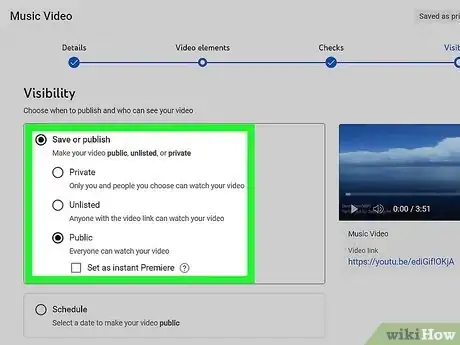
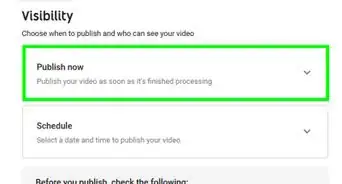
10Select a visibility level. There are three visibility options you can select. Click the radio option next to the option you prefer. The visibility options are as follow:
- Public: This makes your video public searchable and viewable to anyone on youTube.
- Unlisted: The video is not publicly listed, but anyone with the video link can still view the video.
- Private: This allows only you to view the video when you are signed in to your account.
-
11Schedule a date to go public (optional). If you do not want the video to go public right away, you can schedule a time for it to go public. To schedule a time, click the radio button next to "Schedule". Then click the drop-down menu with the date and select the date you want it to go public. Then click the drop-down menu with the time and select the time you want it to go public.
-
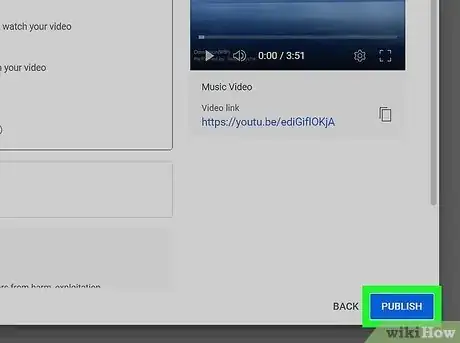
12Click the blue Save or Schedule button. It's at the bottom-right corner of the window. This will publish the video to your YouTube channel at the scheduled date and time, or after the video is finished processing.
- To edit the title and description at any time, go to https://studio.youtube.com/ and click Videos in the side panel to the left. Hover the mouse cursor over the video on this page, click the three-dot icon ⋮, and then click Edit title and description.
- You can change the visibility level of the video on this page by clicking the current level (e.g., Private) and selecting a different option. This is especially useful if you're uploading a video with HD quality so no one sees the lower-resolution version before it's finished processing.
- Once your video has been uploaded, you can embed it on your website or share it online.
Community Q&A
-
QuestionWhat should I write in the description box?
 Community AnswerWrite more information about the video that may spark people's interest -- describe the video, essentially. Also, you can include which type of camera and microphone you used. If you have friends in the video, link to their channels.
 -
QuestionCan I upload a video from my computer if I have a built in camera?
 Community AnswerRecord, then save it to a file, then take the video from the file into the uploader.
 -
QuestionHow can I find a video I've uploaded to YouTube?
 Community AnswerIf you have a YouTube account, sign in and click on your profile. It will show your subscriptions and your YouTube history. To find videos that only you have done, click on "My Videos."
Warnings
- Don't upload commercial or copyrighted DVD videos to YouTube without permission of the copyright owner. This may cause trouble for you, and even lawsuits.⧼thumbs_response⧽
- Always follow YouTube's Community Guidelines and Terms of Use to prevent your account from being deleted.⧼thumbs_response⧽
- Don't upload any video that contains copyrighted material onto YouTube without the permission of the copyright owner. It's against YouTube's user agreement, and the video with copyright-infringing material will get deleted as a warning (copyright strike). If you continue uploading videos that contain copyrighted content onto YouTube without the permission of the owners, your account will be terminated. You could even be fined or imprisoned. Especially avoid violating copyrights belonging to film studios, independent filmmakers (even the most obscure ones are merciless about their copyrights), singers, actors, etc. Some YouTube users are also notoriously aggressive in enforcing their copyrights. You may upload Copyrighted material that follows Fair Use law.⧼thumbs_response⧽
- Don't upload too many videos a day. Otherwise, the view counters will be stopped or get only a few views. You can still upload videos anytime, but not daily.⧼thumbs_response⧽
