wikiHow is a “wiki,” similar to Wikipedia, which means that many of our articles are co-written by multiple authors. To create this article, volunteer authors worked to edit and improve it over time.
wikiHow marks an article as reader-approved once it receives enough positive feedback. In this case, 91% of readers who voted found the article helpful, earning it our reader-approved status.
This article has been viewed 233,976 times.
Learn more...
This article will teach you a super easy way to form acrylic plastic sheets without cracking, splintering, or destroying the sheet. Note that this is not on the level of mixing and pouring a fluid for intricate forms. Instead, this is for taking an existing plastic sheet and cutting and bending it to a form. You'll need cold weather gloves, strong scissors, your mold and an oven.
Steps
-
1Measure the inside of your oven. As you'll need to put the plastic sheet into the oven, this is your size limitation.
-
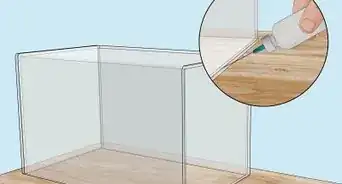
2Have a mold ready to use. The example here is the outside of a mold, but it can work inside, too.Advertisement
-
3Make adjustments appropriate to the specifications of your project. The only major variable that can affect the forming process is the thickness of the plastic sheet. This article uses a sheet about 1/4" thick, so all times are about 10 to 15 minutes per step. For thicker sheets, it will take longer, and for thinner sheets, it will take less time. Modify the timing as necessary.[1]
-
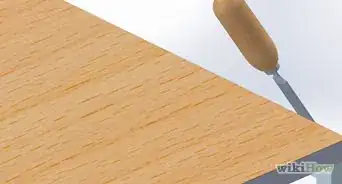
4Measure the size of the of the overall piece you need. Make sure the sheet is just big enough for the form. Use a plastic cutting knife to cut the sheet down to the general overall size.[2]
-
5Mark the shape with a black felt tip pen. This should include any interior cutouts, corners, etc.
-
6Place the plastic sheet on a cookie sheet and place in an oven set to 250 F. Wait about 10 minutes for it to warm fully. When it's ready you'll find it flexible when you try to pick it up.[3]
-
7Put on your gloves when you work with the plastic. It's hot and will burn you if you're not careful.[4]
-
8Cut any curves, corners, cutouts, etc. using the heavy shears or scissors. You'll have about 2 minutes before it cools and hardens too much to cut. If it gets too hard, put it back in the oven to warm up again.[5]
-
9Place back into the oven once it's cut to form, and raise the temperature to no more than 275 F. At 300 F. it will begin to stick to the cookie sheet. Above that temperature it can melt and/or begin to bubble.[6]
-
10Pull the plastic out and quickly press onto or into the mold that is ready. Use your fingers and firm pressure to press into any corners, fold, bends, etc. Continue to hold and press into shape until it begins to harden.
-
11Quickly dunk into cold water to cool and set the piece.
-
12If there is a mistake, reheat and start over again.
-
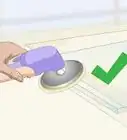
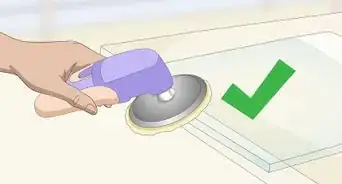
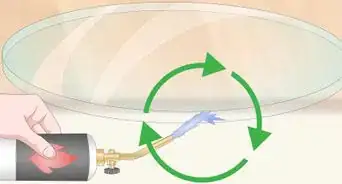
13Final check. If there are a few curves or bends that need correcting, you can turn on a burner on low to pass the piece back and forth over to SLOWLY heat it up for localized bends.


Community Q&A
-
QuestionAre there any health/safety precautions to be taken? Is it safe to just put the plastic in the oven?
 Community AnswerIn most cases yes, but if you're using a kind of plastic that either has a very low combustion temperature, or gives off nasty fumes when heated, then I would suggest using an air mask to protect yourself. Look online to see whether this sort of thing would happen with your specific type of plastic. This will not happen for acrylic sheets, as they are safe to mold.
 -
QuestionIf my mold is made of plastic, will it melt or get stuck in the plastic that I'm molding?
 Yonaton ChanowitzCommunity AnswerDepending on what type of plastic it is, it probably will stick to it. You can put parchment paper sheets between the mold to avoid this, but the heat from the thermoplastic may warp the mold.
 -
QuestionI am using an aluminum mold and followed the steps in the article. However, I have small air bubbles on the surface. How do I correct this?Community AnswerThe aluminum got too hot and began to burn the plastic, or the oven was too hot. Either way, the bubbles can be sanded or flame polished.
Warnings
- Don't heat to more than 300 F. or you will begin to create bubbles in the plastic.⧼thumbs_response⧽
- Make sure you use heat (cold) resistant gloves. They will still get hot as you work.⧼thumbs_response⧽


References
- ↑ http://www.earthguild.com/products/riff/rpolymer.htm
- ↑ https://www.naturalhandyman.com/iip/infxtra/infacrylic.html
- ↑ https://ourpastimes.com/mold-plexiglass-6105219.html
- ↑ https://ourpastimes.com/mold-plexiglass-6105219.html
- ↑ https://www.youtube.com/watch?v=s23lMNN1lyE
- ↑ http://www.earthguild.com/products/riff/rpolymer.htm