This article was co-authored by wikiHow Staff. Our trained team of editors and researchers validate articles for accuracy and comprehensiveness. wikiHow's Content Management Team carefully monitors the work from our editorial staff to ensure that each article is backed by trusted research and meets our high quality standards.
This article has been viewed 56,796 times.
Learn more...
Acrylic is a versatile type of plastic that has numerous uses in homes, automobiles, medical products, and industrial machinery. Acrylic plastic products are durable and easy to maintain. If you want to add a personal touch to acrylic products around your home, or make a product match your style, you can easily dye acrylic plastic right at home to achieve your desired look. There are actually a couple of different ways you can dye acrylic plastic depending on the size of the object, and this article will walk you through both methods step-by-step.
Steps
Using Food Coloring to Dye Small Objects
-
1Dye objects with food coloring for a quick DIY project. Make sure the object you want to dye is small and made of clear acrylic plastic. This method works best if you only dye the inside of an object so that the color doesn’t rub off onto other objects. This option is great for objects that are shaped like cubes or are round. Small objects you can dye with this method include:
- ornaments
- makeup accessory containers
- decorative vases
- jars
- bowls
- flower pots
- votive candle holders (for decoration only)
-
2Protect your work space with newspapers and a garbage bag. Clear off your work surface and cover it with a garbage bag and newspapers. You need enough space to dry your object upside down and let it drip onto the work surface. Wear clothes that can get stained in case there are any spills.Advertisement
-
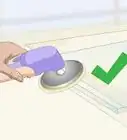
3Clean your object with a microfiber cloth before dyeing it. Take off any stickers with warm soapy water. Make sure the object is clean and dry so that your dye sticks to the object. Cleaning your object will prevent any dust from sticking to your finished product.
-
4Pour glue, food coloring, and water into a small container. Add your glue or decoupage sealer to the container, starting with about one tablespoon at first. Add enough glue to completely coat the inside of your object. Add a few drops of food coloring and mix it with a toothpick or small paintbrush. Add a few drops of water to thin out the mixture.[1]
- Add more food coloring one drop at a time if you desire a stronger color.
- There are no exact measurements for this process. Add more glue and/or water as needed to thin the dye enough so that it swirls around easily in the mixing container.
-
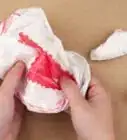
5Pour the mixture into your object. Use a funnel to pour the dye into the object if it has a small opening. Swirl the mixture around until the entire inside of your object is covered. Rotate the object at slight downward angle to make sure the dye does not miss any areas.[2]
-
6Turn the object upside down to dry completely. Dry the object for at least several hours. Leave it upside down to avoid streaks or unevenly dyed areas.


Boiling Water to Dye Large Objects
-
1Dye objects in boiling water to create a long lasting design. This option works well if you want to dye a larger or irregularly shaped object. You can also use this method if you want to dye an entire object, even if it is small. Boiling your object in dye will make the dye last longer. Objects that you can dye with this method include:
- RC car and truck parts
- acrylic boxes and containers
- decorative objects
- small tabletops
- picture frames
- chairs
- charger plates
- bookends
- display stands
- shelves
-
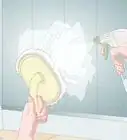
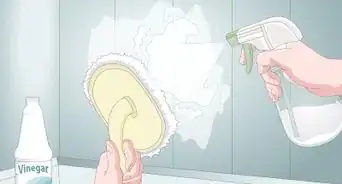
2Clean your object before dyeing it. Remove any stickers with warm soapy water to create a smooth look for your object. Make sure the object is clean and dry so that your dye sticks to the object. Cleaning your object will prevent any dust from sticking to your finished product.
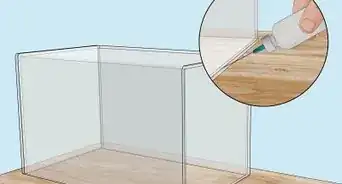
- Prepare to dye each plastic part of the object separately. Take apart any removable parts first and label or photograph them to remember how to put the object back together.
- Do not dye metal, wood, glass, or rubber pieces using this method because they will not absorb the synthetic dye properly.
-
3Protect your work space from dye using newspapers, garbage bags, and cardboard. Use newspapers, garbage bags, and cardboard to protect surfaces and floors in the area you are working in. Wear clothes that you don’t mind getting stained in case there are any spills. Wear rubber gloves to protect your hands from dye. Place towels or oven mitts nearby to use when you are handling hot pots.
-
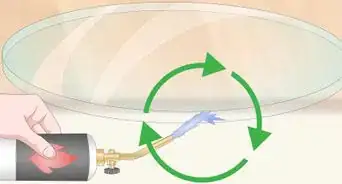
4Add the synthetic dye to a pot of boiling water. Bring a large pot of water to a boil. While wearing rubber gloves, add the synthetic dye to the water according to the product instructions. Boil the mixture for several minutes until the dye is completely dissolved and mixed in.
- While your water is coming to a boil, fill a second container or pot with cool water for rinsing your object. Place this container next to the pot where you are dyeing your object.
- If your object is very large, first boil several more pots or kettles of water and pour them into a larger container.[3]
- Place a lid or other covering over this container to keep the water hot while boiling your dye mixture. Pour your dye mixture into this larger container and make sure there is enough water in the container to cover your object.
-
5Wait for the water temperature to cool before placing your object in the dye. Let the water cool to slightly below boiling. Use a probe thermometer to take accurate temperature measurements. The water needs to remain hot to ensure the plastic absorbs the dye.
-
6Place your object in the dye. Use tongs if possible to slowly place the object in dye. Move the object around with tongs to cover it completely with dye. Make sure the front of the object is not touching the bottom of the container to prevent smudges.
-
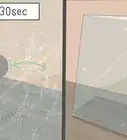
7Dye and rinse the object. Create a dye and rinse cycle for your object until you achieve your desired color. Dip the object in cool water every 7-10 minutes to achieve an even color. Repeat this process several times until your object is dyed the color you want.
- This process may take up to 1 hour depending on the size of your object.[4]
- Some objects will only need 10-15 minutes to absorb the dye.
-
8Dry the object overnight. Place the object on a protected, waterproof surface to air dry. Make sure this area is protected from other objects, people, or animals that could bump into the object while drying.
- Dispose of the dyeing mixture responsibly. If you use a disperse dye, you can pour the mixture down a bathtub drain. Be careful to poor only on the porcelain surface, which will wash easier.[5]


Warnings
- Do not use pots or utensils that you use for food preparation.⧼thumbs_response⧽
- Do not ingest any dye.⧼thumbs_response⧽
- Be careful when handling boiling water.⧼thumbs_response⧽
- Do not consume food from any of the containers that you dyed.⧼thumbs_response⧽
- Do not use a basic dye unless you have significant experience dyeing objects.[6]⧼thumbs_response⧽
Things You'll Need
Using Food Coloring to Dye Small Objects
- Food coloring (gel or liquid)
- Decoupage sealer or school glue (clear drying)
- Water
- Container to mix dye
- Newspapers and garbage bags
- Toothpicks or paintbrush
- Funnel (optional)
- Cooling rack or disposable cup (optional)
Boiling Water to Dye Large Objects
- Synthetic dye
- 1 or 2 large stainless steel pots with lids (6-qt or larger)
- 2 large tote bins or buckets with lids (optional)
- Oven mitts
- Tongs
- Probe food thermometer
- Rubber gloves
- Newspapers, garbage bags, cardboard, and towels

References
- ↑ https://www.brit.co/stained-glass-ornaments/
- ↑ https://www.youtube.com/watch?v=ivBlwdF7I-k
- ↑ https://www.youtube.com/watch?reload=9&v=lGUf1VpvICI
- ↑ https://www.youtube.com/watch?reload=9&v=lGUf1VpvICI
- ↑ http://www.pburch.net/dyeing/dyeblog/C763608095/E2142583771/index.html
- ↑ http://www.pburch.net/dyeing/basic_dyes.shtml
About This Article