This article was co-authored by wikiHow staff writer, Kyle Hall. Kyle Hall works on the content team at wikiHow. He helps manage our team of editors and creates content for a variety of wikiHow projects. Kyle continually looks for new ways to improve the content at wikiHow and make it more helpful and enjoyable for readers. He graduated from Eckerd College in 2015, where he majored in Political Science.
The wikiHow Video Team also followed the article's instructions and verified that they work.
This article has been viewed 36,974 times.
Learn more...
Drawing a perfect circle freehand can be difficult and frustrating. While it’s easy to draw a perfect circle with a compass or a protractor, there’s still hope if you don’t have these tools on hand. With just a pin and some string, you can easily sketch a circle that is nice and symmetrical.
Steps
Setting up the Pin and String
-
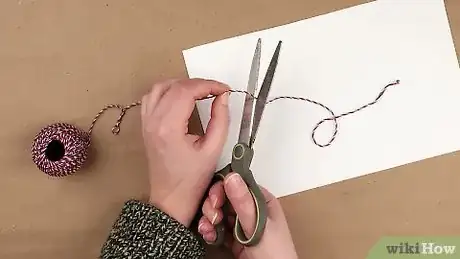
1Cut string that’s 1–2 inches (2.5–5.1 cm) longer than your desired radius. The circle you draw will have a diameter that's twice as long as the string you use, but you should cut it 1–2 inches (2.5–5.1 cm) longer than you want at first since you'll lose some of the length when you tie a loop at each end.[1]
- For example, if you want your circle to be 4 inches (10 cm) across, then your desired radius would be 2 inches (5.1 cm) since the radius is equal to half of the diameter. Therefore, you’d cut the piece of string to be about 3–4 inches (7.6–10.2 cm) long so you have extra string on each end to tie the loops with.
-
2Tie a small loop at each end of the string. You’ll use one of the loops to attach the string to a pin and the other loop to attach it to a pencil. The size of the loops doesn’t need to be precise, but make sure they’re big enough to fit around a pencil and pin but not so big that they use up a lot of the string that you cut.[2]
- When you’re finished tying the loops, you can measure the length of the string to determine what the exact radius of your circle will be. If the radius is too short, you can always cut a longer piece of string and try again.
Advertisement -
3Place a piece of paper over some cardboard, styrofoam, or cork board. Any kind of material will work as long as you’re able to press a pin into it. This base under the paper will give the pin something to stick into and help hold it in place as you use it to draw your circle.
- If you’re drawing your circle onto a piece of thick material, like foam poster board or canvas, you can skip this step.
- If you don’t have anything to use as a base under your sheet of paper, you can try holding the pin in place on the paper with your fingers instead.
-
4Push a pin through the paper where you want the center of your circle to be. Any kind of push pin will work, although the shorter the pin, the easier it will be to work with (since a tall pin might stick up more and be less stable). Make sure it’s not too close to the edge of the paper or else your circle might go off the page when you draw it.[3]
-
5Loop one end of the string over the pin. Don’t worry about tightening the loop. As long as it’s wrapped around the pin, you’re all set.[4]
- It doesn’t matter what end of the string you wrap around the pin. Just make sure the loop on the other end is big enough to wrap around a pencil.
Drawing Your Circle
-
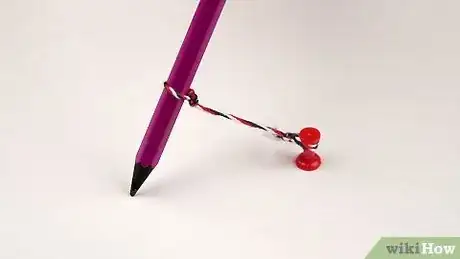
1Loop the other end of the string around the end of a pencil. Simply slide the tip of the pencil into the loop so the string is wrapped around the pencil. It’s OK if the loop slides down the pencil. You’ll be pulling it taut later on so it stays in place.[5]
- You don’t have to use a pencil to draw your circle—you can use a pen, marker, colored pencil, or another drawing utensil as long as the loop fits around it.
-
2Place the tip of the pencil on the paper so the string is pulled taut. Pull the pencil away from the pin until the string is completely taut. Then, place the tip of the pencil down. This is where the edge of your circle will be.[6]
- Don’t pull on the string too hard or you could pull the pin out.
-
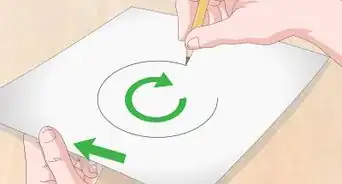
3Draw a circle with the pencil, keeping the string taut as you go. To draw your circle, slowly move the pencil in a circular motion around the pin in the center, holding the pencil up straight and not at an angle. Keep gently pulling the pencil away from the pin in the center so that the string stays taut and your circle is even all the way around.[7]
- If you don’t keep the string taut, you won’t end up with a perfect circle. If your hand slips and you make a mistake, just erase what you’ve drawn and start over.
-
4Remove the pin when you’re finished drawing your circle. If you want to draw another circle, you can push the pin into a different spot on the paper and repeat the process. Otherwise, set the pin and string aside for the next time you need to draw a perfect circle!
Things You’ll Need
- Paper
- Pencil
- String
- Scissors
- Pin
- Cardboard, styrofoam, or cork board
References
- ↑ https://www.youtube.com/watch?v=_yqmqESN_Oo&feature=youtu.be&t=29
- ↑ https://www.youtube.com/watch?v=_yqmqESN_Oo&feature=youtu.be&t=30
- ↑ https://sciencing.com/make-compass-home-geometry-12082521.html
- ↑ https://sciencing.com/make-compass-home-geometry-12082521.html
- ↑ https://sciencing.com/make-compass-home-geometry-12082521.html
- ↑ https://sciencing.com/make-compass-home-geometry-12082521.html
- ↑ https://sciencing.com/make-compass-home-geometry-12082521.html
About This Article
To draw a perfect circle using a pin, start by cutting a piece of string that’s 1 to 2 inches longer than your desired radius and tying a small loop at each end. Then, place a piece of paper over some cardboard or styrofoam, push a pin through the center of the paper, and loop 1 end of the string over the pin. Next, loop the other end of the string around the end of a pencil, and pull the pencil away from the pin so the string is completely taut. Finally, place the tip of the pencil on the paper and draw a circle, keeping the string taut as you go. To learn more, including how to keep the pin in place if you don’t have any cardboard or styrofoam, keep reading.
