This article was co-authored by Sarah Kosakowski. Sarah Kosakowski is a Professional Hair Stylist and the Owner of Alba Salon and Spa based in Cincinnati, Ohio. With a decade of experience, she specializes in bridal and formal hair, blondes, fine hair, and men’s cuts. Sarah received her training at The Aveda Frederic’s Institute and is proud to be a Kevin Murphy Session stylist amongst other accomplishments.
There are 11 references cited in this article, which can be found at the bottom of the page.
This article has been viewed 495,458 times.
Curling your hair with bobby pins is an easy to do. There are many heat-free ways to create curly hairstyles for both short and long hair. All you need is your fingers and some bobby pins! Simply divide your hair into small sections, wrap your hair around your finger, and pin your curl at your roots. Leave the pins in overnight to create effortless, gorgeous curls with any hair type.
Steps
Making Your Curls
-
1Create your curls after applying smoothing products to damp hair. For best results, make your curls when your hair is damp. This will help set your curls and make them last longer. If you usually apply products like leave-in conditioner or silking serums, apply a dime or quarter-size amount of your products to damp hair before you make your curls.[1]
- For instance, make your curls as soon as you get out of the shower.
-
2Place one finger at the end of a 1–2 in (2.5–5.1 cm) wide section of hair. When you are first learning this technique, start at the top so you can easily see your curls as you make them. Grab a section of hair towards the top of your head, and brush through the section from root to tip using either your fingers or a comb. Then, pull your hair taut and place your index finger on your dominant hand at the end of your hair.[2]
- If you want to create larger curls, use bigger sections of hair.
- If you want to make tighter, smaller curls, use smaller sections of hair.
- Use your dominant hand to create your curls, and use your non-dominant hand to help guide your hair.
Advertisement -
3Wrap your hair around your finger until you reach the roots. To start your curl, grab a section of hair and twirl it hair around your finger 2-3 times to secure the ends. Pinch the end of your hair between your thumb and index finger. Then, hold your hair 2–3 in (5.1–7.6 cm) from the bottom with your non-dominant hand, and spin your finger clockwise so your hair tightly twists around it. Adjust your non-dominant hand as you go so it remains about 2–3 in (5.1–7.6 cm) from the end of your hair.[3]
- Be sure there is no space in between your finger and your hair.
- Your non-dominant hand acts as an anchor to keep your hair straight and taut as you spin your hair.
- If you are having trouble wrapping short hair around your finger, use a pen, marker, or mascara tube instead! This still creates the same basic curl shape, though it may be easier to wrap your hair around another object rather than your finger. Use an object that you can wrap your hair around at least 2 times.[4]
- The length of your hair will determine how many times you're able to wrap it. The shorter your hair, the fewer wraps you'll be able to accomplish.
-
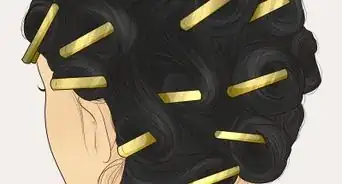
4Slide your finger out and secure your curl at your roots with a bobby pin. Hold your curl at your scalp with your non-dominant hand, and carefully slide your finger out of your curl. Once your finger is free from your curl, grab a bobby pin with your dominant hand, and slide it through your hair as close to your roots as you can get. Position your bobby pin around your curl and the hair at your roots to secure it to your scalp.[5]
- This creates soft, ringlet curls over all of your head.
-
5Pin your curls down flat if you want a finger wave style. If you want a 1920s-inspired finger wave look, pin your curls flat against your roots. To do this, slide off your curl, and pin your hair across the middle of your curl so it lays flat.[6]
- Instead of voluminous curls, you will get a subtle, vintage wave hairstyle.
-
6Repeat this until all of the hair is pinned in place. Locate another section of hair about 1–2 in (2.5–5.1 cm) wide directly under your first pinned curl, and make your next curl directly underneath. Continue twisting small sections of hair around your finger and pinning them in place until all of your hair is styled. Make your next section immediately underneath the one before it.[7]
- Once you finish the top section on one side, move to the top section on the other side. Then, repeat on the bottom sections on both sides until all your hair is pinned in place.
-
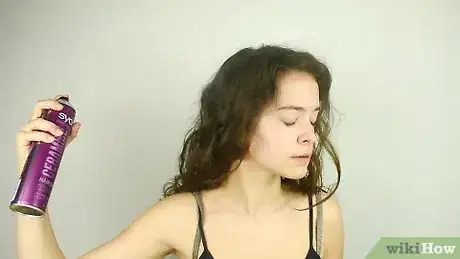
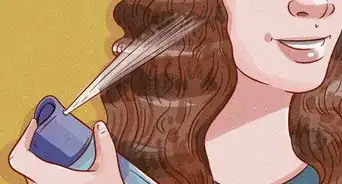
7Spray all your hair with hair spray to set your curls. When all of your hair is pinned to your scalp, apply hair spray across all of your hair to help the curls stay in place. You only need a light coating![8]
- Hairspray helps keep your hair in a curled shape, helpful when creating gorgeous ringlets.
Finishing the Look
-
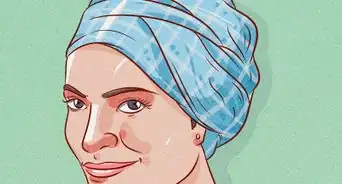
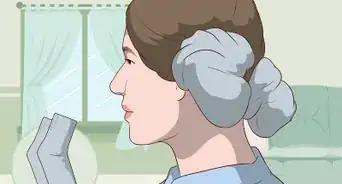
1Wrap your hair in silk and let your curls set for 12-15 hours. For best results, let your curls set overnight. Place a silk cap over your head to protect your curls. Secure the cap around the back of your head, then pull it over the top of your head until you reach your hairline. This is an easy way to keep your hair protected as it air dries. Let your hair set for 12-15 hours before you take out your pins.[9]
- Alternatively, you can wrap your hair in a silk scarf if you do not have a cap. Simply place a silk scarf across the top of your head. Gather the ends of the scarf at the back of your head, and secure the scarf with 2 knots to keep it in place. Pull the ends of the scarf across your forehead and tuck them underneath the scarf near your eyebrow.[10]
- Make sure the scarf is secure, but avoid tying it too tight. A tight scarf could flatten your curls.
-
2Slide the bobby pins off 1 at a time, starting at the back. Start at the back of your hair so your curls don't get tangled. To remove the bobby pin, simply slide it away from your curl and remove it with your fingers. Continue removing your pins from the back, sides, and top of your head until they are all out.
- Starting from the back also helps you keep track of how many pins you still have left so you don’t get overwhelmed.
-
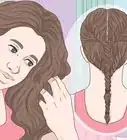
3Tousle your hair in your hands to create natural-looking curls. Once your bobby pins are all removed, put your hands in your hair at your scalp, and wiggle them back and forth to shake out your curls. This creates a natural look and lets your curls take their shape.
- In addition, you can separate larger sections of curls to create multiple, smaller curls. Simply lift your curl up and divide it in half.
-
4Comb your hair on top if you want a wavy look. Comb your hair starting at your hairline, and move your comb from your hair when you reach about half way down. This helps smooth out your hair while still keeping the curls at the end.[11]
- This is a great option if you want a vintage, wavy style, rather than a kinky, curly look.
- You can use either a medium- or wide-tooth comb.
-
5Tease the bottom of your hair if you want to create fullness and volume. Locate the under layers of your hair, and comb about 2–3 in (5.1–7.6 cm) of your hair towards your scalp about 3 times. This creates a glamorous, elegant look great for professional or nighttime events.[12]
- Additionally, tease your hair about half way from the ends to give a full-bodied look, or tease your roots if you want a little extra lift.
- For best results, tease your hair with a fine-tooth comb.
-
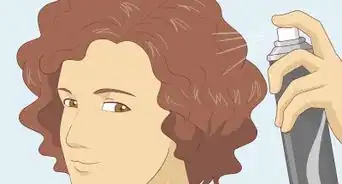
6Spray a light coating of hair spray so the curls last all day. After your curls are positioned how you like, spray a light layer of hairspray over your hair to keep your curls defined all day long.
Expert Q&A
Did you know you can get expert answers for this article?
Unlock expert answers by supporting wikiHow
-
QuestionI don't have those bobby pins mine are smaller. How will I do it?
 Ashley AdamsAshley Adams is a Licensed Cosmetologist and Hair Stylist in Illinois. She completed her Cosmetology education at John Amico School of Hair Design in 2016.
Professional Hair Stylist Since you have smaller bobby pins, it would be best for you to curl your hair in smaller sections. Instead of using sections that are 1-2 in. wide, your sections should be no larger than 1 inch wide by 1 inch long for best results. If you try to use larger sections, your hair will seep out of the bobby pins creating uneven curls.
 -
QuestionI have really thick hair that never holds a curl. Will these methods still work for me?
 Ayyat KhurramCommunity AnswerTry using a hairspray after curling your hair to hold it.
 -
QuestionWhat should I do if I have short hair?
 Community AnswerTry dividing your hair into smaller/thinner sections. Your hair will look cute and fluffy.
Things You’ll Need
- Box of bobby pins
- Comb
- Damp hair
- Silk cap (optional)
- Leave-in conditioner
- Serum
- Hairspray
Warnings
- Don’t be discouraged if your curls don’t come out perfectly the first time! It may take a couple tries before you nail the look. If your curls come out wonky, you can touch them up with a curling iron.⧼thumbs_response⧽
References
- ↑ http://www.rookiemag.com/2015/02/short-hair/
- ↑ https://youtu.be/XlrygYC6oIA?t=22s
- ↑ https://youtu.be/4i4COjt3zw8?t=1m47s
- ↑ http://www.rookiemag.com/2015/02/short-hair/
- ↑ https://youtu.be/XlrygYC6oIA?t=37s
- ↑ https://youtu.be/XlrygYC6oIA?t=1m43s
- ↑ https://youtu.be/4i4COjt3zw8?t=2m29s
- ↑ https://youtu.be/XlrygYC6oIA?t=2m23s
- ↑ https://youtu.be/4i4COjt3zw8?t=3m54s
About This Article
To curl your hair with bobby pins, start with damp hair and separate out a 1 to 2 inch wide section of your hair toward the top of your head, brushing it from root to tip. You can use bigger or smaller sections of hair to make larger or smaller curls! Pull that hair taut and put your index finger at the end. Spin your finger clockwise to twist the hair to the root. Then slide your finger out and stick a bobby pin in, securing the curl to the roots of your hair. Do your whole head, put a little hairspray on, and give it 12-15 hours to set. For tips from our Beauty reviewer on how to wrap your hair if it's short, read on!


-Step-12-Version-4.webp)


-Step-12-Version-4.webp)
