This article was co-authored by Shun Pittman. Shun Pittman is a Master Cosmetologist, Author, Owner, and Founder of Corps d’Elite Salon and Corps d’Elite Beauty. With over 25 years of international experience, she is dedicated to and specializes in providing luxury salon services to all hair types and textures and every skin tone and shade. Her services include hair conditioning treatments, cutting, coloring, styling, extensions, and makeup application. Shun has experience working with, coaching, training, and mentoring beauty professionals from multiple companies including L'Oréal, Wella, Matrix, Paul Mitchell, Redken, Big Sexy Hair, and Toni & Guy. She is also a host for national and local media outlets and her work has been featured in The Washingtonian, The Cheddar Network, and WJLA Good Morning Washington's Beauty and Fashion Police segments. Shun is the author of “50 Things Your Hairdresser Wants YOU to Know (and a few things we don’t...)".
This article has been viewed 1,402,190 times.
A curling iron can be used to create tight, formal curls, big, bold waves, thin spirals, or thick tube curls. From big to small you can have whatever curls you want depending on the curling iron. To curl hair with a curling iron, try one of the following methods. Here is a guide on wikiHow to curl hair with a curling iron.
Steps
Wand Curling
-
1Heat up the curling iron. Turn on the curling iron and heat it to 320 degrees for fine hair and 430 degrees for thicker hair. Experiment to find the right temperature for you. It's best to go with the lowest temperature that does the job. This is going to damage your hair less.[1]
- Test the iron's temperature by pressing it to a piece of white tissue paper. If the paper scorches, the curling iron is too hot.[2]
-
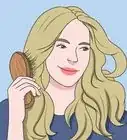
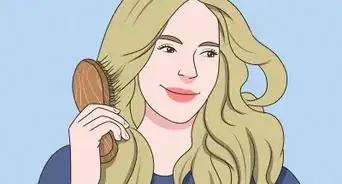
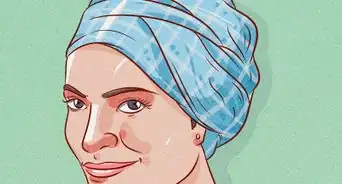
2Brush your hair thoroughly. Make sure there are no tangles or your curls won’t form properly. Your hair should be completely dry before you curl it. Blow dry any damp sections.Advertisement
-
3Apply a heat protectant to your hair. This product is usually sprayed onto dry hair. The heat protectant will form a buffer between your locks and the iron to add shine and prevent damage at high temperatures.[3]
-
4Separate your hair into 4 sections. Divide your hair into a top and bottom half, then separate each of those sections into a left piece and a right piece. From there, you can divide it into subsections that are about 2–3 inches (5.1–7.6 cm) wide. Secure the sections using clips so that the only hair hanging has either been curled already or is the next section of hair that is going to be curled.
-
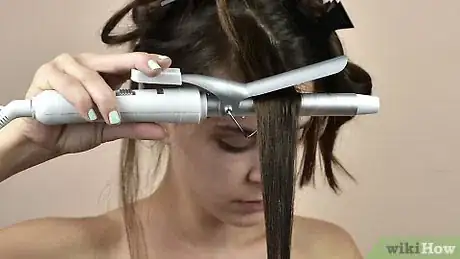
5Working in sections, curl your hair. To achieve a wand curl, use just the wand and wrap your section of hair around the barrel. Don't use the clamp at the bottom of the wand that "holds" the hair as it curls. Be sure not to overlap your hair, as this will reduce heat and result in limp sections. Use your fingers to hold the edge of the section of hair close to the barrel without burning your hair. Doing this rather than using the clamp will prevent crimps in the curls.[4]
- Be sure to alternate the curling direction between clockwise and counterclockwise for a more natural effect.[5]
-
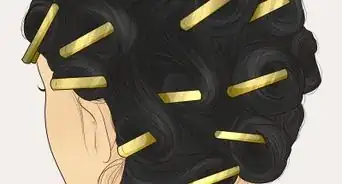
6Pin up curls quickly to help them last longer. Grabbing the bottom of the curl, compact the curl to create a perfect curl. Use a bobby pin or a similar hair clip to fasten the circle of hair to your head.
- Pinning up the curls allows them to hold their shape while they cool. This will make the curls last longer.
-
7Continue until all of your hair is pinned up. then wait until the curls are no longer hot before you take off the clips.
-
8Take out all of the bobby pins, after the hair is cool. Shake out the curls and fix any curls that are messed up.[6]
-
9Manipulate curled hair, if desired. Unless you want to leave it in its current, more formal arrangement, tousle it with your fingers or tease it slightly. Tousling large curls is a great way to create waves.
-
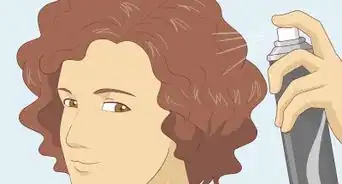
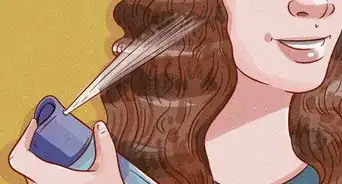
10Add hairspray lightly, to give your curls hold. Do not over-spray, as this will make your hair crispy and/or weigh it down.
Spiral Curls
-
1Grab one strand of hair to curl. For tighter curls, grab smaller sections.
- The ends of your hair are fragile. If you start at the bottom of the section, you may be more likely to damage your hair.
-
2Squeeze the curling iron open and place it near the top of a section of hair. Keep the iron squeezed open for now.
-
3Wrap the entire section of hair around the iron rod manually. Wrap moving the hair away from your face and work carefully to avoid burning your fingers.[7]
-
4Clamp the hair inside the iron for approximately 10 seconds. Your actual time may vary depending on your curling iron and heat settings, so if you need to experiment, on the low side in the beginning.
- You'll know it's time to release the curl when you can feel the heat coming through the hair that's wrapped around the curling iron.
-
5Loosen your hair and repeat on the next section. It will help to unclamp and clamp the iron as you loosen, but be careful not to touch the iron in the process.
What Products Should Somebody Use Before They Curl Their Hair?
Community Q&A
-
QuestionAre there substitutes for heat protectant that won't make my hair smell?
 wikiHow Staff EditorThis answer was written by one of our trained team of researchers who validated it for accuracy and comprehensiveness.
Staff Answer wikiHow Staff EditorStaff AnswerYes, there are several substitutes for heat protectant that won't make your hair smell bad. Some good examples include argan oil, coconut oil and leave-in conditioners. You can also consider using a silk or satin pillowcase to reduce friction and protect your hair from damage while you sleep. There are also heat-protectant sprays formulated to not smell or that have a pleasant scent. Test all new products on a small area of hair first.
 -
QuestionHow long will it take me to curl my hair?
 Community AnswerIt depends on the texture of your hair, how long it is, and how wide the sections you curl are. It can take as little as 30 minutes to as long as 2 hours. Keep in mind that with more practice and experience, you will be able to curl your hair faster.
 -
QuestionDo I have to use the heat protector?
 Community AnswerIt is not essential but it is preferable as it helps to ensure that your hair will not get damaged. Without it, your hair will likely reflect the damaging effects of heat faster.
Warnings
- Gently pull the iron away from your head as you curl to both protect your scalp and add volume.⧼thumbs_response⧽
- Make sure to always unplug the curling iron after you're finished.⧼thumbs_response⧽
- Don't plug in your curling iron near water: it could fall in and electrocute someone.⧼thumbs_response⧽
- If you curl a section for too long, you will cause heat damage, possibly even causing hair to fall out.⧼thumbs_response⧽
- The curling iron is hot. Do not move it too close to your scalp or bump it with your free hand.⧼thumbs_response⧽
- These directions can work in two ways: achieve fabulously kinky natural looking curls, or cause your hair to frizz up like a ball. If your hair tends to frizz, use anti-frizz serum.⧼thumbs_response⧽
- Read the safety instructions before using a curling iron. This will also give you a sense of how long to curl each section of hair for.⧼thumbs_response⧽
Things You'll Need
- Heat protectant
- Curling iron
- Hairspray
- Optional: curl-enhancing spray or shampoo, smoothing serum
- Hairbrush
References
- ↑ https://www.glamour.com/story/biggest-curling-iron-mistakes-youre-making
- ↑ Shun Pittman. Master Cosmetologist, Global Salon Educator & Author. Expert Interview. 16 June 2021.
- ↑ Shun Pittman. Master Cosmetologist, Global Salon Educator & Author. Expert Interview. 16 June 2021.
- ↑ Shun Pittman. Master Cosmetologist, Global Salon Educator & Author. Expert Interview. 16 June 2021.
- ↑ https://advicefromatwentysomething.com/how-to-use-a-curling-iron/
- ↑ https://www.self.com/story/curling-iron-mistakes
- ↑ https://www.samvilla.com/blog/6-different-ways-curl-your-hair/
About This Article
Once you’ve heated your curler and brushed your hair, prepare your hair for curling by spraying it with a heat protectant and separating it into 2 to 3 inch wide sections. Wrap a section of hair around your curling wand with your fingers, then bobby pin your curls to your head when you’re done. Curl every section, and remove the bobby pins once your hair has cooled down. Tousle your hair to create a more natural look and use hairspray to give your curls hold. For tips on how to create spiraling or tube curls, scroll down!



-Step-12-Version-4.webp)


-Step-12-Version-4.webp)
