This article was co-authored by Steven Waldman. Steven Waldman is a Professional Hair Stylist and the Director of Technical Training at Hair Cuttery. Steven uses his creative insight and extensive experience to drive educational programming and motivates facilitators and learners to communicate effectively, create and execute strategies to maximize potential, and achieve success. He uses unexpected sources such as art genres, architecture, and cooking to inspire shape, color, and cuts.
There are 7 references cited in this article, which can be found at the bottom of the page.
This article has been viewed 206,104 times.
Foam bendy rollers are a low-cost, low-effort, and no-heat solution to creating beautiful curls. Great for fine or thick hair and medium to long lengths, bendy rollers can give you tight ringlets or a loose beachy wave. Also, since they do not need heat to set, foam bendy rollers do less damage than hot rollers and are great for woven-in hair or extensions.[1]
Steps
Preparing Your Hair for Rolling with Bendy Rollers
-
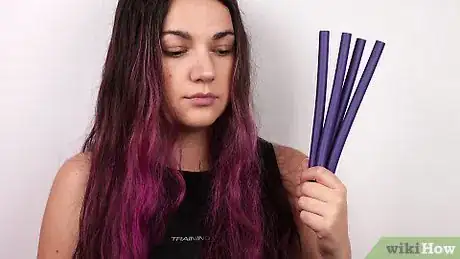
1Choose rollers according to how tight you want your curls. Depending on your hair length, thickness, and desired outcome, choose rollers accordingly. Smaller rollers will produce tighter curls and larger rollers will give you waves. Experiment with sizes until you find what works for you.[2]
- If you are a first-time user, start with rollers that are all the same size. As you become comfortable using them, you can even mix and match different sizes for different looks.[3]
- The size and number of rollers you choose will also depend on the size of your head and the length and thickness of your hair. The more hair you have or the more curls you want, the more rollers you will need.
- Bendy rollers are very inexpensive and can be found online, in most stores, and even at the dollar store.
-
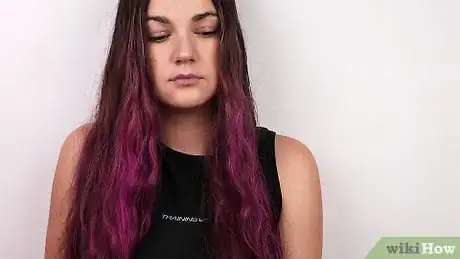
2Wash and condition your hair as usual. It’s important to to start with clean and soft hair to get nice curls. Wash your hair with your favorite shampoo, apply conditioner throughout, and rinse well.[4]
- If your hair is already clean but dry, you can spritz a leave-in conditioner or water all over to dampen it.
Advertisement -
3Towel dry your hair, making sure to squeeze out any excess water. Since the rollers are foam, you do not want a lot of excess water soaking into the rollers. If they are too wet when you roll them, they will take a long time to dry and the curls may not set properly. You want hair that is just damp and without any dripping.[5]
-
4Comb your hair with a wide-toothed comb to remove tangles. Beginning at the bottom of your hair and working your way up, comb your hair to remove any knots or tangles. Using a wide-toothed comb will prevent pulling and damage.
- If you have very thick or coarse hair, you can use a detangling brush that you can get at most beauty supply stores instead of a comb.[6]
-
5Distribute styling mousse or curl definer throughout your hair. This step is especially important if you have fine or very straight hair to make your curls last. Squeeze the amount indicated on the bottle into your hands and rub in throughout your hair from root to tip.
Rolling Your Hair with Bendy Rollers
-
1Partition your hair into four sections. Using a comb and claw-style hair clips, divide your hair into a back section, two side sections, and a top section. You do not need to be precise with your divisions, the sections are just to help you manage the rolling and keep it neat.[7]
-
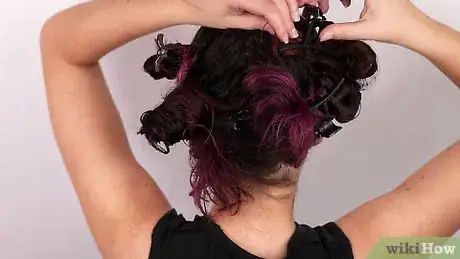
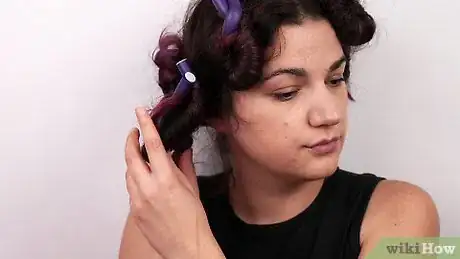
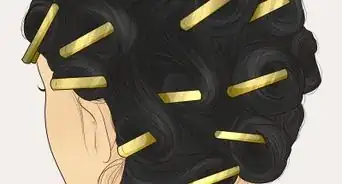
2Roll your hair tightly around the rollers and bend them into place. Beginning at the back of your head and working forward, wrap the end of a small section of hair around the middle of the roller 3 or 4 times. Then, gripping the roller on either side, slowly roll it up to the root and bend the roller so the two ends overlap like a pretzel.[8] Repeat until all your hair is rolled up tight.[9]
- The more hair you put on each roller, the bigger the curls will be. For tighter curls, roll less hair on each roller.[10]
- If your hair begins to dry while you are rolling, spritz with water to keep it moist.
- For a more natural look, twist your hair in random directions as you roll so your curls are not uniform.[11]
-
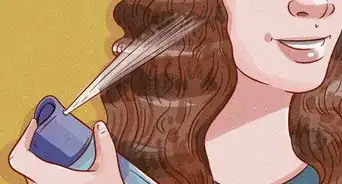
3Spray your hair all over with a maximum hold hair spray. If you really want your curls to last, you need to add more product at this stage so that as the hair is drying, it gets locked into place.[12]
-
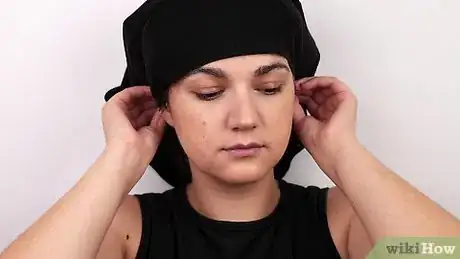
4Wrap your hair in a satin scarf or pillowcase and sleep. Using a satin scarf or pillowcase to cover all of your hair will keep the rollers tight to your head and reduce pulling or falling as you sleep. Tie the scarf or pillowcase securely into place at the top of your head so the knot doesn’t bother you during the night.[13]
- Satin is best because it is smooth, but you can use cotton as well in a pinch. You just may have a little more frizzing without the satin wrap.
Finishing and Styling Your Curls
-
1Remove the scarf and check that your hair is dry. When you wake up, remove the satin wrap and feel around with your fingertips at the root of each roller for dampness. If you feel moisture, wait longer if you can to allow for the hair to dry or, if you are out of time, you can use a hair dryer on a low-setting to finish.[14]
-
2Unroll the rollers and release the curls. Once your hair is completely dry, unbend the rollers from their pretzel shape back into a straight rod and unroll gently. Allow the curls to cascade around your face and resist the urge to touch them so you do not make them frizzy.[15]
- You can loosely pull back your curls out of your face with a claw clip as you work, but be careful not to undo any of the curls.[16]
-
3Separate curls carefully using your fingers. Depending on how curly or how big you want your final style, use your fingers to gently pull apart the curls. The more you separate them, the bigger your hair will be at the end.[17]
- Do not use a brush or comb to separate curls because it will blend the curls together and create frizz.[18]
-
4Style your curls any way you like. Depending on your final desired look, you can tousle your hair with your hands to create a carefree and bouncy look or you can pull some or all of the curls back into an updo for a more formal or professional appearance.[19]
-
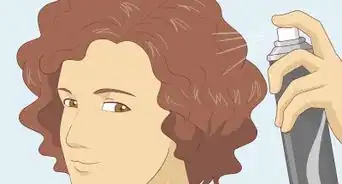
5Spray with a finishing spray or hair spray to hold in place. It’s important to mist your final style all over with hair spray or finishing spray to ensure that it stays in place. A strong holding product will prolong the unfurling effects of gravity and time.[20]
- For extra volume, you can flip your hair upside down before you spray or for a more defined look you can use hair wax instead of spray on each individual curl.
Community Q&A
-
QuestionHow do you use bendy rollers to make waves?
 wikiHow Staff EditorThis answer was written by one of our trained team of researchers who validated it for accuracy and comprehensiveness.
Staff Answer wikiHow Staff EditorStaff AnswerTo get waves, used the largest-sized rollers. Divide your hair into 4 sections and wait until it’s just slightly damp (about 90% dry), then wrap it around the rollers in a spiraling motion, like you would with a curling iron. Use a hair elastic to secure the end of the hair before bending the roller into place. Leave the rollers in place overnight and remove them once your hair is completely dry, then style your waves as desired!
 -
QuestionDo you use bendy rollers on wet or dry hair?
 wikiHow Staff EditorThis answer was written by one of our trained team of researchers who validated it for accuracy and comprehensiveness.
Staff Answer wikiHow Staff EditorStaff AnswerYou can use them on wet or dry hair, but you’ll get tighter, more defined curls with wet hair. Make sure your hair is mostly dry (80-90%) before putting the rollers in to get the best results. You’ll also need to wait until your hair is completely dry before taking the rollers out, or your curls won’t stick.
 -
QuestionDo bendy rollers work on short hair?
 wikiHow Staff EditorThis answer was written by one of our trained team of researchers who validated it for accuracy and comprehensiveness.
Staff Answer wikiHow Staff EditorStaff AnswerYes, as long as you have enough hair to wrap around the rollers. Bendy rollers work well for hair of all lengths.
References
- ↑ https://www.bustle.com/articles/189730-how-to-use-flexi-rods-on-wet-or-dry-hair-to-create-pretty-spirals-waves
- ↑ Steven Waldman. Professional Hair Stylist. Expert Interview. 27 July 2021.
- ↑ https://ravishly.com/bendy-rollers-your-ticket-two-easy-styles-curls
- ↑ https://www.allure.com/gallery/best-hair-rollers-for-every-curl-wave
- ↑ https://youtu.be/pMVK2kgesHI
- ↑ https://www.bustle.com/articles/189730-how-to-use-flexi-rods-on-wet-or-dry-hair-to-create-pretty-spirals-waves
- ↑ https://www.allure.com/gallery/best-hair-rollers-for-every-curl-wave
- ↑ https://youtu.be/pMVK2kgesHI
- ↑ Steven Waldman. Professional Hair Stylist. Expert Interview. 27 July 2021.
- ↑ https://youtu.be/pMVK2kgesHI
- ↑ https://ravishly.com/bendy-rollers-your-ticket-two-easy-styles-curls
- ↑ Steven Waldman. Professional Hair Stylist. Expert Interview. 27 July 2021.
- ↑ https://www.volure.co.za/products/bendy-rollers
- ↑ https://www.volure.co.za/products/bendy-rollers
- ↑ Steven Waldman. Professional Hair Stylist. Expert Interview. 27 July 2021.
- ↑ https://youtu.be/pMVK2kgesHI
- ↑ https://www.leaf.tv/articles/how-to-use-bendy-hair-curlers/
- ↑ https://www.allure.com/gallery/best-hair-rollers-for-every-curl-wave
- ↑ https://www.allure.com/gallery/best-hair-rollers-for-every-curl-wave
- ↑ https://www.allure.com/gallery/best-hair-rollers-for-every-curl-wave



-Step-12-Version-4.webp)





-Step-12-Version-4.webp)


