This article was co-authored by wikiHow Staff. Our trained team of editors and researchers validate articles for accuracy and comprehensiveness. wikiHow's Content Management Team carefully monitors the work from our editorial staff to ensure that each article is backed by trusted research and meets our high quality standards.
The wikiHow Video Team also followed the article's instructions and verified that they work.
This article has been viewed 98,941 times.
Learn more...
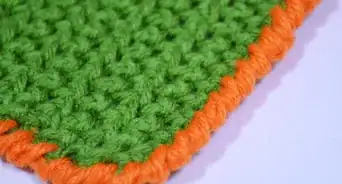
The waffle stitch is a distinct, textured crochet stitch that resembles a waffle. The pattern is achieved by using a combination of double crochet stitches and front post double crochet stitches. It is an easy stitch to learn as long as you have mastered the basics of crochet, such as how to chain and double crochet. Try making a washcloth, scarf, or hat with this fun textured crochet stitch!
Steps
Creating Your Foundation Row
-
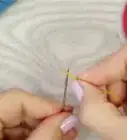
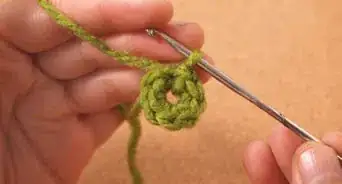
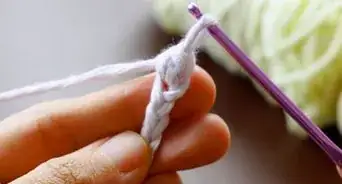
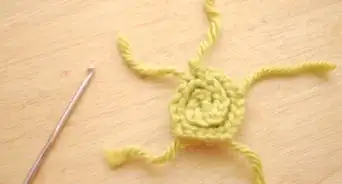
1Chain a multiple of 3. You can make your waffle stitch crocheted item as small or as large as you want, but the starting chain needs to be a multiple of 3. Make a slipknot to get started and then yarn over and pull through the slipknot to make your first chain. Yarn over and pull through twice more to make your first 3 chain stitches.[1] Keep chaining multiples of 3 until you are happy with the length.[2]
- If you just want to practice this stitch, then try making a chain of 12. This will allow you to create a sample swatch.
- For a larger item, such as a washcloth, scarf, or blanket, make chains in multiples of 3 until the chain is the length that you want the finished project to be.
-
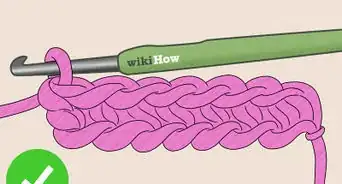
2Double crochet across the chain. To complete your foundation row, you will need to double crochet into each of the chains in your first row. Start with the third chain from the hook and double crochet to the end.[3]
- To double crochet, yarn over the hook, then insert the hook into both of the top loops in the next stitch. Yarn over again and pull through 1 loop. Then, yarn over again and pull through 2 loops. Then, yarn over again and pull through the last 2 loops.[4]
Advertisement -
3Turn and chain 3. After you reach the end of the chain, turn your work and then chain 3 to begin the next row. This chain of 3 will provide slack to continue working your project.[5]
Working the Second Row
-
1Double crochet into the next stitch. The first stitch you make for the second row will be a regular double crochet stitch. Work the stitch into the stitch next to the turning chain you have made.[6]
-
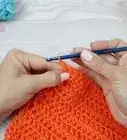
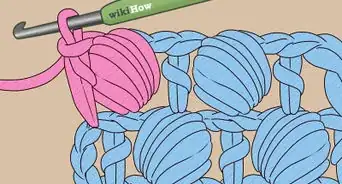
2Go behind the next stitch to make a front post double crochet stitch. Next, you need to work a double crochet stitch into the back of one of your stitches from the previous row. This is called a front post double crochet stitch. The only difference between a front post double crochet stitch and regular double crochet stitch is that after you yarn over for the first time, you need to insert the hook behind the stitch rather than going into it. Insert your hook behind the stitch that is just below your next stitch. Then, yarn over again and complete the double crochet stitch as usual.[7]
- Make sure to work the front post double crochet stitch behind the top of your last double crochet stitch, and not into the stitch. Working the stitch this way will push the yarn forward and help to form the waffle pattern.[8]
-
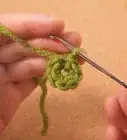
3Double crochet into the next two stitches. After you complete the front post double crochet stitch, work a regular double crochet stitch into each of the next 2 stitches. These stitches will sit further back from the front post double crochet stitch and you should start to see the beginnings of a waffle pattern.[9]
-
4Repeat the process to the end of the row. Continue to work 1 front post double crochet stitch followed by 2 regular double crochet stitches. Do this all the way to the end of the row.[10]
-
5Chain 3 and turn. After you complete this row, make a chain of 3 and then turn your work around. This will serve as your turning chain and provide slack to begin the next row.[11]
Working the Third Row
-
1Double crochet into the next stitch. You will be working the third row and all other odd rows on the wrong side (also known as the back side) of your project. Work a double crochet stitch into the stitch next to the chain of 3 you just made.[12]
-
2Work a double crochet stitch into the front of the next two stitches. Follow up your first double crochet stitch with 2 front post double crochet stitches. Work these stitches behind each of the next 2 double crochet stitches in your row.[13]
-
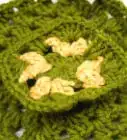
3Repeat this process to the end. Continue to work 1 double crochet stitch followed by 2 front post double crochet stitches all the way to the end of your third row. You should now notice a distinct waffle pattern on the right side of your work.[14]
-
4Finish the row with a front post double crochet stitch. To complete your third row, work a front post double crochet stitch around the chain of 3 at the end of your row. This will have the same effect as the normal double crochet stitch that you are using to end your right side rows.[15]
-
5Repeat the second and third rows. To keep working the waffle stitch, keep repeating the second and third rows. Do this until your crocheted piece reaches the desired size, and then tie off your last stitch and cut the excess yarn.
Things You'll Need
- Yarn in any color or type
- Crochet hook that is appropriate for the type of yarn you are using. Check the label for a recommendation.
- Scissors
References
- ↑ https://www.craftyarncouncil.com/mar06_crochet.html
- ↑ https://www.thestitchinmommy.com/2015/06/waffle-stitch-tutorial.html
- ↑ https://www.youtube.com/watch?v=YRnJHytHN_w
- ↑ http://www.craftyarncouncil.com/mar06_dc.html
- ↑ https://www.youtube.com/watch?v=YRnJHytHN_w
- ↑ https://www.youtube.com/watch?v=YRnJHytHN_w
- ↑ https://www.youtube.com/watch?v=YRnJHytHN_w
- ↑ http://newstitchaday.com/fpdc-front-post-double-crochet/
- ↑ https://www.youtube.com/watch?v=YRnJHytHN_w
- ↑ https://www.youtube.com/watch?v=YRnJHytHN_w
- ↑ https://www.thestitchinmommy.com/2015/06/waffle-stitch-tutorial.html
- ↑ https://www.thestitchinmommy.com/2015/06/waffle-stitch-tutorial.html
- ↑ https://www.thestitchinmommy.com/2015/06/waffle-stitch-tutorial.html
- ↑ https://www.thestitchinmommy.com/2015/06/waffle-stitch-tutorial.html
- ↑ https://www.thestitchinmommy.com/2015/06/waffle-stitch-tutorial.html
About This Article

If you've already done a foundation chain and want to crochet a waffle stitch, start by chaining 3 and turning your work. Double crochet into the first stitch, then do a front post double crochet stitch in the next stitch. Next, double crochet into the following 2 stitches, work a front post double crochet into the next stitch, and continue this pattern to the end. For your third row, double crochet the first stitch, make 2 front post double crochets into the next 2 stitches, and repeat until the end. Finally, alternate between the second and third row patterns until your work is done. For advice on how to create your foundation chain, read on!