X
This article was co-authored by wikiHow Staff. Our trained team of editors and researchers validate articles for accuracy and comprehensiveness. wikiHow's Content Management Team carefully monitors the work from our editorial staff to ensure that each article is backed by trusted research and meets our high quality standards.
This article has been viewed 19,598 times.
Learn more...
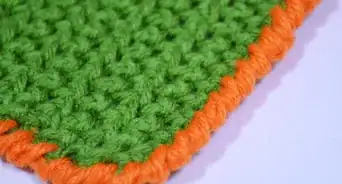
Bullion stitches have a distinct, puffy look to them, which can add interest and texture to a crochet project. The bullion stitch is considered an advanced stitch by many crocheters. However, the bullion stitch is easier than it looks. You will just need some basic crocheting knowledge, some yarn, and a crochet hook to get started.
Steps
Part 1
Part 1 of 2:
Working the Bullion Stitch
-
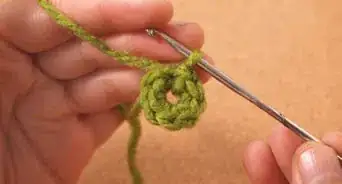
1Create a foundation row. Start by making a chain of 15 stitches, or however many stitches your project calls for. Then, single crochet all the way to the end of the chain to make your first row. This will be the foundation row for your bullion stitch practice or project.[1]
- To single crochet, insert the hook into the second chain from the hook. Then, loop the yarn over the end of the hook and pull it through the first loop. Then, yarn over again and pull through both loops. This completes one single crochet stitch.[2]
- Repeat the single crochet stitch to the end of the chain.
-
2Chain two when you reach the end. When you get to the end of the first row, chain two stitches and then turn the stitches around. This is called the turning chain and it is helpful for preventing puckering in your work. Do this before each new row.[3]Advertisement
-
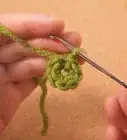
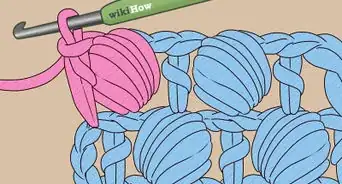
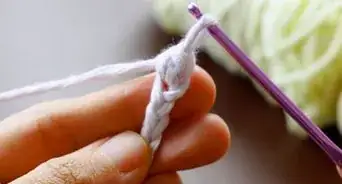
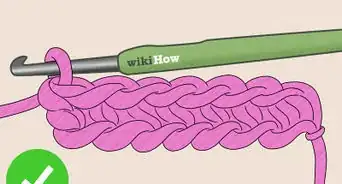
3Wrap the yarn around your hook seven times. To do your first bullion stitch, loop the yarn around the hook seven times. Keep the yarn close together but do not wrap the yarn over other loops. The yarn should look similar to a spring coiled around the hook.[4]
- You can wrap the yarn around your hook more than seven times to create a larger stitch.[5] Try looping the yarn around 10 or more times to see the difference in size.
-
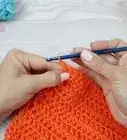
4Insert the hook, yarn over, and pull through first loop. Next, insert the hook into the next stitch in your row. Then, loop the yarn over the hook and pull this loop through the second loop on your hook. This new loop will go through all of the loops on the hook to make the first bullion stitch.[6]
-
5Loop the yarn over again and pull through all loops on the hook. Begin pulling the yarn through all of the loops on your hook. You do not have to pull through all the loops at once. Just pull through them one at a time. When you have pulled through all of the loops on the hook, you have completed your first bullion stitch.[7]
- You can follow the bullion stitch with another bullion stitch, or alternate between bullion stitches and single crochet stitches. Continue to do bullion stitches or alternate between bullion stitches and single crochet stitches to the end of the row.
-
6Follow with a row of single crochet. To provide stitches to work into for your next round of bullion stitches, you may want to follow each row of bullion stitches with a row of single crochet stitches. Then, do another row of bullion stitches for the following row.[8]
- Remember to chain two for the turning chain at the beginning of every row.
-
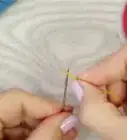
7Finish your project. When you have finished your project or have gotten enough practice, snip the tail leaving enough yarn to pull through and make a secure knot. Then, pull the free end of the yarn through the loop and tug to tighten your final stitch into a knot. You may even want to knot it again to ensure that it is secure. Then, snip the excess yarn.


Advertisement
Part 2
Part 2 of 2:
Ensuring Successful Stitches
-
1Choose a yarn that will work well with this stitch. The bullion stitch looks good with many different types of yarn, but some types of yarn may unravel slightly as you loop them around and around the hook. Therefore, a yarn that will not unravel may be a good choice. Experiment with different types of yarn to see which ones look best with the bullion stitch.
- Remember to check the label of the yarn to find out what kind of hook will work best with it. There should be a crochet hook size recommendation on the yarn label.
-
2Go slow. The bullion stitch may take some time to master, so be sure to go slow, especially at first. Count the loops as you ravel them around the hook and be careful as you pull the yarn through each loop. Also, keep in mind that going slow is helpful for any crochet project or new stitch.[9]
- Don’t try to pull through all of the loops at once. It may seem like a good idea, but it is unlikely to yield good results.
-
3Maintain consistent tension. Tension is important when you are working the bullion stitch and in other crochet stitches.[10] You may easily apply too much tension to one loop and not enough tension to another loop, and this could lead to a sloppy stitch. Try to ensure that each loop has roughly the same tension, and adjust as needed.
- If you do end up with some inconsistent tension, then you can try to adjust the loops after they have been taken off the hook. Just gently tug at the loops to even them out.


Advertisement
Things You’ll Need
- Yarn
- Crochet hook (check yarn label for size recommendation)
- Scissors
References
- ↑ http://www.bhookedcrochet.com/2015/06/28/crochet-bullion-stitch-the-easy-way/
- ↑ http://www.craftyarncouncil.com/instructions_cr.php3
- ↑ http://www.bhookedcrochet.com/2015/06/28/crochet-bullion-stitch-the-easy-way/
- ↑ http://www.bhookedcrochet.com/2015/06/28/crochet-bullion-stitch-the-easy-way/
- ↑ https://www.youtube.com/watch?v=iqIvn3LKEVA
- ↑ http://www.bhookedcrochet.com/2015/06/28/crochet-bullion-stitch-the-easy-way/
- ↑ http://www.bhookedcrochet.com/2015/06/28/crochet-bullion-stitch-the-easy-way/
- ↑ http://www.bhookedcrochet.com/2015/06/28/crochet-bullion-stitch-the-easy-way/
- ↑ http://www.makeandtakes.com/7-simple-crochet-tips-for-beginners
About This Article

wikiHow Staff
wikiHow Staff Writer
This article was co-authored by wikiHow Staff. Our trained team of editors and researchers validate articles for accuracy and comprehensiveness. wikiHow's Content Management Team carefully monitors the work from our editorial staff to ensure that each article is backed by trusted research and meets our high quality standards. This article has been viewed 19,598 times.
Co-authors: 1
Updated: March 29, 2019
Views: 19,598
Categories: Crochet Stitches
Advertisement