This article was co-authored by wikiHow Staff. Our trained team of editors and researchers validate articles for accuracy and comprehensiveness. wikiHow's Content Management Team carefully monitors the work from our editorial staff to ensure that each article is backed by trusted research and meets our high quality standards.
There are 14 references cited in this article, which can be found at the bottom of the page.
This article has been viewed 18,285 times.
Learn more...
Crocheted coasters are easy to make, and so useful! Make coasters using cotton yarn to ensure that they will absorb any fluid that gets on them. Start by crocheting a circle, and keep working in rounds until the circle is the desired size for your coasters. Then, add a finishing touch if desired, such as by crocheting a border stitch or weaving a piece of decorative ribbon or contrasting color yarn into the outer edges of the coaster.
Steps
Creating the Center of a Coaster
-
1Make a slipknot. Loop the yarn around your index and middle fingers 2 times. Then, pull the first loop through the second loop. Tug the tail of the yarn slightly to tighten the base of the loop. Then, place the slipknot onto your crochet hook.[1]
- Cotton yarn works best for making coasters since it will absorb the moisture at the bottom of your cup.
How to Choose Yarn Colors for Coasters
Opt for dark colors to avoid visible stains, such as black, navy, plum, burgundy, and dark green.
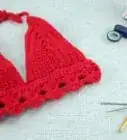
Make seasonal coasters for something festive, such as black and orange coasters for Halloween or red and green coasters for Christmas.
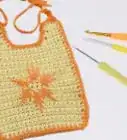
Choose yarn colors that will match your china, tablecloth, or other items on your table, such as yellow coasters with a white tablecloth, or purple coasters to match purple mugs and plates.
-
2Chain 6 to use as a central loop. With your slipknot on the crochet hook, wrap the working yarn over the end of the hook. Then, pull this loop through the slipknot to create the first chain.[2]
- Repeat this 5 more times to make a total of 6 chain stitches.
Advertisement -
3Connect the ends of the chain with a slipstitch. Insert the hook into the first chain you made. Then, loop the yarn over the end of the hook and pull it through both loops to lock them together.[3]
- Pull the yarn taut to ensure that the ends are well-connected.
-
4Make a chain of 3. Wrap the yarn around the end of your hook and pull through 1 stitch. Then, repeat this 2 more times.[4]
- Only do this at the beginning of the round. This chain of 3 counts as a double crochet stitch.
-
5Double crochet into the center of the circle 11 times.[5] Insert the crochet hook through the center of the chain circle, then wrap the yarn over the hook and pull this yarn back through the circle. Wrap the yarn over the hook again and pull through the next 2 stitches on the hook. Yarn over, and pull through 2 again to complete the stitch.[6]
- Repeat this 10 more times for a total of 11 double crochet stitches plus the chain of 3, which counts as a double crochet stitch.
- Count to see if you have a total of 12 stitches (including the chain of 3 as 1 stitch) at the end of the round. If not, add or remove a stitch to get to this total.
-
6Slipstitch to connect the first and last stitches. Insert the hook into the top of the chain of 3 you created at the beginning of the round. Then, loop the yarn over the hook and pull it through both stitches on the hook to secure the ends of the round.[7]
- Only do this at the end of the round.


Expanding the Coaster
-
1Chain 3 and double crochet 1 time into the same space. Wrap the yarn around the end of the hook, and pull it through the loop to make a chain. Repeat this 2 more times for a total of 3 chains. Then, double crochet 1 time into the same space that the chain is extending from.[8]
- Only work a chain of 3 at the beginning of the round. It counts as a double crochet stitch.
-
2Double crochet twice into each of the stitches in the round. To increase the total number of stitches in the round by 12, work 2 double crochet stitches into each of the stitches in the round for a finishing total of 24 stitches.[9]
- Count to make sure you have 24 stitches at the end of the round. Add or remove a stitch if needed.
-
3Slipstitch to connect the ends of the round. Insert the hook through the top of the chain of 3. Loop the yarn over the hook, and pull it through both stitches on the hook.[10]
- Keep the yarn taut to ensure that the ends of the round are securely connected.
-
4Continue to increase the circle by adding 12 stitches per round. Work 12 increases per round to keep making the circle bigger. Work as many additional rounds as desired. Most coasters are about 4 in (10 cm) in diameter, so measure the coaster with a ruler after each round to check the size. Work the additional rounds using the following stitch sequences: [11]
- Round 3: Chain 3 and double crochet 1 time into the same space. Then, double crochet 1 time into the next stitch, and 2 times into the next stitch, repeat this sequence to the end of the round. Slipstitch to secure the ends together.
- Round 4: Chain 3 and double crochet 1 time into the same space. Then, double crochet 1 time into each of the next 2 stitches, and 2 times into the stitch after that, repeat this sequence to the end of the round. Slipstitch to secure the ends together.
- Round 5: Chain 3 and double crochet 1 time into the same space. Then, double crochet 1 time into each of the next 3 stitches, and 2 times into the stitch after that, repeat this sequence to the end of the round. Slipstitch to secure the ends together.


Finishing a Coaster
-
1Weave in the end of the yarn to complete the circle. When the coaster is the desired size, cut the yarn about 8 in (20 cm) from the last stitch. Thread the end of the yarn through the eye of a yarn needle, and pull the yarn through the eye by about 3 in (7.6 cm). Then, insert the needle next to the last stitch on the backside of your work and pull the yarn taut.[12]
- Weave the yarn through a few more stitches in the same way, then tie the yarn in a knot around the last stitch.
- Cut the yarn about 0.25 in (0.64 cm) from the knot.
- This completes a basic coaster! You can stop here or add a finishing touch.
-
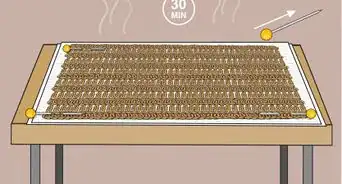
2Add a border to the outside of the coaster, if desired. Adding a border makes the coaster more decorative, but it is optional. After you have completed the last round, work 1 additional round in the border stitch of your choice. Make sure to work 12 increases into the border to keep the circular shape of the coaster.
- Work single crochet stitches into the edge of the coaster if you want a narrow, flat edge.[13]
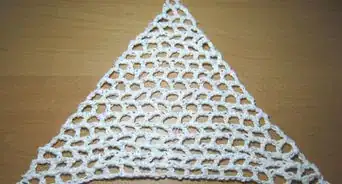
- Choose the shell stitch, if you want a pretty, decorative edge on your coaster.
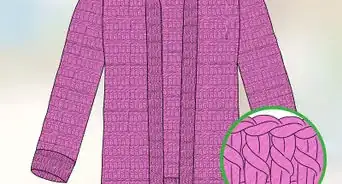
- Go with a textured stitch, such as the popcorn stitch, if you want a border that stands out.
-
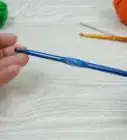
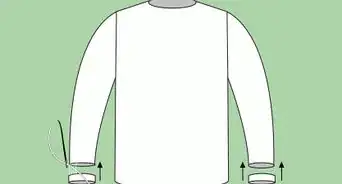
3Weave ribbon or yarn through the edges of the coaster. Thread a 12 in (30 cm) piece of ribbon through the eye of a yarn needle. Then, insert the threaded needle into a stitch on the outermost round of the coaster. Continue to weave in and out of the stitches in this round until you are back at the beginning. Then, tie the ends together in a knot or a bow to secure them.[14]
- Position the bow or knot on the top side of the coaster if you want it to be visible, or on the bottom side if you do not want it to be visible.
- If the ribbon is too wide to fit through a yarn needle, use a crochet hook to pull it through each of the stitches.


Community Q&A
-
QuestionIs there a specific reason why does it always gets curved?
 Oriana NeulingerCommunity AnswerYour gauge may be smaller than the pattern requires. Increase the number of stitches added per round or decrease the tension you hold the yarn with. Alternatively, if working with cotton or wool, "block" it: saturate the coaster with water, stretch it out over a board into the shape you want, and pin or clip it until it dries. You nearly always have to do this with lacework and garments, but it doesn't work with acrylic yarn.
Things You’ll Need
- 1 ball of cotton yarn
- 1 US size H-8 (5.0 mm) crochet hook
- Scissors
- Ribbon or contrasting color yarn (optional)
- Yarn needle (optional, for weaving yarn or ribbon through the edges)
References
- ↑ https://www.youtube.com/watch?v=QFHexyNR1dY&feature=youtu.be&t=27
- ↑ https://www.youtube.com/watch?v=QFHexyNR1dY&feature=youtu.be&t=35
- ↑ https://www.youtube.com/watch?v=QFHexyNR1dY&feature=youtu.be&t=45
- ↑ https://www.youtube.com/watch?v=QFHexyNR1dY&feature=youtu.be&t=91
- ↑ https://www.youtube.com/watch?v=QFHexyNR1dY&feature=youtu.be&t=117
- ↑ https://www.craftyarncouncil.com/mar06_dc.html
- ↑ https://www.youtube.com/watch?v=QFHexyNR1dY&feature=youtu.be&t=135
- ↑ https://www.youtube.com/watch?v=QFHexyNR1dY&feature=youtu.be&t=182
- ↑ https://www.youtube.com/watch?v=QFHexyNR1dY&feature=youtu.be&t=200
- ↑ https://www.youtube.com/watch?v=QFHexyNR1dY&feature=youtu.be&t=210
- ↑ https://www.youtube.com/watch?v=QFHexyNR1dY&feature=youtu.be&t=232
- ↑ https://www.youtube.com/watch?v=oyvdsTz9Jso&feature=youtu.be&t=62
- ↑ https://www.craftyarncouncil.com/mar06_croc_edging.html
- ↑ https://www.youtube.com/watch?v=fipUVNPnhZQ&feature=youtu.be&t=3226
About This Article