This article was co-authored by wikiHow staff writer, Hunter Rising. Hunter Rising is a wikiHow Staff Writer based in Los Angeles. He has more than three years of experience writing for and working with wikiHow. Hunter holds a BFA in Entertainment Design from the University of Wisconsin - Stout and a Minor in English Writing.
There are 25 references cited in this article, which can be found at the bottom of the page.
This article has been viewed 17,526 times.
Learn more...
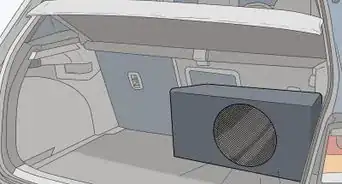
Subwoofers are great for boosting bass when you listen to music at home or in your vehicle, but the boxes holding them may slide around or look unattractive. Luckily, you can upholster a subwoofer box using only a few materials. Covering the boxes prevents them from shifting positions when they’re in your vehicle and hides the raw wood underneath. Within the span of a few hours, your subwoofer box will look great!
Steps
Preparing Your Materials
-
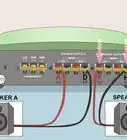
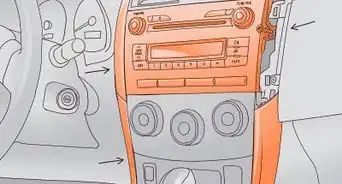
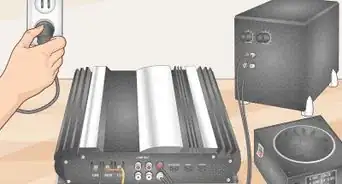
1Remove the subwoofer from the box if you already have it installed. Locate the screws holding the subwoofer speaker in your box and loosen them with a screwdriver. Carefully lift the speaker out from the hole so all of the cords and wires pull through it without snagging. Set the subwoofer aside while you’re working on the box so it doesn’t get damaged.[1]
- Avoid leaving the subwoofer attached while you cover the box since the carpet won’t lay flush and you could damage the speaker.
-
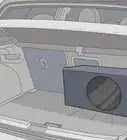
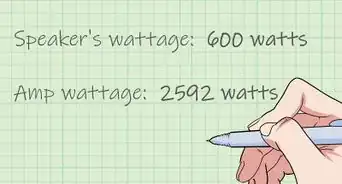
2Measure the dimensions of the box to calculate the surface area. Find the length, width, and depth of the box and write down your measurements. Set up the equation 2(L x W) + 2(W x D) + 2(L x D), where L is the length, W is the width, and D is the depth. Solve the equation with a calculator to find the total area you’ll need to cover with carpet.[2]
- For example, if your box is 24 × 12 × 10 in (61 × 30 × 25 cm), then your equation would look like 2(24 x 12) + 2(12 x 10) + 2(24 x 10).
- Next, simplify the parentheticals: 2(288) + 2(120) + 2(240).
- Then, multiply the numbers together: 576 + 240 + 480.
- Finally, add the numbers together to get the surface area, so the total surface area of the box is 1,296 square inches (0.836 m2).
- If you don’t have a rectangular subwoofer box, then measure the area of each side and add them together.
Advertisement -
3Cut liner carpet 6 in (15 cm) longer than the box’s end perimeter. Look for liner carpet that’s lint-free and matches the color of your vehicle’s interior or the space where you’re keeping the subwoofer. Measure the perimeter around the edge on the short end of the box and add 6 inches (15 cm) so you have some excess carpet. Use a pair of scissors to cut your carpet to the correct length.[3]
- For example, if your box is 24 × 12 × 10 in (61 × 30 × 25 cm), the perimeter on the short end would equal 2(12 + 10), which simplifies to 44 inches (110 cm). Add 6 inches (15 cm) to the length so the carpet is 50 inches (130 cm) long.
- Using carpet longer than the edge’s perimeter allows you to wrap the box with 1 continuous piece so you don’t have multiple seams.
- You can buy liner carpet online or from an auto supply or carpet store.
- Avoid using carpet that has thick backing on it since you won’t be able to bend or flex it around the box as easily.
Variation: You can also choose vinyl upholstery instead of carpet.
-
4Trim the piece of carpet as wide as the box’s combined length and width. Add the box’s length and width together to find your measurement. Use your scissors and a straightedge to cut the carpet to the proper width so it can wrap around the shortest ends. That way, you won’t have unattractive seams around the edges of the box and it will look like a single piece.[4]
- For example, if your box is 24 × 12 × 10 in (61 × 30 × 25 cm), then the carpet width would equal 24 + 12, which would be 36 inches (91 cm).
-
5Spread the liner carpet face down on a flat surface. Find a flat space in a well-ventilated area to work, such as in a garage or on a driveway, since the adhesive you’ll use creates harmful fumes. Lay your carpet on the ground so the good side is on the bottom, and smooth out any wrinkles so it’s flat.[5]
- Avoid putting the carpet face-up, or else it will be backwards when you attach it to the box.
- If you need to work indoors, open windows and run a fan to keep the space ventilated properly.
-
6Lay the box in the middle of the carpet so the speaker hole faces down. Set your box in the center so the carpet extends past the short ends by the same distance on each side. Test wrapping the carpet around the box’s longer sides to make sure it covers the wood completely, and adjust the box’s position if you need to.[6]
- If you keep the speaker hole face up, then the carpet seam will be on the front of the subwoofer box and it may not look as clean.


Wrapping Carpet around the Long Sides
-
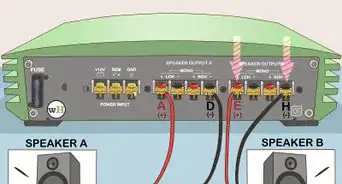
1Apply contact cement to the side and the carpet that will cover it. Mix the contact cement with a stir stick to ensure it’s thoroughly combined. Dip a paintbrush in your cement and apply a thin layer to a side of the box that’s perpendicular to the carpet. Then spread the cement on the rectangular area of the carpet directly below the side you just worked on.[7]
- Contact cement is an adhesive that sticks to itself, and you can buy it from your local hardware store.
- You may also use a spray adhesive if you want. Still be sure to apply it to both the carpet and the box so it sticks better.
Tip: Contact cement adheres the best to itself, so always be sure to apply it to both the box and the carpet, or else it may come loose more easily.
-
2Allow the contact cement to dry for 10–15 minutes. Avoid working on your box while the cement is still wet since it won’t adhere properly. Test the adhesive with your finger to make sure it’s dry to the touch but still tacky.[8]
- If you’re using spray adhesive, you don’t need to wait for it to dry before you start working.
-
3Pull the carpet tight against the glued side of the box. Grab the edge of the carpet closest to the side you’re attaching and pull it tight until you don’t see any wrinkles. Slowly lift the carpet and press it against the side of the box covered with adhesive. Wrap the edge of the carpet around the top of the box and smooth out any wrinkles from the bottom edge toward the top with your hand.[9]
- You may also use a plastic scraper to try and smooth out any wrinkles in the fabric.
- If there are wrinkles or folds you can’t get out, carefully peel the carpet back and stretch it again. Usually, you can readjust the carpet once or twice without reapplying adhesive.
-
4Turn the box so the side you just glued is on the bottom. Tip your box onto the carpeted side so the speaker hole is visible. Be careful that you don’t accidentally pull the carpet off of the side you just glued, or else you may have to reattach it.[10]
-
5Glue the carpet to the front side that has the speaker hole. Apply the contact cement to the side with the speaker holes and the rectangular section of carpet directly below it. Allow the contact cement to dry to the touch before stretching the carpet tight against the side. Smooth out any wrinkles as best as you can by hand.[11]
- It’s okay to cover the speaker hole with carpet since you’ll eventually cut it out.
-
6Attach the carpet to the third side of the box with contact cement. Turn the box so the side with the speaker hole faces the ground. Apply your contact cement to the next adjacent side and the carpet directly below it. After the contact cement dries, pull your carpet tight onto the wood and smooth it out. After you attach the third side, you should have 2 loose flaps of carpet that fold over onto the back of the box.[12]
- Avoid gluing the third side before the one with the speaker hole, or else you won’t be able to apply the contact cement to it.


Cutting the Back Seam and Speaker Hole
-
1Apply the contact cement to the back of the box and the ends of the carpet. Paint a thin layer of the contact cement on the back of the box, which should be pointing up at this point. Then coat the carpet flaps with it as well. Allow the contact cement to dry completely to the touch so it’s able to adhere to itself better.[13]
- Be careful that the carpet flaps don’t touch the adhesive on the box, or else they may try together and be difficult to remove.
-
2Fold the sides of the carpet onto the back so they overlap by 3 in (7.6 cm). Pull one of the carpet flaps tight and press it down against the back of the box. Smooth out any wrinkles as best as you can, working from the edge toward the center of the box. Then fold the second flap down so it slightly overlaps the first flap. Press the carpet down firmly so it adheres properly to the wood.[14]
- It’s okay if the overlapped section of carpet looks raised compared to the rest of the box since you’ll be able to trim the pieces.
-
3Cut a seam along the length of the box so it goes through both layers of carpet. Lay a straightedge down so it’s parallel to the edges of the carpet and runs through the center of the box. Press a utility knife into the carpet at the edge of the box, and drag the blade along the straightedge so it cuts through both carpet flaps. If you aren’t able to cut through both pieces of the carpet in a single cut, go over it 1–2 more times until you feel the blade drag against the wood underneath.[15]
- Always cut away from your body so you don’t accidentally injure yourself if the blade slips.
- It’s okay if you leave a dent or scratch in the wood since it will be covered by carpet.
Warning: Avoid using a dull blade since it may leave a ragged edge and make the seam look unattractive.
-
4Remove the overlapping pieces so the carpet makes a perfect seam. Rip off the piece of carpet from the top flap that isn’t pressed against the back of the box. Then, carefully peel the top flap up to expose the bottom flap. Grab the cut piece of carpet from the bottom flap and tear it off of the wood.[16]
- If you have trouble removing the cut piece of carpet, try using a plastic scraper to peel the piece off of the wood.
-
5Press the carpet flaps down to secure them back onto the box. Pull the top carpet flap tight again so the edge lines up perfectly with the bottom flap. Apply firm pressure to the top flap and smooth out any wrinkles toward the seam. When you’re finished, the flaps will look flush against the wood and have a straight seam running through the middle.[17]
- While you shouldn’t have to reapply adhesive, you may need to add another layer if the carpet doesn’t stick against the wood again.
-
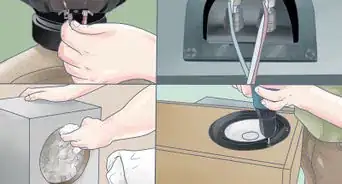
6Cut the carpet off that’s covering the speaker hole. Turn the speaker box over so the side with the speaker hole faces up. Press down on the carpet to see where it feels loose so you know the hole’s location. Push the knife blade through the carpet and slowly slice toward the edge of the hole. Follow along the hole’s outline with the blade to remove the circular section of carpet. Work slowly so your cuts are precise and tight against the edge.[18]
- Feel around for any other loose carpet sections on the side or back of the subwoofer box, since there may be holes for ports for cords or additional speakers. Cut them out in the same way.


Securing the Carpet to the Short Ends
-
1Cut the carpet from the box's corners toward the loose edges to create flaps. Start your blade in the carpet at the corner of the box and make a straight cut with your knife toward the loose edge. Continue slicing from the corners to the carpet’s edge so each short end has 4 rectangular flaps.[19]
- Cutting the ends of the carpet into flaps makes them easier to fold over without wrinkles.
-
2Spread contact cement on the flaps and wood on one end of the box. Stand the subwoofer box up on one of the short ends so you can work on it more easily. Paint a thin layer of the contact cement onto the exposed wood on the box’s short end. Then, thoroughly apply it to each of the carpet flaps. Allow the cement to dry for 10–15 minutes, or until it doesn’t feel wet anymore.[20]
- Be careful that the flaps don’t touch one another after applying the contact cement since they will stick together and be difficult to pull apart.
-
3Pull the bottom and top flaps over the end so they overlap. Look for the flaps that are on the sides perpendicular to the speaker hole. Pull the first flap tight and press it down against the wood so the contact cement adheres to it. Smooth out any wrinkles away from the edge of the box to ensure it lays flat. Then bring the top flap down so it overlaps the first one and press it down firmly.[21]
- Leave the flaps on the front and back of the box loose for now.
-
4Make a straight seam through the middle of the flaps with your utility knife. Lay a straightedge through the middle of the short end so it’s parallel to the edges of the top and bottom flaps. Using your straightedge as a guide, make a cut through the flaps where they overlap to make a new seam. Make sure the blade goes through both pieces of the carpet so you can easily remove the pieces.[22]
- Cut away from your body so you don’t get hurt if the knife blade slips.
-
5Peel the flaps up to remove the cut carpet sections and press them back down. Remove the loose section of carpet on top before carefully peeling the flap off the adhesive. Locate the cut section of the carpet from the bottom flap and tear it off the wood. Then press the top flap back down so the cut edges line up and create a straight, clean seam through the middle of the box.[23]
- Try using a plastic scraper if you have trouble removing the carpet piece from the wood.
-
6Fold down the flap from the front of the box. Take the flap that’s on the side of the box with the speaker hole and pull it tight. Press the flap down on top of the top and bottom flaps and smooth out the wrinkles with your palm. It’s okay for the front flap to overlap the pieces you already attached to the box.[24]
- Avoid folding the flap on the back of the box right away since it will be more difficult to make your cuts.
-
7Cut a 3 in (7.6 cm) curve between the corners on the front flap. Start your knife blade in one of the corners for the front flap. Drag the blade through the carpet to create a concave curve, or half-moon shape, so it extends about 3 inches (7.6 cm) from the edge in the middle. End your cut in the other corner on the front flap. Follow along the cut 1–2 times to ensure you cut through all the layers of carpet.[25]
- Cutting a curve will make create a clean and attractive seam on the end of the box.
Tip: If you have trouble cutting the curve without a guide, draw the outline of the curve with a piece of chalk or a washable marker.
-
8Remove the cut sections so the curve is flush with the box. Rip off the cutout piece from the front flap and discard it. Peel up the curved front flap to expose the cut pieces of carpet from the top and bottom flaps. Remove the loose pieces of carpet before pressing the front flap back down against the wood. Line up the curve with the cut in the bottom flaps so they don’t overlap.[26]
- Curves help hide the seams more than straight cuts and make them less noticeable.
-
9Fold and cut the back flap so it’s curved and creates a perfect seam. Stretch the back flap tight and press it down on top of the other flaps. Cut out a curve that’s symmetrical to the front flap and remove the cut piece. Lift the back flap so you can remove the cut carpet pieces underneath it. Press the back flap down again so it’s flush with the rest of the carpet.[27]
- It’s okay if the curves aren’t exactly the same.
-
10Repeat the process on the other end of the box. Flip the box over so the unfinished short end is on top. Apply your contact cement to the flaps and the wood and allow it dry to the touch. Start with the top and bottom flaps, and cut a straight seam through the middle. Then fold over your front and back flaps and cut them into curves as you did on the first side.[28]
- Once you’re finished, you can re-screw the speaker back into the speaker hole.


Warnings
- Work in a well-ventilated area while working with contact cement since it can create fumes that cause irritation.⧼thumbs_response⧽
- Always cut away from your body while working with a utility knife so you’re less likely to hurt yourself if the blade slips.⧼thumbs_response⧽
Things You’ll Need
- Screwdriver
- Measuring tape
- Liner carpet
- Scissors
- Straightedge
- Contact cement
- Paintbrush
- Utility knife


References
- ↑ https://youtu.be/yEhHwCVL4jk?t=172
- ↑ http://www.math.com/tables/geometry/surfareas.htm
- ↑ https://youtu.be/yEhHwCVL4jk?t=149
- ↑ https://youtu.be/yEhHwCVL4jk?t=149
- ↑ https://youtu.be/yEhHwCVL4jk?t=149
- ↑ https://youtu.be/yEhHwCVL4jk?t=183
- ↑ https://youtu.be/yEhHwCVL4jk?t=183
- ↑ https://youtu.be/oA7jafMrqdk?t=271
- ↑ https://youtu.be/yEhHwCVL4jk?t=213
- ↑ https://youtu.be/yEhHwCVL4jk?t=228
- ↑ https://youtu.be/WZ4JhEtppuU?t=48
- ↑ https://youtu.be/WZ4JhEtppuU?t=61
- ↑ https://youtu.be/yEhHwCVL4jk?t=183
- ↑ https://youtu.be/WZ4JhEtppuU?t=91
- ↑ https://youtu.be/WZ4JhEtppuU?t=103
- ↑ https://youtu.be/yEhHwCVL4jk?t=254
- ↑ https://youtu.be/yEhHwCVL4jk?t=257
- ↑ https://youtu.be/A6i0-wEyDko?t=122
- ↑ https://youtu.be/WZ4JhEtppuU?t=146
- ↑ https://youtu.be/yEhHwCVL4jk?t=301
- ↑ https://youtu.be/WZ4JhEtppuU?t=185
- ↑ https://youtu.be/yEhHwCVL4jk?t=337
- ↑ https://youtu.be/WZ4JhEtppuU?t=202
- ↑ https://youtu.be/GJKFFsfKAUI?t=392
- ↑ https://youtu.be/GJKFFsfKAUI?t=399
- ↑ https://youtu.be/GJKFFsfKAUI?t=411
- ↑ https://youtu.be/GJKFFsfKAUI?t=510
- ↑ https://youtu.be/WZ4JhEtppuU?t=256
About This Article