This article was co-authored by wikiHow staff writer, Travis Boylls. Travis Boylls is a Technology Writer and Editor for wikiHow. Travis has experience writing technology-related articles, providing software customer service, and in graphic design. He specializes in Windows, macOS, Android, iOS, and Linux platforms. He studied graphic design at Pikes Peak Community College.
The wikiHow Tech Team also followed the article's instructions and verified that they work.
This article has been viewed 187,571 times.
Learn more...
Connecting your Mac to a server is an ideal way to copy files directly from one Mac to another, share large files, or access files from another network. You can connect to nearly any Mac or Windows server on your network as long as the server has file sharing enabled. This wikiHow teaches you how to connect to a server on a Mac.
Steps
Using AppleScript
-
1
-
2Click the Applications folder. It's in the sidebar to the left of the Finder. This displays a list of all applications you have installed on your Mac.Advertisement
-
3Open the Utilities folder. It has an icon that resembles a blue folder with tools on the front. It's in your Applications folder. This displays a list of system-related applications.
-
4
-
5Type the following command into Terminal: tell app "Finder" to open location. This is the start of the command to open a location in the Finder. Don't press Enter just yet. There is still more to add to the line.
-
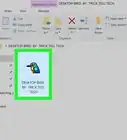
6Add the following syntax to the terminal command: "protocol://username:password@ipaddress/folder". In this syntax, type the server protocol (i.e, ftp, smb) in place of "protocol". Type the actual username and password needed to log in in place of "username" and "password". Type the IP address of the server in place of "ipaddress". Finally, type the name of the shared folder in place of "folder".
- For a local server, type "local" in place of "ipaddress".
- The full command should look something similar to this: tell app "Finder" to open location "ftp://admin:admin@192.168.127.2/pictures"
-
7Press ↵ Enter on your keyboard. This executes the command. Your Mac will now be connected to the server you specified.


Browsing in Finder
-
1
-
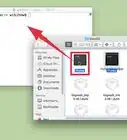
2Click Go. It's in the menu bar at the top of the screen.
-
3Click Connect to Server. It's at the bottom of the menu that drops down when you click "Go".
-
4Click Browse. It's the first option in the lower-right corner of the "Connect to Server" window. This displays a list of servers available on the network.
-
5Click the server you want to connect to. You can connect to it in the Network window, or the sidebar to the left.
-
6Select "Guest" or "Registered User". If you are a registered user of the server, click the radio button next to "Registered User". If you are not a registered user, click the radio button next to "Guest". These options are next to "Connect as" in the window.
-
7Type your username and password into the fields provided. If you are a registered user, type the username and password in the fields provided.
-
8Click Connect. You will now be connected to that particular server.[1]


Entering the Server Address in the Finder
-
1
-
2Click Go. It's in the menu bar at the top of the screen.
-
3Click Connect to Server. It's at the bottom of the menu that drops down when you click "Go".
-
4Type the address of the server into the “Server Address” field. The network address should consist of a protocol (such as afp://, smb://, or ftp:// depending on the server type) followed by the Domain Name System (DNS) name, and the pathname for the computer.
-
5Click Connect. It's in the lower-right corner of the Connect to Server window.
-
6Select "Guest" or "Registered User". If you are a registered user of the server, click the radio button next to "Registered User". If you are not a registered user, click the radio button next to "Guest". These options are next to "Connect as" in the window.
-
7Type your username and password into the fields provided. If you are a registered user, type the username and password in the fields provided.
-
8Click Connect. You will now be connected to that particular server.


Reconnecting to a Recently Used Server
-
1
-
2Place the mouse cursor over Recent items. This displays a list of recent servers and folder locations you have visited.
- If you have not connected to any servers recently, none will be listed.
-
3Click on the name of the server you recently connected to. It's under "Servers" in the list of recent items. Your Mac will reconnect you to the server, and display the server files in a new Finder window.
- You may need to enter the username and password to connect to the server.


About This Article

1. Open the Finder.
2. Click Go in the menu bar at the top of the screen.
3. Click Connect to Server at the bottom of the menu.
4. Type the server address in the "Server address" bar at the top of the screen.
5. Click Connect.
6. Select "Registered User" or "Guest".
7. Type the username and password for the server.
8. Click Connect.