This article was written by Luigi Oppido and by wikiHow staff writer, Jack Lloyd. Luigi Oppido is the Owner and Operator of Pleasure Point Computers in Santa Cruz, California. Luigi has over 25 years of experience in general computer repair, data recovery, virus removal, and upgrades. He is also the host of the Computer Man Show! broadcasted on KSQD covering central California for over two years.
The wikiHow Tech Team also followed the article's instructions and verified that they work.
This article has been viewed 858,959 times.
This wikiHow teaches you how to clear your Windows 7 computer's various caches of information and temporary files.
Steps
Disk Cache
-
1
-
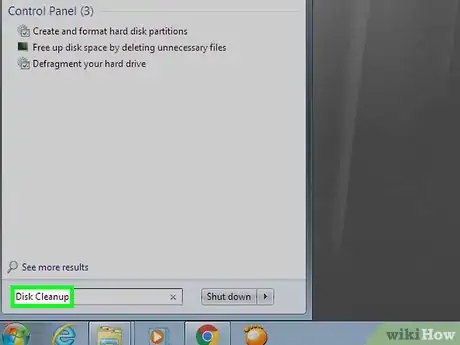
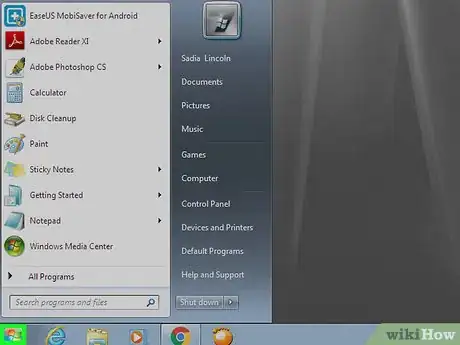
2Type disk cleanup into Start. Doing so will search your computer for the Disk Cleanup program.
- If your mouse cursor doesn't appear in the text box at the bottom of Start when you open it, click the text box before typing.
Advertisement -
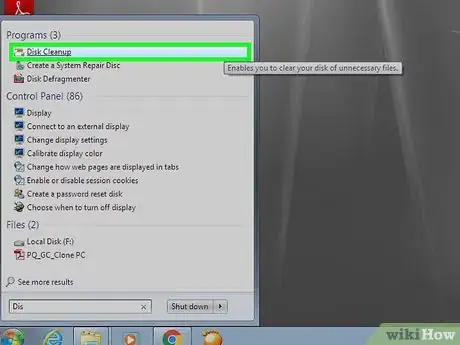
3Click Disk Cleanup. This program's icon, which resembles a flash drive with a brush on it, should be at the top of the Start menu. The Disk Cleanup program will open.
- You may have to click the Disk Cleanup icon once it appears at the bottom of the screen to open the Disk Cleanup window.
-
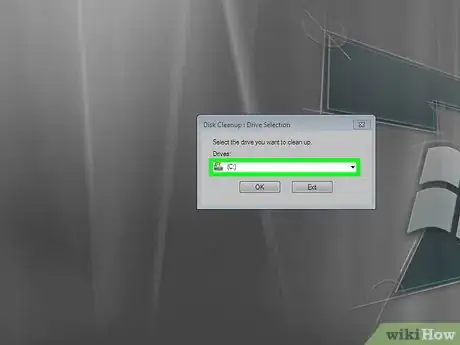
4Check every box in the Disk Cleanup window. Click the checkbox to the left of each item in the Disk Cleanup window, scrolling down once you reach the bottom of the window to view more options if necessary.
-
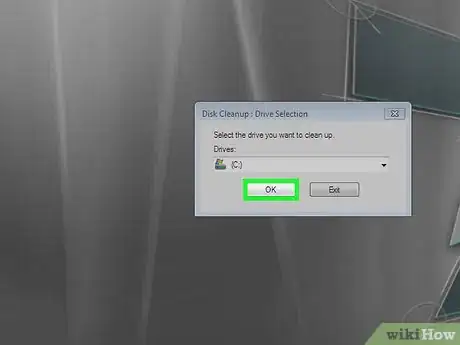
5Click OK. It's at the bottom of the window.
-
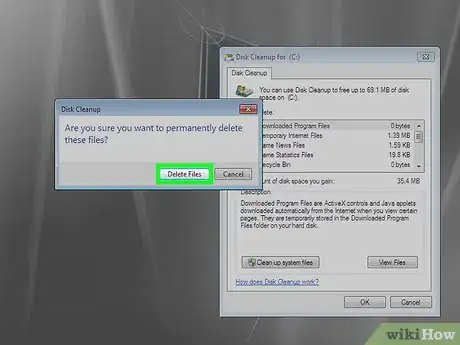
6Click Delete Files when prompted. Disk Cleanup will begin deleting temporary files from places like the "Thumbnails" cache and the Recycle Bin cache.
- Once this process is complete, Disk Cleanup will close.
App Data
-
1
-
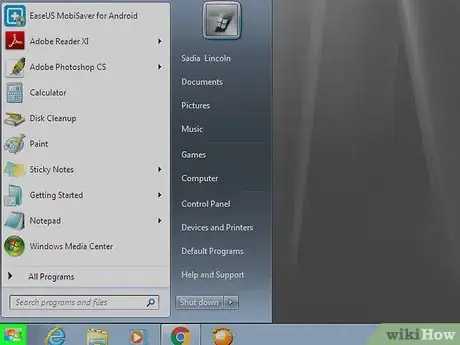
2Click My Computer. It's a tab on the right side of the Start window. This will open the My Computer window.
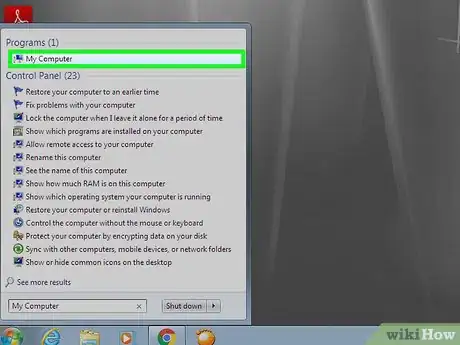
- If you don't see the My Computer tab here, type my computer into Start, then click My Computer at the top of the Start window.
-
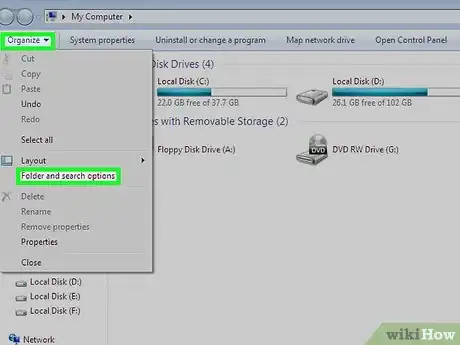
3Enable viewing for hidden files and folders. To do so from the My Computer window:
- Click the Organize tab in the upper-left corner of the window.
- Click Folder and search options in the resulting drop-down menu.
- Click the View tab.
- Check the "Show hidden files, folders, and drives" box under the "Hidden files and folders" section of the "Files and folders" section.
- Click OK at the bottom of the window.
-
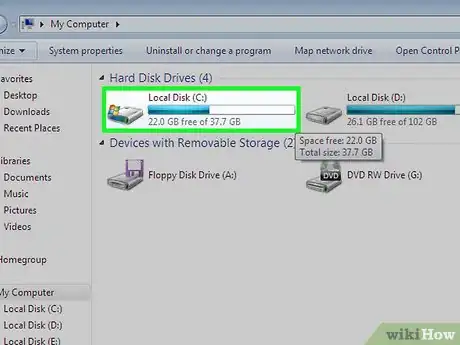
4Double-click your hard drive's name. Below the "Hard Disk Drives" heading, double-click the Local Disk option.
- The hard drive's letter is usually "C", stylized as (C:).
-
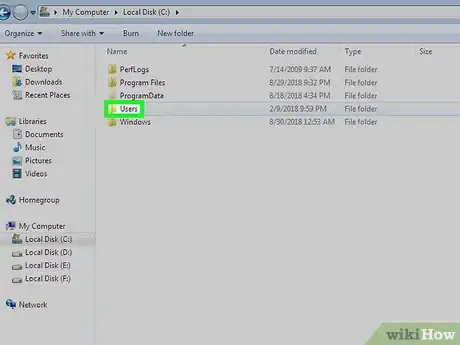
5Double-click the Users folder. You'll find it near the top of the window.
-
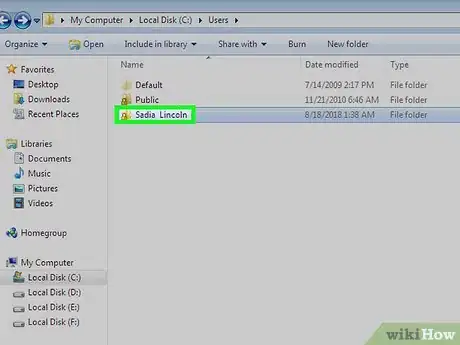
6Double-click your user folder. This will usually be a folder with the first few letters of your name or Microsoft account address.
-
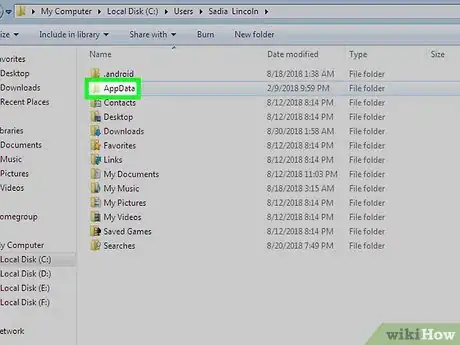
7Double-click the AppData folder. It's in the middle of the window, though you may have to scroll down to find it if the window isn't in full-screen mode.
-
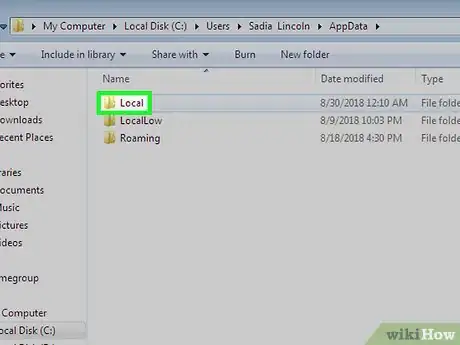
8Double-click the Local folder. You'll find this option near the top of the window.
-
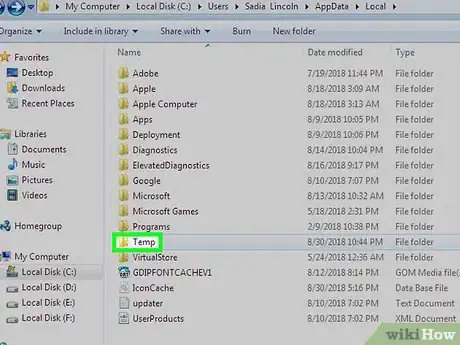
9Scroll down and select the Temp folder. Click once this folder to select it.
-
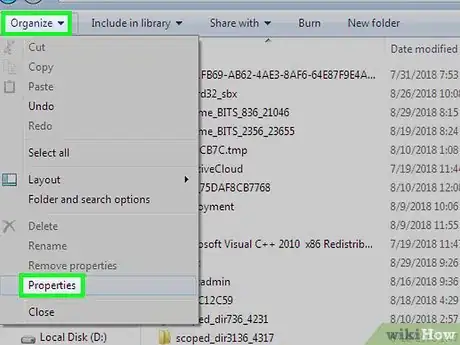
10Remove the read-only protection from the folder. To do so:
- Click the Organize tab.
- Click Properties
- Uncheck the "Read-only" box.
- Click Apply
- Click OK when prompted.
- Click OK
-
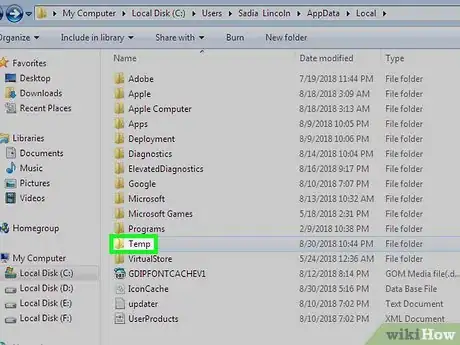
11Double-click the Temp folder. It should open.
-
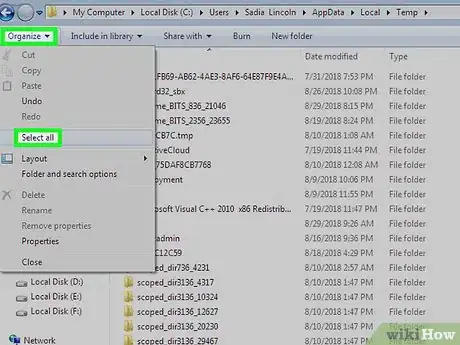
12Select the folder's contents. Click one item in the folder, then press Ctrl+A. Alternatively, you can click Organize and then click Select all.
-
13Delete the folder's contents. Press the Del key on your keyboard.
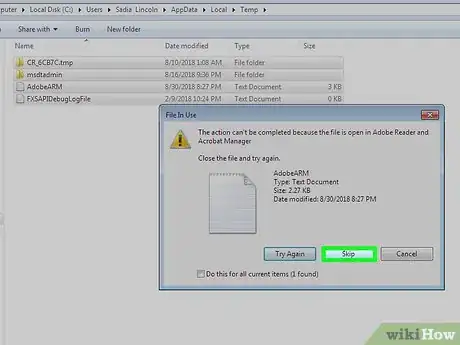
- A few of the files in the Temp folder may be in use, or system files, meaning that you can't delete them. If prompted, check the "Do this for all current items" box and click Skip.
-
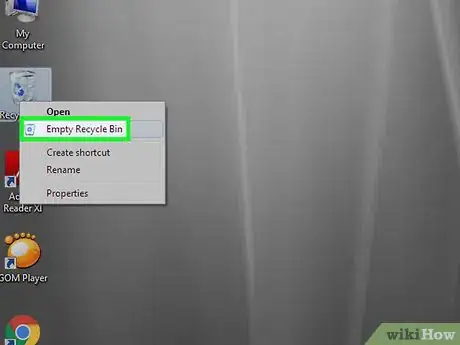
14Empty the Recycle Bin. Doing so will completely remove the deleted files from your computer.
Internet Explorer Cache
-
1
-
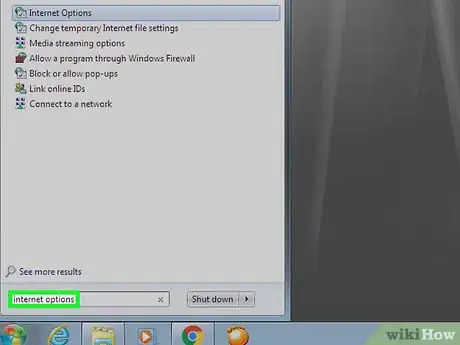
2Type in internet options. This will search your computer for the Internet Options program.
- If your mouse cursor doesn't appear in the text box at the bottom of Start when you open it, click the text box before typing.
-
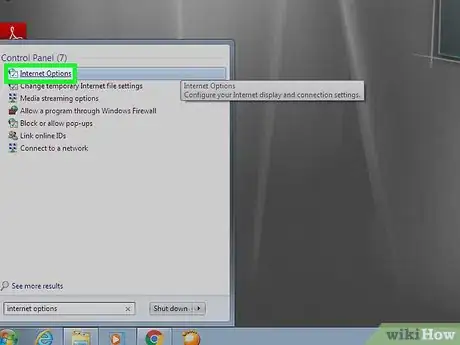
3Click Internet Options. It should be at the top of the Start menu. The Internet Options window will open.
-
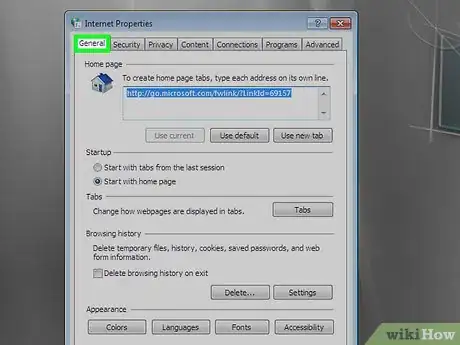
4Click the General tab. This is at the top of the window.
-
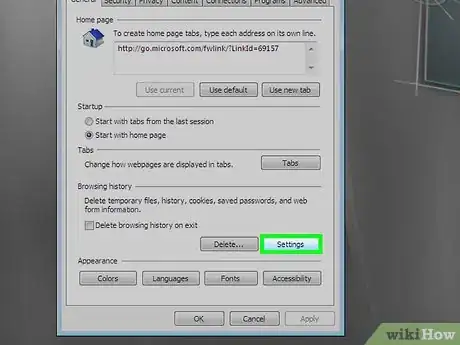
5Click Settings. It's in the lower-right side of the "Browsing history" section.
-
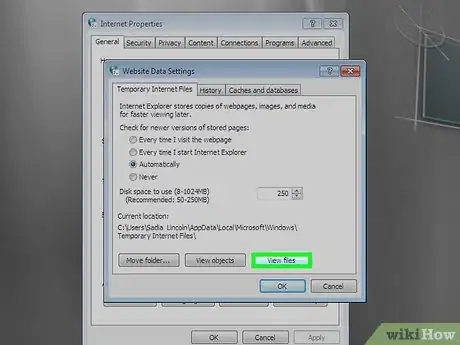
6Click View files. You'll find it near the bottom-right side of the window. A new window containing all of your Internet Explorer cached files will open.
-
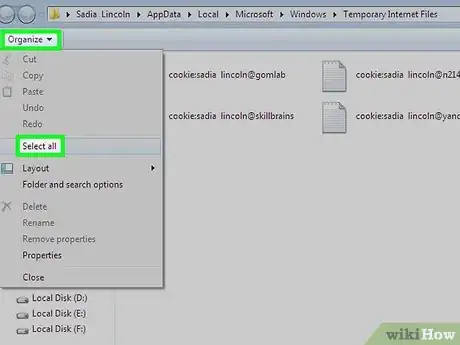
7Select the folder's contents. Click one item in the folder, then press Ctrl+A. Alternatively, you can click Organize and then click Select all.
-
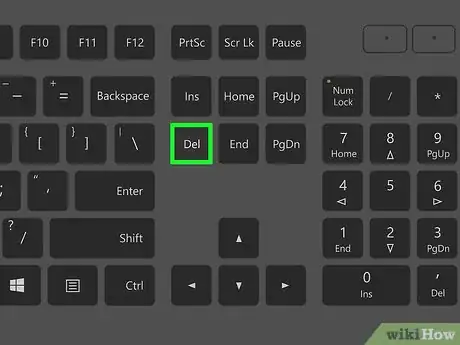
8Delete the folder's contents. Press the Del key on your keyboard.
-
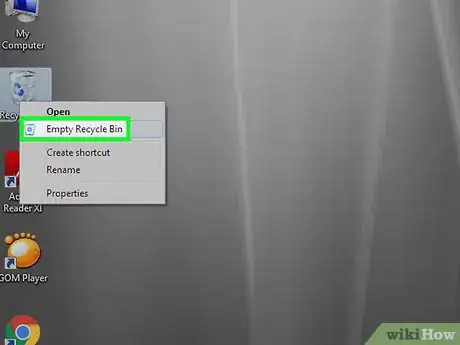
9Empty the Recycle Bin. Doing so will completely remove the deleted files from your computer.
DNS Cache
-
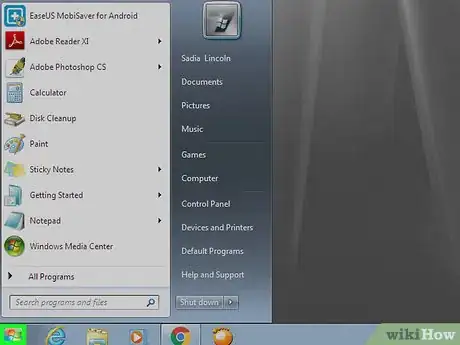
1
-
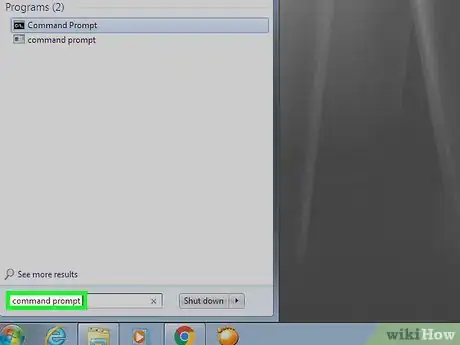
2Type command prompt into Start. This will search your computer for the Command Prompt program.
- If your mouse cursor doesn't appear in the text box at the bottom of Start when you open it, click the text box before typing.
-
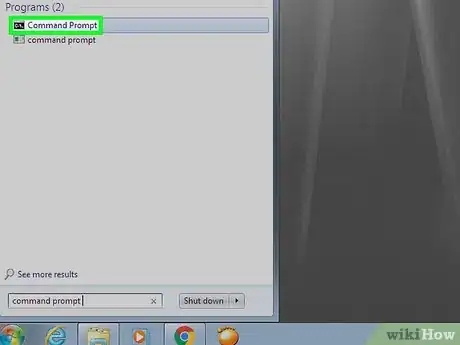
3Right-click Command Prompt. It should be at the top of the Start menu. A drop-down menu will appear.
- If your mouse doesn't have a right-click button, click the right side of the mouse, or use two fingers to click the mouse.
- If your computer uses a trackpad instead of a mouse, use two fingers to tap the trackpad or press the bottom-right side of the trackpad.
-
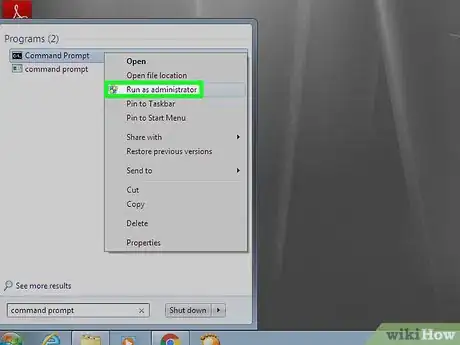
4Click Run as Administrator. It's an option in the drop-down menu. This will open Command Prompt with Administrator privileges.
- You can't do this if you aren't using an Administrator account on your computer.
- You may need to click Yes when prompted before you can continue.
-
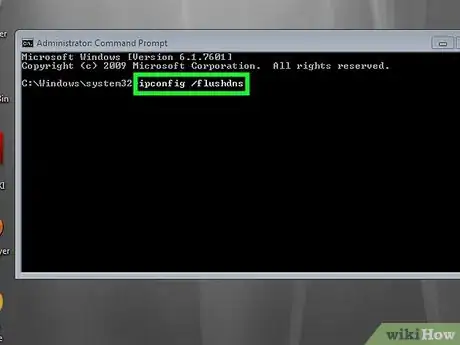
5Enter the DNS flush command. Type in ipconfig /flushdns and press ↵ Enter.
-
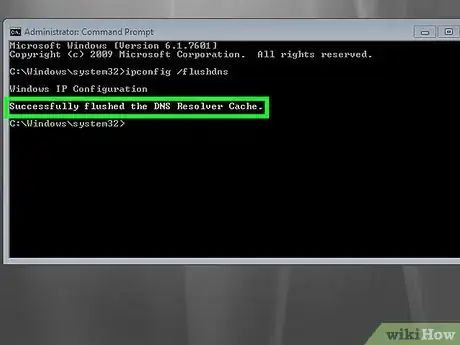
6Wait for the confirmation command. You'll see a command saying "Successfully flushed the DNS Resolver Cache" appear if the flush is successful.
- You may need to restart your computer before you'll notice the changes to your Internet connection.
Warnings
- Some "temporary" program files cannot be deleted since they're used by the Windows operating system. These files typically only take up a few kilobytes of memory.⧼thumbs_response⧽
References
- ↑ Luigi Oppido. Computer & Tech Specialist. Expert Interview. 31 July 2019.
About This Article
1. Click the Start menu.
2. Type disk cleanup into the search bar.
3. Click Disk Cleanup.
4. Check every box in the window.
5. Click OK.
6. Click Delete Files.



-Step-55-Version-2.webp)
