X
This article was co-authored by wikiHow Staff. Our trained team of editors and researchers validate articles for accuracy and comprehensiveness. wikiHow's Content Management Team carefully monitors the work from our editorial staff to ensure that each article is backed by trusted research and meets our high quality standards.
This article has been viewed 181,719 times.
Learn more...
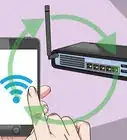
By default, your Mac will attempt to join the Wi-Fi network that it was most recently connected to. However, Apple makes it easy for you to change your default Wi-Fi network and even remove networks that you no longer wish to use.
Steps
Part 1
Part 1 of 2:
Opening Your Wi-Fi Preferences
-
1Click on the Apple logo. The Apple logo is located in the upper left-hand corner of your screen. A drop-down menu will appear.
-
2Select "System Preferences." A new window will appear.Advertisement
-
3Select the "Network" icon. The "Network" icon looks like a globe with white lines running inside it.
-
4Confirm that "Wi-Fi" is highlighted in the left-hand panel. If Wi-Fi is not highlighted, click on it.
- If you do not see Wi-Fi as an option, click the + button at the bottom of the list on the left-hand side of the window. Click on the "Interface" drop-down menu, and select "Wi-Fi." Name your service by typing it into the corresponding text field, then hit "Create."
- An AirPort card must be installed in your Mac in order to use Wi-Fi.
- In older Mac Operating systems, the "Wi-Fi" section is called "AirPort."


Advertisement
Part 2
Part 2 of 2:
Changing Your Wi-Fi Preferences
-
1Click on the "Advanced" button. The "Advanced" button is at the bottom right of the window. Clicking on it will bring up a new menu.
-
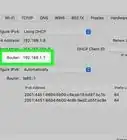
2Locate your list of Preferred Networks. You should see a list of networks that you have been connected to in the past. The network on the top of your list is your default.
- When your Mac is within range of any two networks on your "Preferred Networks" list, it will connect to whichever network is placed higher up on the list. [1]
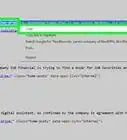
- If you don't see the networks that you expect, click the + sign to add a new network. The "Show Networks" button will give you a list of available Wi-Fi networks in your range. Select one and click "Join" to join it. You will need to type in a Wi-Fi password to join some networks.
-
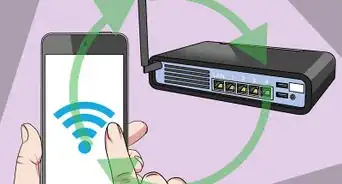
3Drag your preferred network to the top of the list. Scroll through the "Preferred Networks" list until you find the one you want to be the default. Click and drag it to the top of the list.
-
4Remove a Network (optional). You can remove a network from the "Preferred Networks" section at any time by simply clicking on it, then selecting the - button. A pop-up window will appear asking you to confirm your changes. Hit "Remove" to remove the network.
-
5Click "OK." Select the "OK" button at the bottom right of the window. Exit out of the "Network" window. Your changes have been made.


Advertisement
Community Q&A
-
QuestionThe apply button is greyed out on Step 4, and I can't get it to work. Can you help me?
 Community AnswerIf you have unlocked the lock, then it probably means that you haven't activated any changes and there is no update to apply. To confirm this, you may want to switch to a different network and apply that one, confirming that the apply works. Then switch back to the network that you want again.
 -
QuestionHow can I default to factory settings without losing data?
 Community AnswerUnfortunately, you cannot. 'Factory settings' by definition involves losing data, as it is resetting your phone to the state that it was in when it came from the factory before any data was on it.
 -
QuestionHow do I set a Macbook Pro to have WiFi off as the default, so that it is only on when I require it?Community AnswerGo to 'System Preferences' and then to 'Network.' Click the lock at the bottom left, and enter the password. In the menu on the left, select the 'Wi-Fi' option, then click the minus sign at the bottom of the list. To re-enable WiFi, click the plus icon next to the minus. In the drop-down menu, select 'Wi-Fi.' Click 'Create.' If needed, authenticate with your Wi-Fi network.
Advertisement


References
About This Article

wikiHow Staff
wikiHow Staff Writer
This article was co-authored by wikiHow Staff. Our trained team of editors and researchers validate articles for accuracy and comprehensiveness. wikiHow's Content Management Team carefully monitors the work from our editorial staff to ensure that each article is backed by trusted research and meets our high quality standards. This article has been viewed 181,719 times.
How helpful is this?
Co-authors: 13
Updated: June 3, 2021
Views: 181,719
Categories: Featured Articles | Mac
Advertisement