This article was co-authored by wikiHow staff writer, Hunter Rising. Hunter Rising is a wikiHow Staff Writer based in Los Angeles. He has more than three years of experience writing for and working with wikiHow. Hunter holds a BFA in Entertainment Design from the University of Wisconsin - Stout and a Minor in English Writing.
There are 10 references cited in this article, which can be found at the bottom of the page.
This article has been viewed 93,603 times.
Learn more...
Remote control cars, more commonly called RC cars, are mostly sold as ready-to-run models so you can use them straight out of the box, but many hobbyists like to build their own. Making your own RC car lets you customize options, such as the paint color, motor, and engines, so you can build a unique toy car you can control. While many people build RC cars from prepackaged kits, you can also purchase separate electronic components and make a homemade chassis from plastic!
Steps
Making RC Cars from a Kit
-
1Look for an RC kit online or at a hobbyist shop. RC kits come in many different models based on the type of car you want to build. See if there is a hobby shop that sells remote-controlled cars and visit the store to see what kits they have available. If you don’t have a hobby shop near you, look for stores online that sell kits.[1]
- RC kits can start anywhere from $50 USD and reach prices up to $1,000 USD depending on the size and components. If you want a smaller and simpler build, get a cheaper RC kit. For a more complex build, look for a more expensive kit.
- RC kits come in many shapes, sizes, and colors. Pick the kit that you’re the most interested in that’s within your budget.
-
2Work in a well-lit and uncluttered space. Pick a table or work area where you can leave the kit components out for an extended period of time since building an RC car takes a few days to complete. Make sure the room is lit completely so you can see small parts sitting on your work area.[2]
- If you’re working on a hard surface, consider laying a towel down before spreading the components out so you don’t lose any pieces or damage the surface.
- RC kits contain small parts, so keep your work area where children or pets can’t reach them.
- Read through the manual before opening any parts. If you see any steps that are confusing or have a lot of small pieces, make a note in the manual so you know to spend extra time on building when you get there.
Advertisement -
3Use thread-locking glue on all of your screws going into metal. Screws that go into metal will loosen over time as you drive your RC car. Look for a medium strength thread-locking glue and apply a small dot onto the screws before securing them in place.[3]
- Thread-locking glue can be purchased from your local hardware store or at a hobby shop.
- If your screws go through plastic or any other surface besides metal, you do not need to use thread-locking glue.
- Avoid using electric screwdrivers since they may strip the threading on your screws.
-
4Put together the wheel axles first. Open the bags listed in your manual containing the wheel pieces, and organize the pieces so you don’t lose any of them. Secure the gears in the back axle using the hardware provided and a screwdriver. When the axles are assembled, attach the wheels to the ends.
- The back wheels will have the motor attached to them and the front wheels will control the direction your vehicle goes.
- Organize small parts in a tray or bowls. Many kits will have different bags to open depending on how far into the build you are, so make sure to label each container with what bag the components came from.[4]
- Avoid opening all the bags at once or else you may mix up or lose parts. Only open the bags required for the section you’re working on.
- Avoid using electric screwdrivers since they may strip the threading on your screws.
-
5Assemble the shocks system. The shocks will form the main supports of your chassis and attach directly to the wheels. Fill the shocks with the shock oil provided in your kit and screw the cap on. Slide the springs onto the bottom of the shocks and secure them in place. Screw the shocks onto the axles where the directions tell you to.
Tip: If there are multiple pieces that need to be put together in the same way, organize them in an assembly line so you can streamline the build process.
-
6Attach the servos, battery, and the electric motors to your chassis. The servos transmit the signal for which direction you’re turning your car. Place the servos near the front of the vehicle and attach them to the front axles. Screw the electric motors onto the back axles so they’re attached to the gears. Set the battery on top of the chassis and attach all of the wires.
- Batteries are typically sold separately from the RC kits. Check with your kit’s manual to figure out which type of battery you need.
-
7Put the body of the car on top of the chassis. Use the clips provided in your kit to attach the body on top of the chassis. Whenever you need to charge the battery or make adjustments inside, undo the clips to take the body off again.
- Paint the RC car before attaching it to the chassis if you want it a different color.


Building an RC Car from Scratch
-
1Cut a chassis out from Lexan plastic sheets. Lexan is a thick plastic that makes a great base for a simple RC car. Cut out a 3 in × 7 in (7.6 cm × 17.8 cm) rectangle from a larger sheet of Lexan plastic using a utility knife. Cut out 3⁄4 in × 1 1⁄4 in (1.9 cm × 3.2 cm) rectangles on each side 3⁄4 in (1.9 cm) from the front of the chassis so the front wheels have room to turn.[5]
- If you want to make a larger RC car, you can try using wood and PVC pipes for your chassis.[6]
-
2Attach the wheels from an old toy car to the front of your chassis. Take wheels that are 2 in (5.1 cm) in diameter off of another toy car. Cut out 6 L-shaped pieces about 1 1⁄2 in × 1 1⁄2 in (3.8 cm × 3.8 cm) in size out of your Lexan plastic. Make 2 wheel hinges by stacking 3 pieces and gluing them together. Stick a nail into the center of one of the front wheels and into the middle of your hinge. Repeat the process with the other wheel. Use bolts on the bottoms of the hinges to secure them to your chassis.[7]
- You can also use wheels from other RC kits or ones that you bought from a supply store.
-
3Make a steering component out of plastic and a servo for the front tires. Cut out a thin strip of Lexan plastic that’s the same length as the distance between your wheel hinges. Drill a small hole through the backs of the hinges and the strip you just cut. Attach a small bolt through each hole so the strip stays in place. This way, both of your wheels will turn in the same direction. Glue the servo right behind the steering component so it can control the direction of the wheels.[8]
- Servos for RC cars can be purchased online or in hobby shops.
-
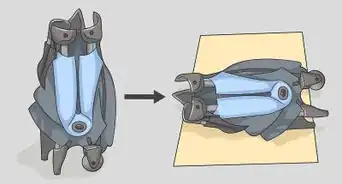
4Put electric drive motors onto the back tires before securing them to the chassis. The back wheels of your RC car control the speed and whether your car drives forward or in reverse. Put 2 800-rpm electric drive motors into plastic housings, and glue them to the back of your vehicle. Slide the wheels onto the ends of the motor so they’re secure.[9]
- RC motors can be found online or in hobby shops.
- Using larger motors will get you more speed, but it will also use more power and make your car heavier.
-
5Connect a receiver, speed controller, and battery to the motors and servos. It doesn’t matter how you organize the components on the chassis of your RC car as long as you can wire them easily. Use a 9V or 11.5V battery to power your car. Glue the parts down to secure them and make sure to connect the wires from the battery to the receiver, servo, speed controller, and motors.[10]
- Receivers, transmitters, speed controllers, and battery packs can all be purchased online or from RC hobby shops.
- Always disconnect the battery before working on any electrical components.
Did You Know?
The receiver gets the signal from the transmitter, or remote control, and controls the speed and direction your car drives.The speed controller controls how fast your car drives based on what it senses from the transmitter.
-
6Drive the RC car using the transmitter. Use the remote transmitter to drive your car around your home or outside. Be careful not to flip the car over since the components are exposed on top. Test the range of the car and see how fast you can make it drive![11]


Warnings
- Be careful while working with wires and electronic components for your RC car. Make sure to disconnect batteries before working with any electrical components.⧼thumbs_response⧽
Things You’ll Need
Making RC Cars from a Kit
- Prepackaging RC kit
- Compartment trays or small bowls
- Tool kit
- Thread-locking glue
- Batteries
Making an RC Car from Scratch
- Lexan plastic
- Toy car wheels
- Screws
- Nails
- Servo
- Glue
- Electric drive motors
- Receiver and transmitter
- Speed controller
- Battery


References
- ↑ https://www.rccaraction.com/get-started-rc-everything-need-know/
- ↑ https://www.rccaraction.com/tips-first-time-builders/
- ↑ https://www.rccaraction.com/tips-first-time-builders/
- ↑ https://www.rccaraction.com/tips-first-time-builders/
- ↑ https://youtu.be/nzkbhGDTL5w?t=19
- ↑ https://makezine.com/projects/scratch-built-rc-car/
- ↑ https://youtu.be/nzkbhGDTL5w?t=44
- ↑ https://youtu.be/nzkbhGDTL5w?t=109
- ↑ https://youtu.be/nzkbhGDTL5w?t=132
About This Article

You can build your own RC car using a kit or from scratch. An RC kit comes with everything you’ll need to build your car and there are many different models, so you can choose the type of car that you want to build. You can purchase a kit at your local hobby shop or find one online. To build an RC car from scratch, you’ll need to cut out the body of the car from thick plastic sheets so it’s sturdy but lightweight. You can use the wheels from an old toy car, and fit a steering component and servo onto the front tires to allow you to turn your car. To power it, you’ll need 2 electric motors fitted to the rear tires to turn them and move the car forward or backward. Finally, attach a receiver, speed controller, and battery to the motors and servos so you’re able to control the car’s functions with a transmitter. For tips about how to put together wheel axles, keep reading!