X
This article was co-authored by wikiHow staff writer, Jack Lloyd. Jack Lloyd is a Technology Writer and Editor for wikiHow. He has over two years of experience writing and editing technology-related articles. He is technology enthusiast and an English teacher.
This article has been viewed 19,862 times.
Learn more...
This wikiHow teaches you how to add an email address that can be used to verify your identity in the case of an account lock-out to your Apple ID account.
Steps
Part 1
Part 1 of 2:
Adding an Address
-
1Open your iPhone's Settings. Do so by tapping the grey gear icon on one of your Home screens (it might also be in a folder named "Utilities").
-
2Scroll to the fourth group of options and select iCloud.Advertisement
-
3Tap your Apple ID at the top of the page. You may have to enter your Apple ID password to proceed.
-
4Tap Password & Security.
-
5Select Add Rescue Email. This is under the "Rescue Email Address" heading. If you already have an email listed here, select it instead.
-
6Type in the answers to two of your security questions.
-
7Tap Verify. It's in the top right corner of your screen.
-
8Type in an email address.
-
9Tap Done. Now that your rescue email address has been added, you'll need to verify that it's an active address to complete the process.


Advertisement
Part 2
Part 2 of 2:
Verifying and Confirming
-
1Log into the email account you just typed in. For the easiest time possible, do this on a computer.
-
2Open the email from Apple entitled "Verify your email address." If you don't see it, check your Spam folder (and your Updates folder if you're using Gmail).
-
3Select the Verify now > link. It's in the body of the verification email.
-
4Type in your Apple ID email address and password. These are different than your rescue email credentials.
-
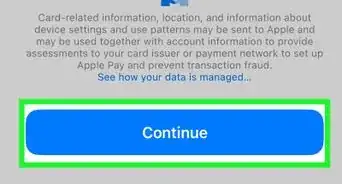
5Select Continue. As long as your Apple ID email address and password are correct, your rescue email address is now verified. You can use it to gain access to your account if you lose your password and/or security questions.


Advertisement
Warnings
- If your rescue email address isn't up to date and you lose access to your account, you may not be able to verify your identity.⧼thumbs_response⧽
Advertisement


About This Article
Jack Lloyd
wikiHow Technology Writer
This article was co-authored by wikiHow staff writer, Jack Lloyd. Jack Lloyd is a Technology Writer and Editor for wikiHow. He has over two years of experience writing and editing technology-related articles. He is technology enthusiast and an English teacher. This article has been viewed 19,862 times.
How helpful is this?
Co-authors: 3
Updated: July 28, 2022
Views: 19,862
Categories: IPhone
Article SummaryX
1. Open Settings.
2. Select iCloud.
3. Tap your Apple ID.
4. Tap Password & Security.
5. Select Add Rescue Email or your current rescue email address.
6. Answer your security questions.
7. Tap Verify.
8. Type in your new rescue email address, then tap Done.
Did this summary help you?
Advertisement