This article was co-authored by wikiHow staff writer, Nicole Levine, MFA. Nicole Levine is a Technology Writer and Editor for wikiHow. She has more than 20 years of experience creating technical documentation and leading support teams at major web hosting and software companies. Nicole also holds an MFA in Creative Writing from Portland State University and teaches composition, fiction-writing, and zine-making at various institutions.
This article has been viewed 49,795 times.
Learn more...
This wikiHow teaches you how to use Google Backup and Sync to sync folders from your Google Drive to a PC or Mac. You'll also learn how to sync folders from your computer to your Google Drive so you can access files anywhere you have internet access.
Steps
Windows
-
1Go to https://www.google.com/drive/download in a web browser. This is the Google Backup and Sync download page.
-
2Click Download under "Personal." A terms of service window will appear.[1]Advertisement
-
3Click Agree and Download. This downloads a file called installbackupandsync.exe to your PC.[2]
- You may have to select a folder and click Save or Download to download the file.
-
4Run the installer file. You can do this by double-clicking installbackupandsync.exe in your Downloads folder. Backup and Sync will now install.
- If prompted to allow the program to make changes to your computer, click Yes.
-
5Click Close once the app is installed. Now that Backup & Sync is installed, a cloud icon has been added to your system tray (the part of the taskbar where the clock, battery indicator, and volume appear).
-
6Open Backup & Sync. Click the cloud icon in the system tray near the clock. If you don't see it, click the up-arrow to the left of the icons you do see to view more icons—you'll be able to click it there.
-
7Click GET STARTED on the welcome screen.
-
8Sign in to your Google account. Follow the on-screen instructions to sign in with your Google/Gmail username and password.
-
9Click GOT IT once you're signed in. A list of folders will appear.
-
10Choose which folders to sync from your computer to Google Drive. The folders listed at the top of the window are the ones that are set to be backed up by default. All subfolders within each selected folder will also be synced.
- To prevent a folder from syncing to your drive, remove its check mark.
- To add a folder, click CHOOSE FOLDER below the folder list, select a folder, and then click Select Folder.
-
11Click Change to select which files to back up. It's at the bottom-right corner of the folder list. Go through the following steps on the window that appears:
- To sync all types of files from whatever folders you choose to back up, leave Back up all files and folders selected.
- To back up only photos and videos, select Back up photos and videos. You can also choose whether you want to back up screenshots and/or RAW files.
- If you don't want to back up files with certain file extensions (e.g., files that end in .exe), click Advanced Settings, type the file extension, then click ADD.
- Click OK when you're finished.
-
12Select your photo syncing preferences. If you'll be backing up photos, choose a file size option under "Photo and video upload size."
- If you choose High quality, you can enjoy unlimited photo and video backups that don't count against your Google Drive storage. Synced files will be backed up at a slightly-less high quality. This is great for most people.
- If you need to sync very high-resolution photos and videos without degrading their quality (such as if you're a videographer or photographer), select Original quality. Just know that you'll probably need to purchase extra storage space.
- If you want your photos to appear in your Google Photos account, check the box next to "Upload photos and videos to Google Photos."
-
13Click NEXT. It's at the bottom-right corner of the window.
-
14Click GOT IT. Now that you've chosen which folders you'll sync to your Google Drive, you'll have to choose which folders from your Google Drive you want to sync to the computer.
-
15Choose whether to sync folders from Google Drive to your PC. If you want to be able access the files stored on Google Drive while you're working in Windows, check the box next to "Sync My Drive to this computer" at the top of the window.
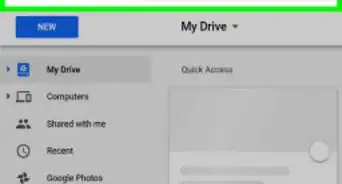
- If you sync files from Google Drive, a new folder called "Google Drive" will be added your main user folder. You'll be able to access this folder in the File Explorer by clicking Google Drive under "Quick access."
-
16Choose which folders to sync to the PC. All folders on your Google Drive are selected by default. To choose specific folders, select Sync only these folders , and then make your selections.
-
17Click Start. The selected files and folders will now sync between your Google Drive and your PC. The cloud icon in the system tray will display two arrows, indicating that a sync is in progress.
- Syncing will happen automatically; there's no need to click anything to resync your files.
- To check the progress of a sync, click the cloud icon in the system tray.
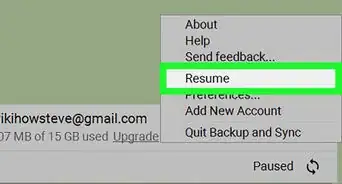
- You can pause a sync-in-progress by clicking the Backup and Sync cloud icon and selecting Pause . Resume the sync when you're ready by clicking Resume in the same menu.
-
18View files you synced to the computer.
- Click the Backup & Sync icon in the system tray.
- Click the small folder icon with a tiny Google Drive logo inside to open the Google Drive folder in File Explorer.
-
19View files you synced to Google Drive.
- Click the Backup & Sync icon.
- Click the triangular Google Drive icon.
- Click Computers in the left panel.
- Click your computer (e.g. My Laptop ) in the main panel to view your files.
-
20Manage your syncing preferences. If you ever want to change which files and folders are synced, click the Backup & Sync icon, click ⁝ at the top-right corner, and then click Preferences .
- You can add or remove files or folders from the sync as needed.
- Click the Settings tab on the left side of the window to view additional options. This is where you can set whether Backup & Sync starts up automatically when you boot the computer. You can also click Network Settings here to adjust your upload and downloads speeds.


macOS
-
1Go to https://www.google.com/drive/download in a web browser. This is the Google Backup and Sync download page.
-
2Click Download under "Personal." A terms of service window will appear.[3]
-
3Click Agree and Download. The installer will now download to your Mac.
-
4Click the file you just downloaded. It's called InstallBackupAndSync.dmg. You'll usually see it at the bottom-left corner of your web browser, but you can also double-click the file in your Downloads folder. This opens the Install Backup and Sync from Google window.
-
5Drag the Backup and Sync icon to the Applications folder. This installs the app to your Applications folder.
-
6Open Backup and Sync. Its blue and white cloud icon is now available in the Applications folder. You'll be asked if you're sure you want to open the app.
-
7Click Open. The welcome screen will appear. You'll also notice that a cloud icon has been added to the menu bar near the top-right corner of the screen.
-
8Click GET STARTED on the welcome screen.
-
9Sign in to your Google account. Follow the on-screen instructions to sign in with your Google/Gmail username and password.
-
10Click GOT IT once you're signed in. A list of folders will appear.
-
11Choose which folders to sync from your computer to Google Drive. The folders listed at the top of the window are the ones that are set to be backed up by default. All subfolders within each selected folder will also be synced.
- To prevent a folder from syncing to your drive, remove its check mark. For example, if you back up your photos with another app (such as iCloud), you probably don't need to sync your photos to Google Drive.
- To add a folder, click CHOOSE FOLDER below the folder list, select a folder, and then click Open.
-
12Click Change to select which files to back up. It's at the bottom-right corner of the folder list. Go through the following steps on the window that appears:
- To sync all types of files from whatever folders you choose to back up, leave Back up all files and folders selected.
- To back up only photos and videos, select Back up photos and videos. You can also choose whether you want to back up screenshots, RAW files, and/or Apple Photos Library metadata.
- If you don't want to back up files with certain file extensions (e.g., files that end in .dmg), click Advanced Settings, type the file extension, then click ADD.
- Click OK when you're finished.
-
13Select your photo syncing preferences. If you'll be backing up photos, choose a file size option under "Photo and video upload size."
- If you choose High quality, you can enjoy unlimited photo and video backups that don't count against your Google Drive storage. Synced files will be backed up at a slightly-less high quality. This is great for most people.
- If you need to sync very high-resolution photos and videos without degrading their quality (such as if you're a videographer or photographer), select Original quality. Just know that you'll probably need to purchase extra storage space.
- If you want your photos to appear in your Google Photos account, check the box next to "Upload photos and videos to Google Photos."
-
14Click NEXT. It's at the bottom-right corner of the window.
-
15Click GOT IT. Now that you've chosen which folders you'll sync to your Google Drive, you'll have to choose which folders from your Google Drive you want to sync to the computer.
-
16Choose whether to sync folders from Google Drive to your Mac. If you want to be able to access the files stored in your Google Drive in Finder, check the box next to "Sync My Drive to this computer" at the top of the window.
- If you sync files from Google Drive, a new folder will be created on your Mac called Google Drive, containing the files and folders you choose to sync.
-
17Choose which Google Drive folders to sync to the computer. All folders on your Google Drive are selected by default. To choose specific folders, select Sync only these folders , and then make your selections.
-
18Click Start. The selected files and folders will now sync between your Google Drive and your Mac. The cloud icon in the menu bar will display two arrows, indicating that a sync is in progress.
- Syncing will happen automatically; there's no need to click anything to resync your files.
- To check the progress of a sync, click the cloud icon in the menu bar.
- You can pause a sync-in-progress by clicking the Backup and Sync cloud icon and selecting Pause. Resume the sync when you're ready by clicking Resume in the same menu.
-
19View files you synced to Google Drive.
- Click the Backup & Sync icon in the menu bar.
- Click the triangular Google Drive icon.
- Click Computers in the left panel.
- Click your computer (e.g. My Laptop ) in the main panel to view your files.
-
20
-
21Manage your syncing preferences. If you ever want to change which files and folders are synced, click the Backup & Sync icon (the cloud in the menu bar), click ⁝ at the top-right corner, and then click Preferences .


References
About This Article