Easy ways to connect two video clips together on your PC or Mac computer
X
This article was co-authored by wikiHow staff writer, Jack Lloyd. Jack Lloyd is a Technology Writer and Editor for wikiHow. He has over two years of experience writing and editing technology-related articles. He is technology enthusiast and an English teacher.
The wikiHow Tech Team also followed the article's instructions and verified that they work.
This article has been viewed 148,778 times.
Learn more...
This wikiHow teaches you how to join two or more video clips together. You can do this using free software on both Windows and Mac computers.
Steps
Method 1
Method 1 of 2:
On Windows
-
1Transfer your video clips to your computer. If your video clips are on a smartphone, you'll need to transfer them to your computer before you can splice them together.
- If your video clips are on a video camera, you'll either need to connect the video camera to your computer via a USB cable or plug the camera's SD card into your computer. After that, you can select the camera in File Explorer (Windows) or Finder (Mac), open the DCIM folder, and move the files onto your computer.
-
2Advertisement
-
3Open Photos. Click the Photos app icon, which resembles a pair of stylized mountains, in the Start menu.
- If you don't see the Photos option, type photos into the search bar at the bottom of the Start menu, then click Photos when it appears at the top of the Start menu.
-
4Click Create. It's in the upper-right corner of the window. A drop-down menu will appear.
-
5Click Custom video with music. You'll see this option in the drop-down menu. Doing so opens a window with your computer's photos and videos listed.
-
6Select videos. Click the checkbox in the upper-left corner of each video clip you want to use in your project.
- If Windows doesn't open the proper folder, first click the Folders tab, then select the folder from which you want to import videos.
-
7Click Create. It's in the upper-right corner of the window.
-
8Enter a name for your video. Type the name that you want to use for your video into the text box that appears, then click OK. Doing so will create your video out of the selected video clips.
-
9Change your video clips' order. In the "Storyboard" section at the bottom of the window, click and drag a clip left or right to move it closer to or farther from the beginning of the video.
-
10Remove music. By default, Windows will add music to your set of clips; you can remove it by doing the following:
- Click Music on the upper-right side of the window.
- Scroll up to the top of the drop-down menu.
- Click None
- Uncheck the "Sync your video to the music's beat" box.
- Click Done
-
11Adjust a video's length. Windows will shorten significantly your video clips, but you can restore each of them to your preferred length:
- Select a video clip in the "Storyboard" section.
- Click Trim in the "Storyboard" section.
- Click and drag the left tab at the bottom of the window to the point where you want the video clip to start.
- Click and drag the right tab at the bottom of the window to the point where you want the video clip to end.
- Click Done in the top-right corner.
-
12
-
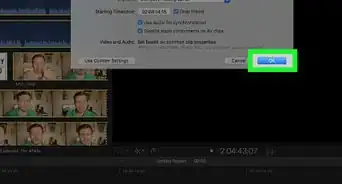
13Click Export or share. It's in the top-right corner of the window. A pop-up window will appear.
-
14Select a file size. Click S, M, or L depending on whether you want your video to be small (standard quality), medium (higher quality), or large (best quality). Your video will begin exporting onto your computer.
- This process can take a while to complete, but you should be able to monitor the export progress in the pop-up window.
-
15Click View in File Explorer. It's on the right side of the window. Doing so will take you to the export location of the video's file; at this point, you can double-click the video to watch it, or you can move it by clicking and dragging it into a different folder if you like.


Advertisement
Method 2
Method 2 of 2:
On Mac
-
1Transfer your video clips to your computer. If your video clips are on a smartphone, you'll need to transfer them to your computer before you can splice them together.
- If your video clips are on a video camera, you'll either need to connect the video camera to your computer via a USB cable or plug the camera's SD card into your computer. After that, you can select the camera in File Explorer (Windows) or Finder (Mac), open the DCIM folder, and move the files onto your computer.
-
2
-
3Create a new project. Click File in the top-left corner of the screen, click New Project... in the drop-down menu, click Movie, and enter a name for your project.
-
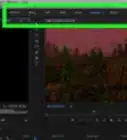
4Select video clips. Before you can join together your videos, you'll need to import them into iMovie:
- Click File
- Select Import
- Click Movies
- Go to the folder in which your movie clips are stored.
- Select movie clips by holding down ⌘ Command and clicking each file you want to use.
- Click Import Selected
-
5Move the movie clips into the editing area. Click and drag each movie clip from the list of clips into the editing section at the bottom of the window.
- You can also select all of the movie clips at once by clicking one and then pressing ⌘ Command+A, after which point you can drag all of the videos into the editing area.
-
6Rearrange your movie clips if necessary. Once in the editing area, you can click and drag a video clip left or right to move it up or down in the video order.
-
7Split a clip. If you want to place one video clip in the middle of another clip, do the following:
- Click the place where you want to insert the second video (e.g., the middle of a clip).
- Press ⌘ Command+B
- Click and drag the video that you want to place in the middle of the clip in between the clip's halves.
-
8Adjust the length of a clip. If you want to trim part of a clip, do the following:
- Select the clip by clicking it.
- Click and drag the left or right edge of the clip in toward the center of the clip.
- Stop dragging when the clip is at your desired length.
-
9
-
10
-
11Click File. It's in the drop-down menu. Doing so will open a pop-up window in which you can save your video.
-
12Save your video. In order to save your iMovie project as a playable video file, do the following:[1]
- Make sure the settings in the pop-up window (e.g., "Resolution") are correct.
- Click Next...
- Enter a name in the "Save As" box.
- Select a save location from the "Where" drop-down box.
- Click Save


Advertisement
Expert Q&A
-
QuestionWhat program should I use to make a video montage?
 Gavin AnsteyGavin Anstey is the COO at Cinebody. Cinebody is User-Directed Content software that empowers brands to create instant, authentic, and engaging video content with anyone on earth. Gavin studied Journalism at the University of Colorado Boulder, before launching a career in video production and software.
Video Producer, COO at CinebodyIMovie works great for splicing videos, because overall, it's a very intuitive program, but even more specifically, splicing videos is very straightforward.
Advertisement
Warnings
- Windows Movie Maker is no longer included with Windows, nor is it possible to download the old version of Windows Movie Maker anymore.⧼thumbs_response⧽
Advertisement


References
About This Article
Jack Lloyd
wikiHow Technology Writer
This article was co-authored by wikiHow staff writer, Jack Lloyd. Jack Lloyd is a Technology Writer and Editor for wikiHow. He has over two years of experience writing and editing technology-related articles. He is technology enthusiast and an English teacher. This article has been viewed 148,778 times.
How helpful is this?
Co-authors: 14
Updated: May 25, 2022
Views: 148,778
Categories: Video
Advertisement