This article was co-authored by wikiHow staff writer, Travis Boylls. Travis Boylls is a Technology Writer and Editor for wikiHow. Travis has experience writing technology-related articles, providing software customer service, and in graphic design. He specializes in Windows, macOS, Android, iOS, and Linux platforms. He studied graphic design at Pikes Peak Community College.
This article has been viewed 206,594 times.
Learn more...
If you have a lot of files you want to share with a person or group of people, you can share those files by putting them in a folder and sharing the folder. The easiest way to share a folder is to use a cloud service like Google Drive, Dropbox, or iCloud. You can also share folders between computers on the same network. This wikiHow teaches you how to share folders using cloud services and over a network.
Steps
Sharing Google Drive Folders
-
1Navigate to https://drive.google.com/ in a web browser. You can use any web browser on a PC or Mac. This opens Google Drive in your web browser.
- If you are not already signed in, click Sign In in the upper-right corner and sign in with the username and password associated with your Google account.
-
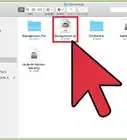
2Click the folder you want to share. Selected items are highlighted in blue.
- If you don't have a folder to share, you can create a new folder by clicking New in the upper-left corner. Then click Folder.
Advertisement -
3Click the icon that resembles a chainlink. It's at the top of the page in the upper-right corner. This displays options for sharing the folder.
-
4Share the folder with specific people. There are two methods for sharing a folder in Google Drive. If you share a link, anyone with the link can access the folder. If the folder is restricted, only specific people in a group can access the folder. Use the following steps to share the folder with specific people or a group:
- Enter the email address of the person(s) you want to share with in the field that says "Add people and groups."
- Type a message for the person.
- Click Send in the lower-right corner. They will receive an email with a link to the folder.
-
5Share a link with people. To share a link with other people, the folder must be unrestricted. This means anybody with the link can view the folder. You can share the link in an email, private message, text message, social media post, memo, or any other platform. Use the following steps to share a link to a folder with people:
- Click Get Link.
- Click the drop-down menu that says "Restricted."
- Click Anyone with the link.
- Click Copy Link.
- Paste the link in a message to anyone you want to share it with.


Sharing Dropbox Folders
-
1Go to https://www.dropbox.com/ in a web browser. You can use any web browser on a PC or Mac.
- If you are not signed in to your Dropbox account, enter the email address and password associated with your Dropbox account and click Sign In.
-
2Hover over the folder you want to share. This highlights the folder in grey and displays a "Share" button to the right.
- If you don't have a folder to share, you can click New folder in the panel to the right to create a new folder, or click Upload folder to upload a folder from your computer.
-
3Click Share. It's the button that appears to the right when you hover over a folder in Dropbox.
-
4Share the folder with a specific person. You can either share the folder with a specific person or you can share a link to the folder. Use the following steps to share the folder with specific people:
- Type the email address of the person(s) you want to share the folder in the line that says "Email or name."
- Click Share.
-
5Create and share a link to the folder. Once you create a link to a folder in Dropbox, anybody with the link can view the folder. You can share it in an email, private message, text message, social media post, memo or any other platform. Use the following steps to create and share a link to a folder in Dropbox.
- Click Create Link.
- Click Copy Link.
- Paste the link in a message to the person(s) you want to share the folder with.


Sharing iCloud Folders
-
1Go to https://www.icloud.com/ in a web browser. You can use any web browser on a PC or Mac.
-
2Login with your Apple ID. Enter the email address and password associated with your Apple ID and click the arrow icon. Then you'll need to retrieve the verification code from your iPhone or iPad or text messages. Enter the verification code and click Verify.
-
3
-
4Click the folder you want to share. This highlights the folder in blue.
- If you don't have a folder to share, you can click the icon that resembles a folder with a plus sign (+) at the top of the page. This creates a new folder.
-
5Click the Share Folder icon. It has an icon that resembles a person with a plus sign (+). It's at the top of the page.
-
6Share the folder over email. There are two ways to share a folder in iCloud. You can share the folder over email in Apple Mail, or you can copy a link and send it to people. Use the following steps to share the folder over email:
- Click the Email icon.
- Click "Share'.
- Enter the email address(es) of the people you want to share the folder within the "To:" field.
- Compose a message.
- Click Send.
-
7Share a link to the folder. When you share a link with people, you can select if you want to allow anyone with the link to access the folder or only the people you invite. You select if you want to allow them to make changes to the folder or only be able to view it. You can share the link in an email, private message, social media post, text message, memo, or any other platform. Use the following steps to share the link to a folder:
- Click Copy Link.
- Click Share Options.
- Use the "Who can access" drop-down menu to select "Only people you invite" or "Anyone with the link."
- Use the "Permissions" drop-down menu to select "Can make changes" or "View only."
- Enter the email addresses or phone numbers of the people you want to share the folder with (if access is set to "Invite Only") in the field that says "Add."
- Click Share.
- Click Copy Link.
- Paste the link in a message to the person you want to share the folder with.


Sharing Windows Folders
-
1Enable printer and file sharing and network discovery. In order to share a folder over a network in Windows, you need to enable network discovery and printer and file sharing in the Control Panel. Use the following steps to enable Printer and File Sharing and Network Discovery:
- Click the Windows Start menu.
- Click the Gear/Settings icon.
- Click Network and Internet.
- Click Sharing Options.
- Click the radio option next to "Turn on network discovery".
- Click the radio option next to "Turn on file and printer sharing."
- Click Save Changes.
-
2
-
3Right-click the folder and click Properties. Use File Explorer to navigate to a folder you want to share. Then right-click it and click Properties. This opens a pop-up menu next to the folder. Click Properties at the bottom of the pop-up menu.
-
4Click the Sharing tab. It's at the top of the Properties menu. This displays the sharing options.
-
5Click Share. This opens a window with options for how you want to share the folder.
-
6Select who you want to share the folder with and click Add. Use the drop-down menu at the top to select who you want to share the folder with. You can share it with a specific user, the admin, guests, or everyone. Click Add when you are finished.
-
7Click Share. It's in the lower-right corner. This shares the folder.
-
8Select the permission level for the folder. To select a permission level, click the drop-down menu below "Permission Level" and to the right of the user, you are sharing the folder with. You can select either Read or Read/Write. "Read" only allows users to view the folder, but not make changes. "Read/Write" allows users to view the folder and make changes.
-
9Click Done. It's in the lower-right corner. This closes the Network Access Window.
-
10Note the Network Path. It's at the top of the Sharing tab below "Network Path". Those who want to access the shared folder may need this information.


-
1Enable printer and file sharing and network discovery. In order to access a shared folder over a network in Windows, you need to enable network discovery and printer and file sharing in the Control Panel. Use the following steps to enable Printer and File Sharing and Network Discovery:
- Click the Windows Start menu.
- Click the Gear/Settings icon.
- Click Network and Internet.
- Click Sharing Options
- Click the radio option next to "Turn on network discovery".
- Click the radio option next to "Turn on file and printer sharing."
- Click Save Changes.
-
2
-
3Click Network. It's in the panel to the left. This displays computers that you have access to over a network.
-
4Double-click the computer you want to access. This displays files and folders that are shared from that computer.
- If the computer you want to access is not listed, you may need to enter the network path in the address bar at the top.
-
5Enter the username and password. Depending on how the owner of the folder has their share settings set up, you may need to enter the username and password they use to log in to access shared folders on that computer.
-
6Double-click the folder you want to access. This opens the folder and allows you to access it.


Sharing Mac Folders
-
1Open System Preferences. Make sure that you are logged in as an Administrator. Use the following steps to open System Preferences:
- Click the Apple logo in the upper-left corner.
- Click System Preferences.
-
2Click Sharing. It has an icon that resembles a blue folder with a crosswalk sign on it. Click the icon in System Preferences to open the Sharing options.
-
3Check the checkbox labeled "File Sharing". It's in the panel to the left. This will turn file sharing on for your Mac. This allows you to share files and folders with other users and other computers on the network.
-
4Click + below "Shared Folders." This opens a Finder window that allows you to select a folder to share.
-
5Select the folder you want to share and click Add. Navigate to the folder you want to share and click it to select it. Then click Add in the lower-right corner to add it to the list of shared folders.


-
1
-
2Click Go. It's in the menu bar at the top of the screen. This displays a drop-down menu.
-
3Click Connect to Server. It's at the bottom of the drop-down menu below "Go."
-
4Enter the network path for the computer you want to access and click Connect. This information is displayed in the Share menu when a user shares a file or folder over the network. Then click Connect in the lower-right corner.
-
5Enter the username and password and click Connect. Depending on how the user has their share settings setup, you may need to enter the username and password they use to sign in to their computer to access shared folders. Then click Connect in the lower-right corner.
-
6Click the computer in Finder. Once you have connected to a shared computer, click the computer in Finder to access its shared folders. Shared computers are listed in the panel to the left under "Shared."


Community Q&A
-
QuestionHow do I share multiple computers running Windows 7 and partitions on a small office network?
 Community AnswerTo consolidate them and allow for ease of backup, you'll probably want to use a PC as a dedicated file server, storing all shared files and folders.
Warnings
- Keep track of who you are sharing your folders with. If there is content you do not want seen, changed, or deleted, make sure to disable sharing permission.⧼thumbs_response⧽
- Unprotected wireless networks will allow nearby users you may not know with wireless access to access your folder.⧼thumbs_response⧽


About This Article

1. Turn on Windows File and Printer Sharing.
2. Right-click the folder you want to share.
3. Click Share with.
4. Click Specific people.
5. Select permissions for the person you're sharing with.
6. Click Share.