This article was co-authored by wikiHow staff writer, Jessica Gibson. Jessica Gibson is a Writer and Editor who's been with wikiHow since 2014. After completing a year of art studies at the Emily Carr University in Vancouver, she graduated from Columbia College with a BA in History. Jessica also completed an MA in History from The University of Oregon in 2013.
There are 13 references cited in this article, which can be found at the bottom of the page.
The wikiHow Video Team also followed the article's instructions and verified that they work.
This article has been viewed 12,551 times.
Learn more...
If you'd like to give crocheted blankets, hats, or bags a little more stability, attach fabric to the back. Woven fabric prevents the crocheted piece from stretching and adds weight so it's sturdier. To put fabric onto a small crocheted item, use any type of basic stitch to sew it by hand. If you're lining a crocheted blanket with fabric, use a sewing machine to finish the project quickly.
Steps
Sewing by Hand
-
1Cut a piece of fabric slightly smaller than your crocheted piece. Use any type of fabric you like and cut it to the size you need for your project. For example, if you've crocheted a baby blanket, cut a piece of fabric that's about 2 inches (5.1 cm) smaller than the blanket if you'd like to leave a few inches of the crocheted edge visible.[1]
- If you use woven fabrics which fray, add an extra 1⁄2 to 1 inch (1.3 to 2.5 cm) seam allowance so you can fold and finish the edges. You could also use fleece, which doesn't fray, if you don't want to finish the edges.
Tip: Although you could make the fabric piece the same size as the crocheted piece, it's tricky to sew the edges evenly. Use a sewing machine if you want to sew equal-sized pieces together.
-
2Iron the fabric to remove wrinkles and crease the edges. Read the care label for your fabric to determine what temperature iron to use. If you're using woven fabric, tuck 1⁄2 inch (1.3 cm) of the edge under itself and iron the folded edge in place.[2]
- Folding the edges hides the raw fabric edge and prevents fraying.
- If you're using fleece, you can skip this step.
Advertisement -
3Lay the fabric on the crocheted piece so the right sides of both fabrics face out. Arrange your crocheted piece on your work surface so the right side with the visible pattern faces down. Then, lay the fabric piece where you'd like to attach it to the crocheted piece. Ensure that the right side of the fabric piece faces up.[3]
-
4Attach safety pins near the edges of the fabric to keep the pieces from sliding. Stick a safety pin through the fabric and crocheted piece so it's secure. Place a safety pin every 1 inch (2.5 cm) for a small project or about every 4 inches (10 cm) for a blanket or large project.[4]
- The crocheted piece and fabric piece will shift a little, but you'll hold it in place while you sew.
-
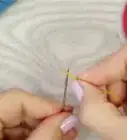
5Thread a tapestry needle with crochet thread and tie a knot at the end. Cut off about 2 feet (61 cm) of crochet thread and insert 1 end through the eye of a tapestry needle. Then, tie a knot at the other end of the thread.[5]
- If you're working on a large project, you'll have to re-thread the needle, but you'll be able to sew quickly if you're working with a short thread tail.
-
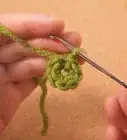
6Insert the thread through a corner of both pieces. Hold both pieces of fabric in place with 1 hand so the fabric doesn't slide. Use your other hand to insert the needle from the bottom crocheted piece up through the corner of the fabric. Keep pulling so the knot catches.[6]
- If your knot slides through the crocheted piece, knot it a few more times so it's larger.
-
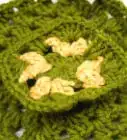
7Sew a running stitch across the edges for a decorative look. Although you could use any type of stitch to sew the pieces together, a running stitch is sturdy and gives your project a defined edge. Push the needle down through the fabric to make your first stitch. Then, leave a space that's as long as the stitch you just made before bringing your needle up through the fabric. Repeat this around the edges of your project.[7]
- For example, if you want to sew a completely straight line, use the back stitch.


Using a Sewing Machine
-
1Cut a piece of fabric that matches the size of your crocheted piece. Unfold your choice of fabric on your work surface and lay the crocheted item on it. Then, mark around the crocheted item with fabric chalk and carefully cut out the fabric along the line.[8]
- If you'd like the finished project to have a noticeable fabric edge, cut the fabric piece larger than the crocheted piece. For example, to make a blanket with a 2 in (5.1 cm) fabric border, cut the fabric 2 inches (5.1 cm) beyond the edges of the crocheted piece.
Tip: If you're using a piece of woven fabric, finish the edges. You could serge the edges or tuck 1⁄4 inch (0.64 cm) of fabric under and iron it in place. For fabric that doesn't fray, use fleece.
-
2Stack the pieces on each other so the right sides of both face out. Lay the fabric piece so the right side with the visible pattern is facing down on your work surface. Then, arrange the crocheted piece directly on it so the right side is facing you.[9]
- Since you'll be sewing along the crocheted edge, both pieces appear right side out.
-
3Use fabric clips to hold the edges of the crocheted and fabric pieces in place. Once the crocheted edges are lined up with the edges of your fabric, keep them from slipping around. Attach a fabric clip about every 1 inch (2.5 cm) along the edges.[10]
- If you don't have fabric clips, you can use sewing pins but the crocheted piece may slide around more.
-
4Set your sewing machine to a straight stitch with a length of 3.5 mm (0.14 in). Attach the straight stitch presser foot to your sewing machine and set the stitch length to 3.5 mm (0.14 in). This ensures that the needle can easily work into the crocheted piece.[11]
- Don't use the open toe presser foot or it will catch on the crocheted piece.
-
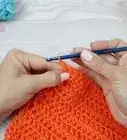
5Place the project crocheted-side up under the presser foot. Use the lever on your machine to lift the presser foot up and slide the project under the needle. Remove a few clips and lower the presser foot.[12]
- Remove more of the clips as you sew across the fabric. You can damage your sewing machine if you sew across them.
-
6Use a straight stitch to sew around each side of your project. Make a few straight stitches and then do a few backstitches to keep the thread from unraveling. Then, straight stitch across each edge of the project. It's important to work the stitches through the crocheted edge so it secures the piece to the fabric underneath.[13]
- Keep the crocheted piece lined up with the fabric piece so the finished edges are even.

Things You'll Need
Sewing by Hand
- Iron
- Ironing board
- Sewing needle
- Crochet thread
- Scissors
- Fabric
- Crocheted piece
- Safety pins
Using a Sewing Machine
- Sewing machine
- Wide sewing machine foot
- Fabric clips
- Fabric
- Crocheted piece
References
- ↑ https://youtu.be/4j2mD4UbQ6s?t=80
- ↑ https://youtu.be/4j2mD4UbQ6s?t=161
- ↑ https://youtu.be/4j2mD4UbQ6s?t=371
- ↑ https://youtu.be/4j2mD4UbQ6s?t=387
- ↑ https://youtu.be/4j2mD4UbQ6s?t=416
- ↑ https://youtu.be/4j2mD4UbQ6s?t=507
- ↑ https://www.stitchpiecenpurl.com/running-stitch.htm
- ↑ https://worldapartsite.com/lining-blanket/
- ↑ https://youtu.be/YAr1yQush28?t=180
About This Article