wikiHow is a “wiki,” similar to Wikipedia, which means that many of our articles are co-written by multiple authors. To create this article, volunteer authors worked to edit and improve it over time.
This article has been viewed 287,143 times.
Learn more...
A Virtual Private Network (VPN) is a connection you can set up between 2 computers that establishes a secure path between a computer with public Internet access and a computer that is connected to a private network; such as the network at your place of business. To set up a VPN, you will need to gather specific criteria for each computer; such as each computer's Internet Protocol (IP) address or domain name, a username and password, and any other applicable authentication settings. You will then enter this information into the VPN configuration settings menu of your computer. This guide provides you with instructions for setting up a VPN in Windows 7 computers and Macintosh (Mac) computers with Operating System (OS) X 10.6.
Steps
Windows 7
-
1Access the VPN menu on the remote computer. This computer will be the computer with public Internet access; not the computer functioning as the server.
- Click on the "Start" button, or Windows logo, from your Windows 7 desktop.
- Type "VPN" into the search box located at the bottom of the floating menu that appears on your screen.
- Select "Set up a virtual private network (VPN) connection" after it appears in the search results, which by default should be located within the Control Panel. This will launch the VPN wizard.
-
2Configure the outgoing VPN connection.
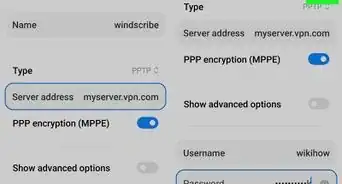
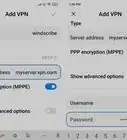
- Enter the domain name or IP address of the computer or server you want to connect to within the field for "Internet address." If you do not have this information, consult with the Information Technology (IT) administrator (admin) who manages the network.
- Enter the username and password that allows you to access the network, then click the "Connect" button.
Advertisement -
3Initiate the outgoing VPN connection.
- Click directly on the Windows logo located on the bottom-right of the VPN window, then click on "Connect" below the section entitled "VPN Connection." You will now be required to finish setting up VPN on the other computer.
-
4Access adapter settings on the incoming computer. The computer with the incoming connection will be the other computer functioning as the server.
- Click on the "Start" menu of the second computer, then type "Network and Sharing" into the search bar.
- Select "Network and Sharing Center" from the options provided, then click on "Change adapter settings" to manage your connections.
-
5Indicate the name of the computer you want given VPN access.
- Click on "File" from within the new menu that appears (hit ALT+F if no "File" menu is visible), then select "New Incoming Connection." A wizard will then appear on your screen that will ask you to choose the users that you want to give VPN access to.
- Choose the users, or name of the computer on which you established the outgoing VPN settings, then click on the "Next" button.
-
6Establish the incoming VPN connection.
- Select the option that indicates you want all users connecting to this network through the Internet, then click again on "Next."
- Indicate the type of IP you want to use for this connection. In most cases, the option commonly chosen by users is "TCP/IPv4."
- Click on the "Allow Access" button. The outgoing computer will now be able to access the private network through VPN.


Mac OS X 10.6
-
1Obtain VPN network settings from your IT admin. You will need these settings to set up a VPN connection on the computer with public Internet access; including the IP address or domain name of the VPN server and the username and password for accessing the network.
-
2Access the VPN Network menu.
- Click directly on your Apple menu, point to "System Preferences," then select the option for "Network."
-
3Enter settings for the VPN connection.
- Click on the "Add" button that resembles a plus symbol at the bottom of the Network menu, then choose "VPN" from the list of options provided.
- Select the type of IP, or connection, you want used for the VPN, then enter a name for the VPN connection.
- Type in the IP address and account name for the server you are connecting to, then click on "Authentication Settings."
- Enter the username and password provided to you by your IT admin, then click "OK."
-
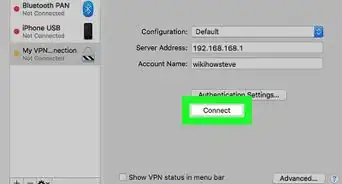
4Access the private network using the VPN connection.
- Click on the "Connect" button at the bottom of the VPN connection window. You will then be able to access the private network you are connected to through VPN.


Community Q&A
-
QuestionCan I set up a VPN between a Windows 10 and my Mac?
 ZachwaxCommunity AnswerYou should be able to, as long as you are not running a (very) old Macintosh system.