This article was co-authored by wikiHow Staff. Our trained team of editors and researchers validate articles for accuracy and comprehensiveness. wikiHow's Content Management Team carefully monitors the work from our editorial staff to ensure that each article is backed by trusted research and meets our high quality standards.
This article has been viewed 30,558 times.
Learn more...
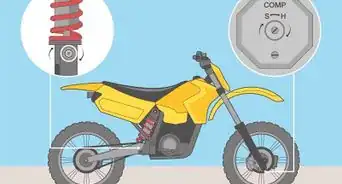
The sag on a dirt bike affects how much the shocks compress when you’re sitting on the bike and when the bike is sitting on the ground by itself. Setting the right sag on your dirt bike will help fine-tune the balance of your bike so it handles just right when you ride it. Before you can properly adjust your bike’s sag, measure the current sag. You’ll be able to use these numbers to adjust the sag to within the recommended range, which depends on the make, model, and engine size of your dirt bike. Keep in mind that though there is a recommended range for sag, it’s up to you as the rider to set what feels right to you within that range for the type of riding you do.
Steps
Measuring Your Bike’s Sag
-
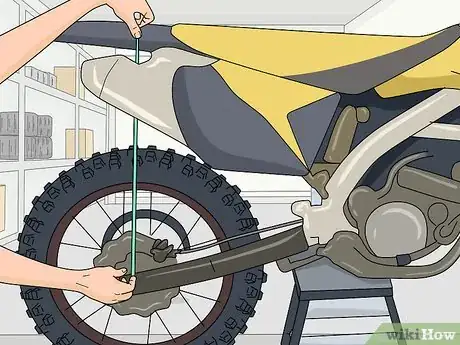
1Put your dirt bike on a stand so the wheels are off the ground. Have someone help you lift your bike up off the ground and set it on a dirt bike stand or a makeshift stand made out of something like cinder blocks or another strong material. This will allow you to measure the sag of the bike with the shocks completely uncompressed.[1]
- You will need at least 1 person to help you measure your bike’s sag. It is easiest if you have 2 people to help you throughout the process.
- You can also flip over a sturdy 5 gallon (18.9 L) (18.92 L) plastic bucket or a milk crate to use as a makeshift stand.
-
2Measure from the rear axle up to a point where the fender and side panel meet. Hold the end of a tape measure against the middle of the rear wheel’s axle. Stretch the tape measure up to the junction where the bike’s side panel and rear fender connect and look at the distance in millimeters. Write down the measurement on a piece of paper.[2]
- Make sure that this fixed point is on the arc that the rear axle moves in when the shocks compress. If it is not, pick another spot on the side panel or fender that is and mark it so you can take all the measurements using the same reference point.
- This measurement is called the unloaded sag because there is no weight on the shock springs.
Advertisement -
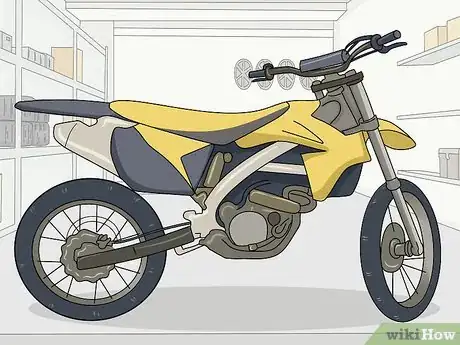
3Remove your dirt bike from the stand and set it on level ground. Lift the dirt bike off of the stand with your helper. Set it down so it rests on its own on the ground.[3]
- Don’t ever measure the sag of your bike on a slope or you will not get accurate numbers.
-
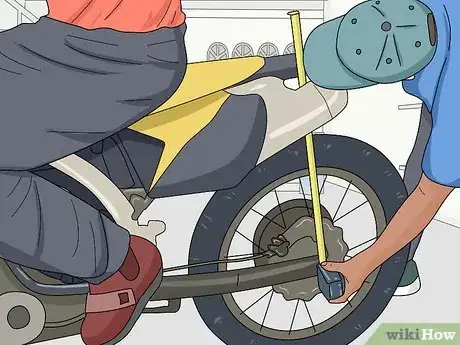
4Sit on the bike towards the front of the seat above the pegs in full gear. Wear boots, pants, a jersey, a helmet, gloves, and any other gear you normally ride in. Hop on the bike as if you’re about to ride it, with your hands on the handles, but slide forward in the seat so you are sitting approximately above the pegs.[4]
- Make sure the bike has proper fluid levels and at least half a tank of gas as well. The idea is to mimic your normal riding conditions as closely as possible so the sag you measure is accurate and you can adjust it properly.
Tip: This step is easiest if you have someone hold the bike steady for you from the front side of the handlebar so you don’t have to keep yourself stable. If you don’t have an additional helper, let your feet barely touch the ground just enough to keep you stable.
-
5Have someone measure the compressed distance with you on the bike. Bounce lightly up and down a couple times on the bike to loosen up the shocks. Have your helper measure the distance in millimeters from the rear axle to the same fixed point on the side panel and rear fender that you measured to before. Write down this number with the first measurement you took.[5]
- The sag measurement with a rider is called the rider sag or race sag.
-
6Check the amount of sag with the bike sitting on its own. Get off the bike and hold it stable so the only weight on the shocks is from the bike itself. Measure the distance in millimeters from the rear axle to the same fixed point as before and write down this measurement.[6]
- The sag measurement without a rider is known as the static sag or free sag.
-
7Subtract the rider sag and static sag from the unloaded sag measurement. Subtract the number you got with you on the bike from the number you got with the bike on the stand to get the actual rider sag measurement. Subtract the number you got with the bike sitting on its own from the number you got with the bike on the stand to get the actual static sag measurement.[7]
- For example, let’s say the unloaded measurement was 605 mm, the measurement with you on the bike was 500 mm, and the measurement with the bike sitting by itself was 565 mm. Your rider sag would be 105 mm and your static sag would be 40 mm.
Adjusting the Sag
-
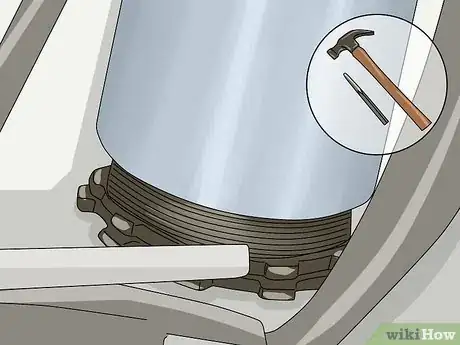
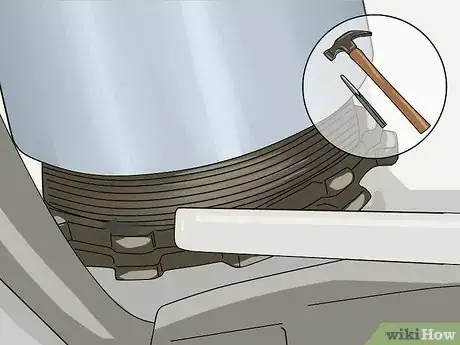
1Knock the top lock nut on the shock spring loose with a hammer and punch. The lock nut is located right above the shock spring at the back of your bike. Hold a punch in your non-dominant hand and place the tip of it against 1 of the tabs of the lock nut, aiming to the right. Use your other hand to hit the back of the punch with a hammer to knock the top lock nut loose, counterclockwise.[8]
- You might have to hit the punch more than once to loosen the lock nut. Hit it as many times as necessary to start turning the lock nut counterclockwise.
Tip: Some dirt bike models, such as Husqvarnas and KTMs, have a plastic top lock nut. If this is the case for your bike, loosen the bolt holding the plastic lock nut in place by hand, rather than using a hammer and punch.
-
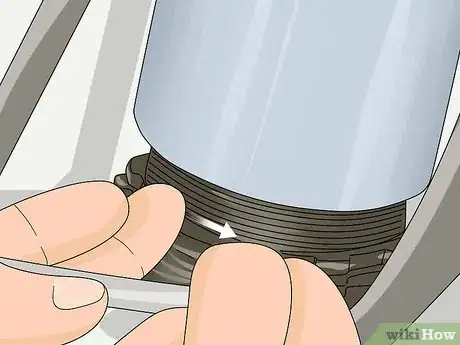
2Turn the top lock nut counter clockwise with your hand to loosen it more. Reach your hand towards the shock spring until you can touch the tabs of the top lock nut with your fingertips. Flick the lock nut counter clockwise until you loosen it about 2-3 full turns.[9]
- Don’t worry too much about how far you loosen the lock nut right now. The idea is just to give yourself some room to work with the bottom lock nut so you can adjust the sag.
- If the top lock nut is still hard to turn, you can spray some WD-40 on the shock spring’s threads to lubricate them.
-
3Do some research to find your bike’s recommended sag range. The recommended range for sag depends mainly on the engine size of your dirt bike, as well as the make and model in some cases. Read your bike’s owner’s manual or search online to find the recommended sag for your specific model of bike.[10]
- For example, a 50cc-65cc dirt bike should have a rider sag of 70 mm and a static sag between 25-35 mm. A dirt bike with a 125cc-450cc engine should have a rider sag of 102-105 mm and a static sag from 30-40mm.
-
4Loosen the bottom lock nut to increase the sag distance. Use a hammer and punch to turn the bottom lock nut, also known as the adjuster nut, counterclockwise at least 1 full rotation. This will decrease the shock spring’s preload, which allows the spring to lengthen and increases the sag distance.[11]
- Keep in mind that 1 full rotation usually equates to a 2-3 mm adjustment to the sag.
- You can check your bike’s owner’s manual or search online to find the exact recommended ranges for your specific dirt bike.
-
5Tighten the bottom lock nut to decrease sag distance. Use your hammer and punch to knock the bottom lock nut clockwise at least 1 full turn. This will increase the shock spring’s preload, which shortens the spring and decreases the sag.[12]
- For example, if you want your bike’s rider sag to be 102-105 mm and it is currently at 107 mm, tightening the bottom lock nut 1 full rotation will decrease the sag to about 104-105 mm.
-
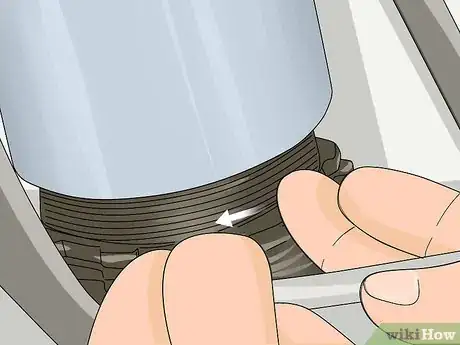
6Tighten the shock spring’s top lock nut again. Turn the top lock nut clockwise as far as you can with your hands. Knock your punch against it with your hammer until it is all the way tight.[13]
- This will hold the bottom adjuster ring in place so the stag stays set.
-
7Measure the rider sag and static sag after making adjustments. Get on the bike in full riding gear again and have your helper measure and record the rider sag. Get off the bike and take the static sag measurement. Subtract these new numbers from the unloaded sag measurement.[14]
- You don’t need to measure the unloaded sag with the bike on a stand again. You can use the same number you got before to calculate the new rider sag and static sag.
- You can repeat the adjustment process, tightening or loosening the shock spring’s adjustment nut as required, until you set the sag exactly where you want it. Turn the adjustment nut less than 1 full turn if you want to make very minor adjustments of less than 2 mm.
Things You’ll Need
- 1-2 helpers
- Tape measure
- Pen
- Paper
- Riding gear
- Hammer
- Punch
References
- ↑ https://www.dirtrider.com/features/understanding-your-suspension-sag/
- ↑ https://www.procircuit.com/content/Setting%2520the%2520Sag.pdf
- ↑ https://www.procircuit.com/content/Setting%2520the%2520Sag.pdf
- ↑ https://www.youtube.com/watch?v=ZXCOoy9T0vc&feature=youtu.be&t=261
- ↑ https://www.procircuit.com/content/Setting%2520the%2520Sag.pdf
- ↑ https://www.dirtrider.com/features/understanding-your-suspension-sag/
- ↑ https://www.procircuit.com/content/Setting%2520the%2520Sag.pdf
- ↑ https://www.youtube.com/watch?v=ZXCOoy9T0vc&feature=youtu.be&t=416
- ↑ https://www.youtube.com/watch?v=ZXCOoy9T0vc&feature=youtu.be&t=436
- ↑ https://www.procircuit.com/content/Setting%2520the%2520Sag.pdf
- ↑ https://www.youtube.com/watch?v=ZXCOoy9T0vc&feature=youtu.be&t=448
- ↑ https://www.procircuit.com/content/Setting%2520the%2520Sag.pdf
- ↑ https://www.procircuit.com/content/Setting%2520the%2520Sag.pdf
- ↑ https://www.youtube.com/watch?v=ZXCOoy9T0vc&feature=youtu.be&t=448
- ↑ https://www.dirtrider.com/features/understanding-your-suspension-sag/

