This article was co-authored by Chiara Corsaro and by wikiHow staff writer, Travis Boylls. Chiara Corsaro is the General Manager and Apple Certified Mac & iOS Technician for macVolks, Inc., an Apple Authorized Service Provider located in the San Francisco Bay Area. macVolks, Inc. was founded in 1990, is accredited by the Better Business Bureau (BBB) with an A+ rating, and is part of the Apple Consultants Network (ACN).
The wikiHow Tech Team also followed the article's instructions and verified that they work.
This article has been viewed 51,441 times.
This wikiHow teaches you how to run a diagnostics test on a Mac computer. All modern Mac computers can access the Apple diagnostic tool which can be used to diagnose problems with your Mac's hardware. This can help pinpoint any issues you may be experiencing with your computer.
Steps
Macs from 2013 and Later
-
1Unplug external connections. If you have anything non-essential plugged into your Mac (such as USB flash drives), unplug them before you begin the test.
-
2Restart your Mac. You can only access Apple Diagnostics as your computer is starting up.
- Click .
- Click Restart.
- Click Restart to confirm.
Advertisement -
3Press and hold D before the screen displays anything. If your Mac still plays the startup chime, press and hold D before the chime plays.
- You may need to disable your firmware password to start Apple Diagnostics.
- If Apple Diagnostics doesn't start, reboot the computer and press ⌥ Option+D. The machine will try to start the diagnostics test online. Select your network connection, enter the password (if needed), and press the checkmark.
-
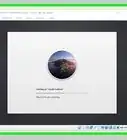
4Click on your language. Once you've selected your language, the diagnostics scan will start.
-
5Allow the diagnostics scan to take place. This may take several minutes, and your computer may run loudly and seemingly erratically. This is normal - it's testing the hardware to make sure it works.EXPERT TIP
Typically, you don't need to run your diagnostics unless you're having some kind of problem like slow performance or connectivity issues.
Chiara Corsaro is the General Manager and Apple Certified Mac & iOS Technician for macVolks, Inc., an Apple Authorized Service Provider located in the San Francisco Bay Area. macVolks, Inc. was founded in 1990, is accredited by the Better Business Bureau (BBB) with an A+ rating, and is part of the Apple Consultants Network (ACN).
Chiara Corsaro
Computer SpecialistChiara Corsaro
Computer Specialist -
6Take note of the results. If Apple Diagnostics finds any abnormalities on your Mac, it will list a summary of the problem(s) and include a reference code under each listed result. From here, you can write down the reference code(s) for use when getting it repaired.
- Some errors have multiple reference codes, so write down the reference code rather than just the problem summary.[1]
- If there are any hardware faults listed, schedule an appointment with Apple to get your computer repaired.


Macs from 2013 and Earlier
-
1Unplug external connections. If you have anything non-essential plugged into your Mac (such as USB flash drives), unplug them before you begin the test.
-
2Insert the OS installation disc, if necessary. If the Mac still has a disc drive and is still running Mac OS X Snow Leopard (10.6) or below, insert the OS installation disc into your computer to ensure Apple Hardware Test can boot.
- If you have a Mac without a CD drive, like a MacBook Air, insert the Software Reinstall USB drive into one of the computer's USB ports.
- This is not necessary if you're running OS X Lion or later. If your computer was released after July 2011 or you've updated your OS since then, it will either retrieve the Hardware Test from the hard disk or will download it from the internet.
-
3
-
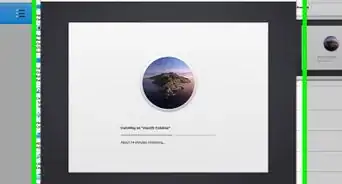
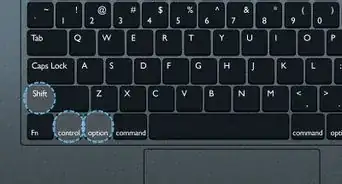
4Press and hold D before the screen displays anything. If your Mac still plays the startup chime, press and hold D before the startup chime plays.
- If Apple Hardware Test doesn't start and your computer was released in 2011 or later, reboot the computer and press ⌥ Option+D to start the hardware test over the internet. Select your network connection, enter the password (if needed), and press the checkmark.
-
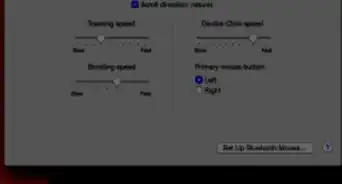
5Select your language. Click on → or press → on your keyboard.
-
6Wait for the Apple Hardware Test window to come up. The Hardware Test will do a quick "probe" of the machine before it does any testing; let it complete the probe.
-
7Click Test, press T, or hit ↵ Enter to start the hardware test. The test may take an hour or more, and your computer may run loudly and seemingly erratically. This is normal - it's testing the hardware to make sure it works.
- If you want the computer to check everything, check the box next to
Perform extended testing(but be aware this will significantly increase the time it takes for the scan to complete).
- If you want the computer to check everything, check the box next to
-
8Take note of the results. If Apple Hardware Test finds any abnormalities on your Mac, it will let you know it found an error and will list the technical code of the problem in the box in the lower right. From here, you can write down the code for use when getting your computer repaired.
- Unlike with Apple Diagnostics, you will not get a specific reference code; it will just be technical jargon.
- If there are any hardware faults listed, schedule an appointment with Apple to get your computer repaired.


References
About This Article
1. Restart your Mac.
2. Hold the D key while restarting.
3. Connect to a Wi-Fi network, if prompted.
4. Select a language.
5. Click on the arrow.
6. Click Test.