This article was co-authored by wikiHow staff writer, Travis Boylls. Travis Boylls is a Technology Writer and Editor for wikiHow. Travis has experience writing technology-related articles, providing software customer service, and in graphic design. He specializes in Windows, macOS, Android, iOS, and Linux platforms. He studied graphic design at Pikes Peak Community College.
This article has been viewed 35,962 times.
Learn more...
In Linux, the root user account is the account that has access to all Terminal commands and files in the system. The root user can modify their Linux system in any way they choose. In most Linux distributions, including the most recent versions of Kali Linux, the root user account is disabled. This is to prevent users from damaging their system. However, you can unlock the root user account pretty easily in Kali Linux using the Terminal. Warning: Use caution when logged in as a root user. Mistakes can cause permanent damage to your system. You should only log in as a root user if you know what you are doing.[1]
Steps
-
1Login to Kali Linux. Go ahead and use your normal username and password to log in to Kali Linux. Once you set a password for the root account, you can log in using the root account.
-
2Press Ctrl+Alt+T to open the Terminal. On most Linux distributions, you can open the Terminal by clicking the Terminal icon in the Apps menu. It has an icon that resembles a black screen with a white cursor. You can also use the keyboard shortcut to open the Terminal, which is Ctrl + Alt + T.Advertisement
-
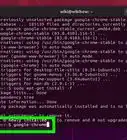
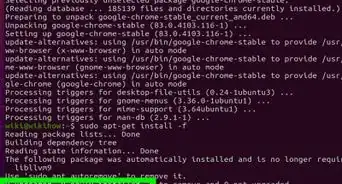
3Type sudo apt update and press ↵ Enter. This command updates the package manager in Kali Linux.
-
4Type sudo apt install kali-root-login and press ↵ Enter. This installs the root login package for Kali Linux, if it hasn't already been installed.[2]
-
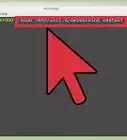
5Type sudo -i and press ↵ Enter. This command gives your current user account root access in the Terminal.[3]
- If the administrator has blocked root access, you cannot grant yourself root access in the Terminal.
-
6Enter your user password and press ↵ Enter. You must enter your user password to switch to root access. If successful, the text cursor should read "root@computername:~#" in the Terminal, instead of the usual "username@computername:~$."
-
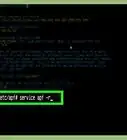
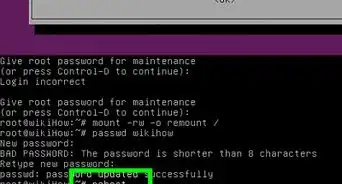
7Type passwd root and press ↵ Enter. Then prompts you to enter a new password for the root user login.
-
8Enter a new root password and press ↵ Enter. This is the password that will be used to log in to the root account.
-
9Retype the password and press ↵ Enter. Make sure you enter the password exactly like you did the first time. This confirms the new root password. If successful, you should see a prompt telling you the password was updated successfully.
-
10Log out of your current user account. To do so, click the icon that resembles a circle with an arrow pointing right. It's in the upper-right corner. From there you can either click Log Out or Switch User.
-
11Log in to the root account. To do so, type "root" in the username field on the login screen. Then type the password you set for the root account and click Log In or press Enter. This logs you in to the root account.[4]
-
12Press Ctrl+Alt+T to open the Terminal. You can verify that you are logged in as a root user by opening the Terminal. It should say "root@computername:~#" by the text cursor by default. You can now access all root commands in the Terminal.


Warnings
- Use caution when logged in as a root user. There is nothing to stop you from accidentally deleting a critical system file, or executing a critical command that causes permanent damage to your system.⧼thumbs_response⧽


References
About This Article